Hand sharpening knives and information about that with tips and tricks
Tips and tricks for sharpening kitchen, pocket or fixed knives and tools
I will share with you here the tips and tricks I have collected over the years of sharpening and dressing all kinds of knives of all brands and types of steel. You will find here gradually added tutorials and videos with sharpening.
Sharpening — what it is and how to do it
The grinding itself + details of how grinding and dressing work
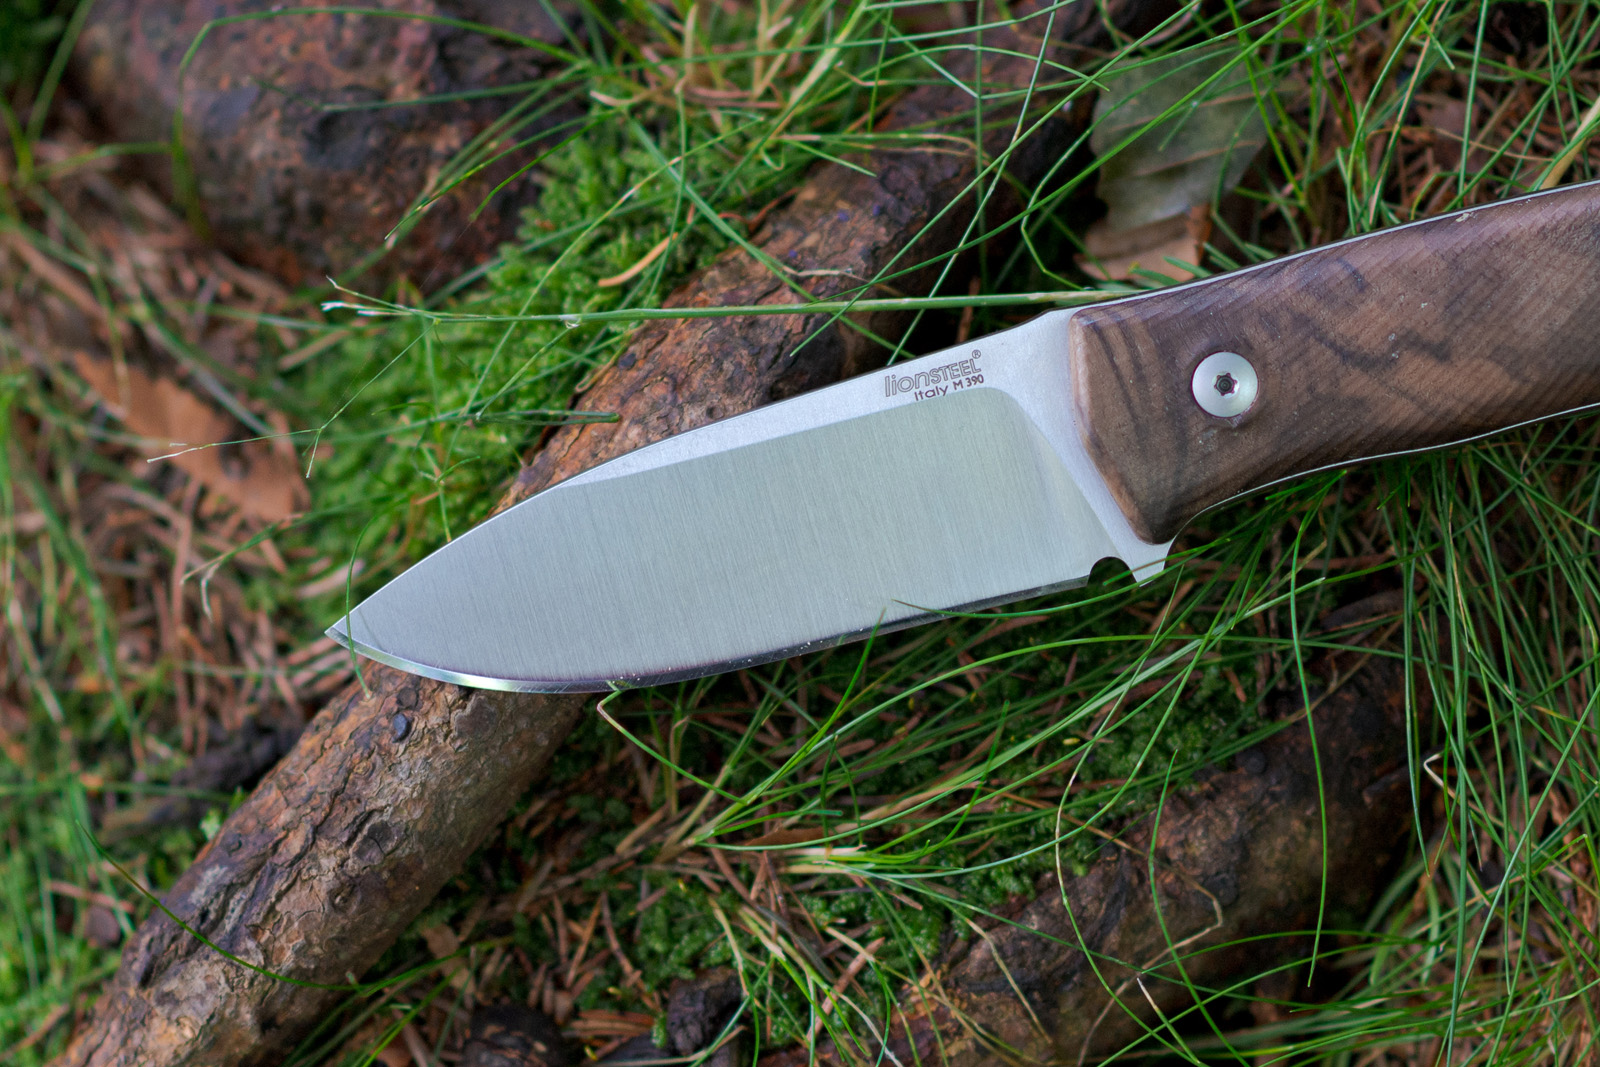
And now, finally, to the actual process of sharpening, or sharpening the facet (which is actually the converging part on the blade that cuts and converges like an inverted canopy into the narrowest cross-section — this area is called the facet, bevel, or edge bevel).

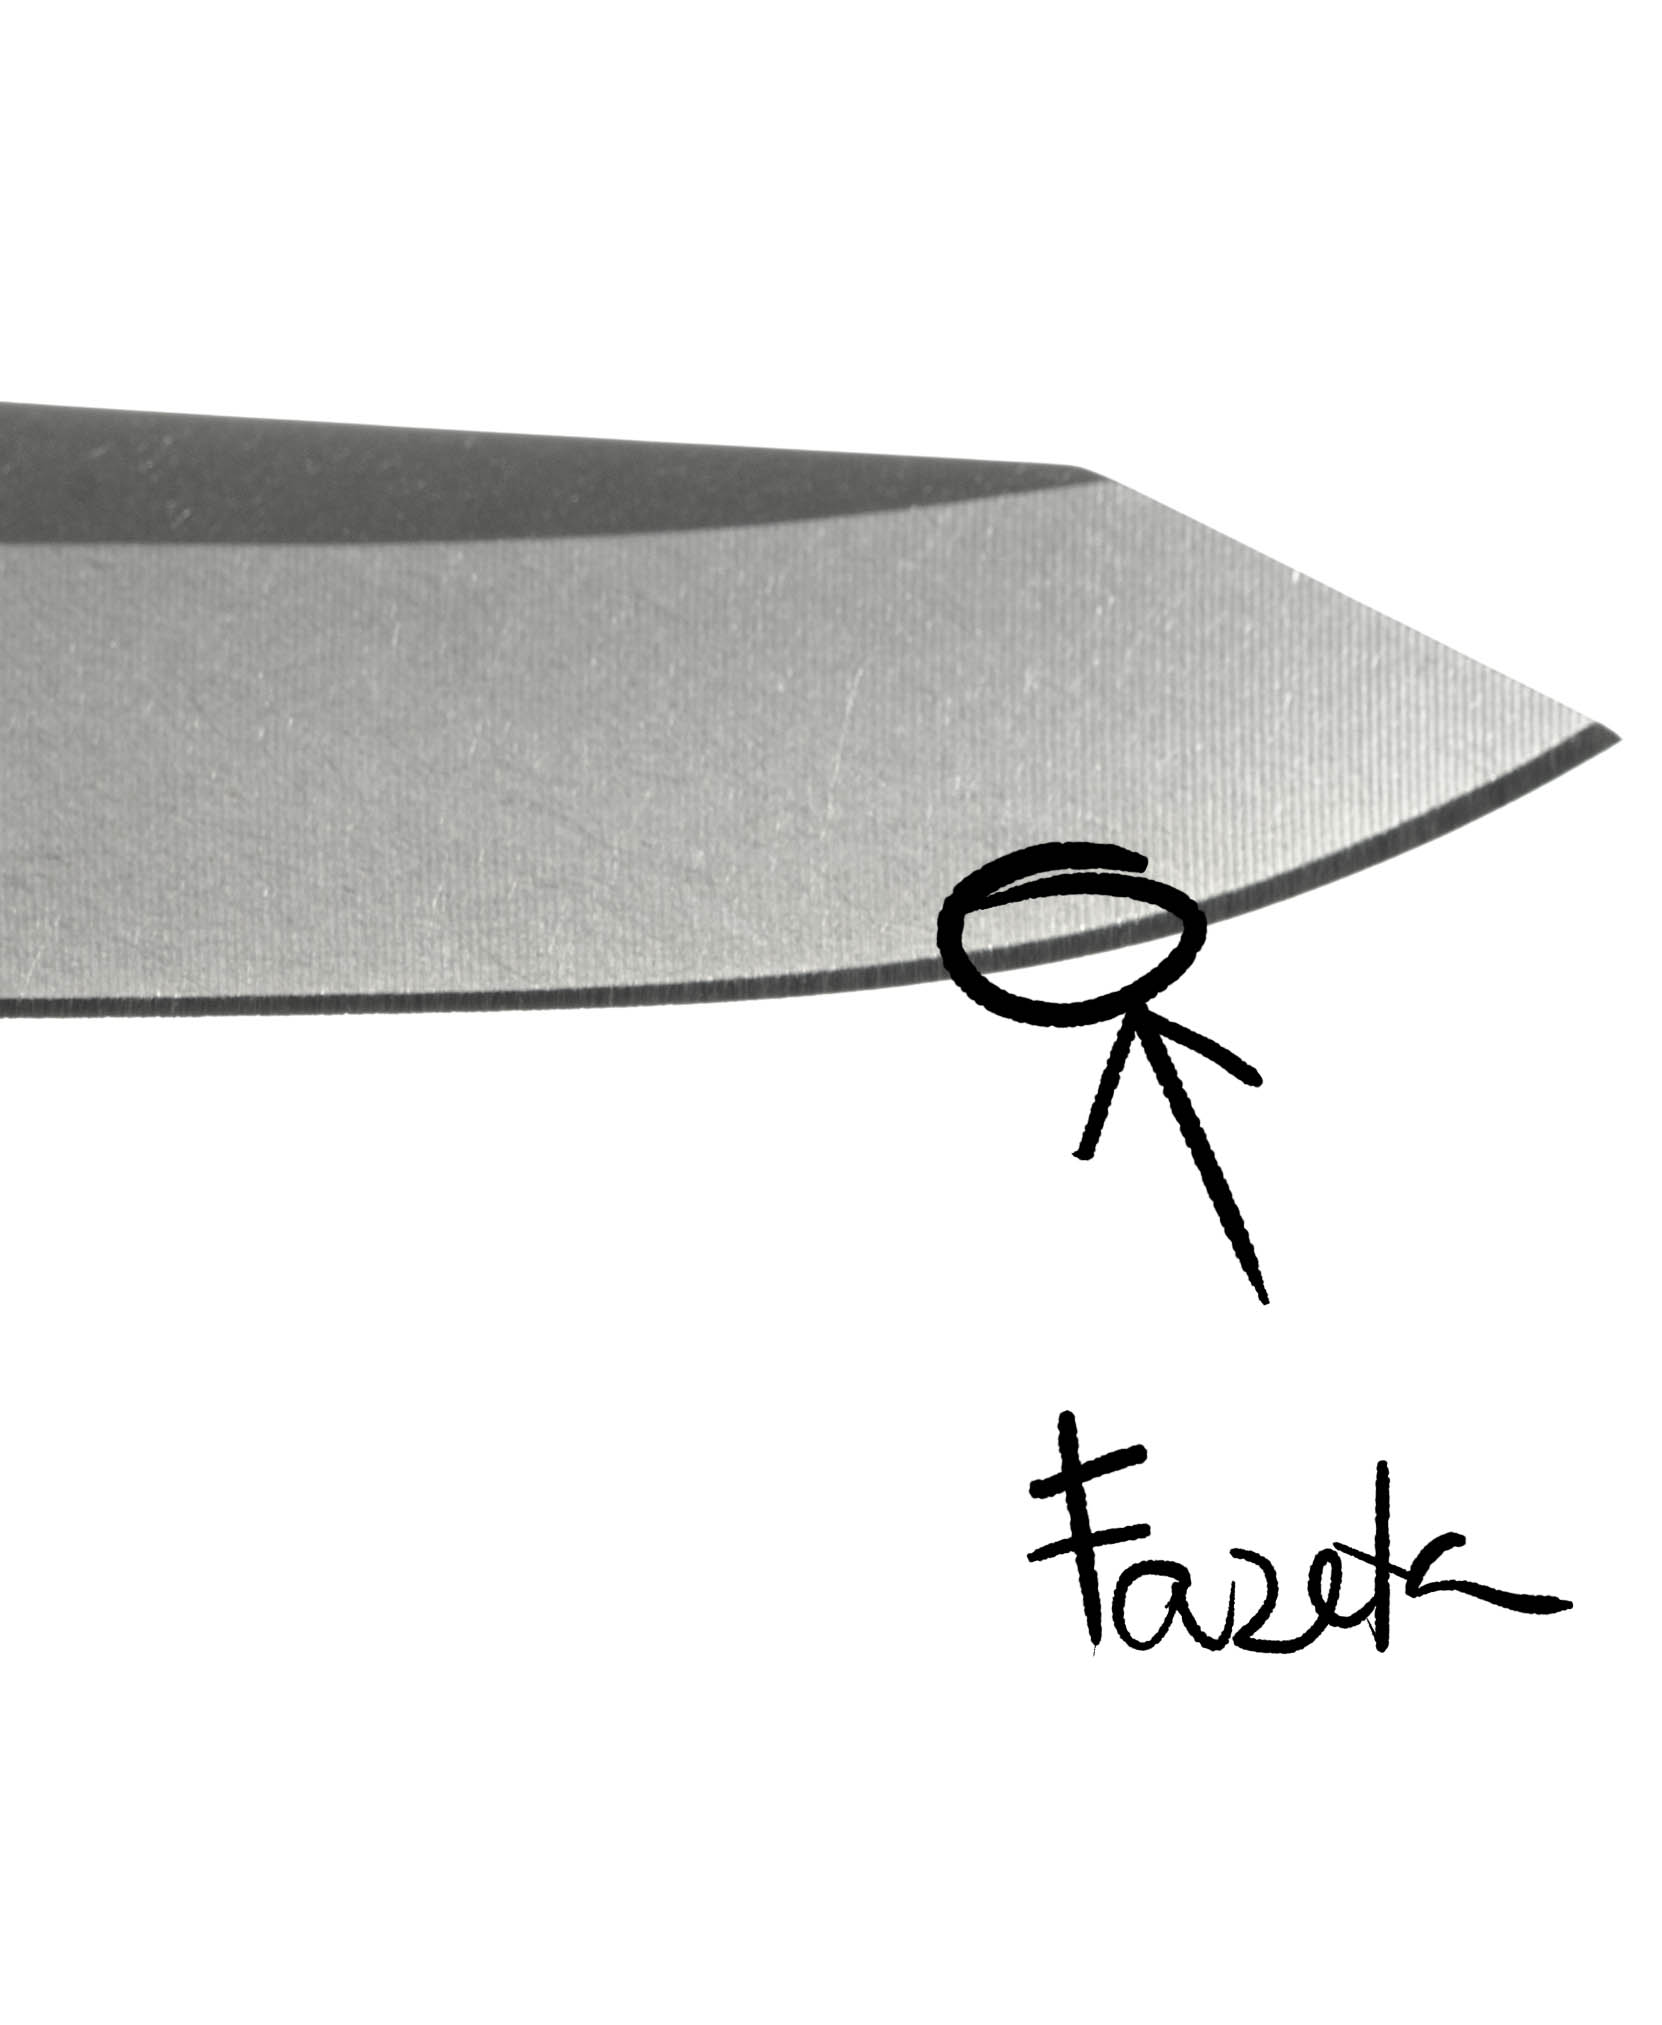

When grinding, we therefore want to grind the bevel so that it meets the other bevel on the other side of the blade at the narrowest possible point. We try to bring the knife to the grinding stone so that the entire width of the facet on one side of the blade touches the longest part of the grinding stone.
simulate the angle for grinding
Throughout the sharpening process, we try to maintain this contact angle and copy the bevel removal as symmetrically as possible along the entire length and on both sides. Start with one side. Once a burr forms at the top of the edge, switch sides — that is, swap the bevels. Aim for even material removal from both sides. During sharpening, try to maintain the given angle as precisely as possible. A good tip is to rest the spine (the blunt side) against your finger and lightly slide your fingertip along the stone. This keeps the distance of the spine consistent and therefore maintains the tight angle between the knife and the whetstone. Stability is key. In general, it doesn't really matter whether you sharpen edge-leading or edge-trailing.
Sharpening a knife on a waterstone is not just about restoring an edge — it's about understanding the geometry of steel and the mechanics of material removal. To achieve a result you will genuinely feel in the kitchen or workshop, you must follow the correct sequence of steps, where any mistake at the beginning will undermine all the effort at the end.
Preparation and Stone Geometry
The foundation of success is a perfectly flat surface. If the stone is hollow in the middle (a so-called "saddle"), you will never achieve a precise and symmetrical angle along the full length of the blade. Before any demanding sharpening session, it is advisable to flatten the stone's surface using a lapping block. Synthetic stones require full water saturation; you'll know they're ready when air bubbles stop rising from the surface and a continuous film of water remains on top.
During use, a fine slurry forms on the stone — a mixture of water and released abrasive particles. Never rinse this "mud" away. It acts as an active medium that accelerates sharpening and refines the resulting steel surface. If the stone begins to dry out, simply sprinkle it lightly with water.
Angle Fixation and Body Mechanics
Stability matters more than speed. Hold the knife in your dominant hand so that your index finger rests on the spine of the blade and your thumb sits on the flat face near the heel. This gives you a feel for the angle. Your other hand applies gentle pressure with its fingers directly above the point of contact with the stone.
The standard angle for general-purpose knives is around 15 to 20 degrees per side. What matters is keeping this angle constant throughout the entire stroke. Any oscillation — rocking at the wrist — results in a convex bevel, which will technically sharpen the knife, but its cutting performance will be duller and the edge will have lower durability. When sharpening the tip, you must slightly raise the handle so the knife follows its own curvature and the angle is preserved even in this critical section.
Mechanics of Material Removal: Creating the Burr
The most common beginner mistake is moving on to a finer stone too soon. On a coarse stone (grit 400 to 1000), you should spend 90% of your time. The goal of this phase is to create what is known as a burr. This is a thin strip of steel that, under the pressure of the abrasive, folds over to the opposite side from the one you are currently sharpening.
Sharpen one side of the knife until you can feel — by running the pad of your thumb from the spine toward the edge — a clear, continuous hook along the entire length of the blade. Until the burr is there, the knife is not truly sharp, and finer stones will not save the situation. Once you have created it, flip the knife and repeat the process on the other side until the burr folds back over.
Refining and Polishing (Progression)
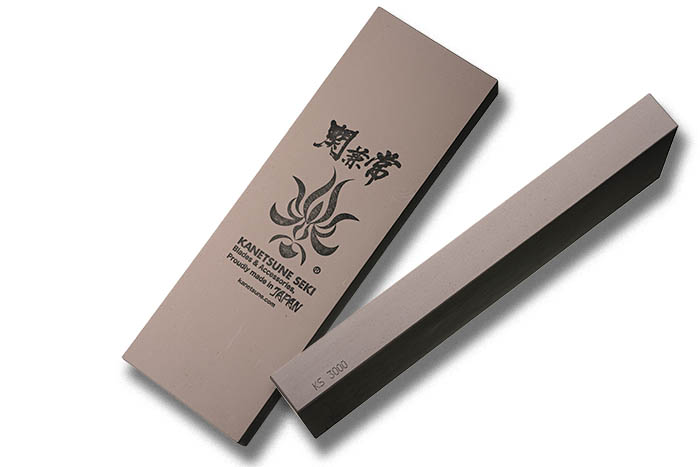
Once the geometry has been established on the coarse stone, the next phase is refining the scratch marks left by sharpening. Moving to stones of grit 3000 and above no longer serves to correct the shape, but to close the steel's structure.
At this stage, progressively reduce your pressure. While you can afford to press slightly into the blade on a coarse stone, on fine stones you should merely guide the knife across the surface. The goal is for the coarse burr to diminish until it becomes nearly imperceptible. Strokes should be smooth and long, making full use of the stone's entire surface.
Final Stropping and Burr Removal
The last and most delicate step is the definitive removal of the residual burr. If left on the knife, it will fold to one side on the first cut and the knife will feel dull.
On the finest stone, perform alternating strokes — one stroke on one side, one on the other. Always draw the knife edge-trailing, as if trying to slice a thin sliver off the stone, but with zero pressure. The weight of the knife alone is sufficient. Repeat this "deburring" process approximately ten times. The result must be a clean, mirror-polished edge that passes through material without resistance.
After finishing, thoroughly clean the knife of any remaining slurry and dry it. For carbon steel blades, it is advisable to apply a drop of oil to the edge to prevent oxidation of the freshly exposed metal.
If you are grinding on a synthetic stone, use it really well soaked in water. I recommend at least 10 minutes. After that, soak it periodically so it doesn't grind dry.
If grinding on a corundum stone, there is no need to leave it in water. It is enough to soak it lightly while grinding.
The diamond is used dry — certainly not with any water or oil. It does sound harsh, but it's the most efficient solution and the surface remains very flat. Other stones are subject to some wear, especially in the middle part. A diamond will not suffer from this. Rather, it can be used to smooth out the undulations of other stones.
As far as natural stones are concerned, the procedure for the actual grinding is still the same. We can lightly wet the stone — natural stone works better with honing oil. The steel of the blade then glides very easily over the stone and the resulting facet surface is much better quality. Natural stones tend to be of finer coarseness, from coarser Arkansas, to Japanese stones, or the Slovak Rozsutec (6–8 thousand grit). The stones are dense and hard, with perfect response to hold the bevel. The grind surface is very decent and smooths the steel. It cannot be said that they lack removal rate — on the contrary, even higher grits are comparable in grinding speed.
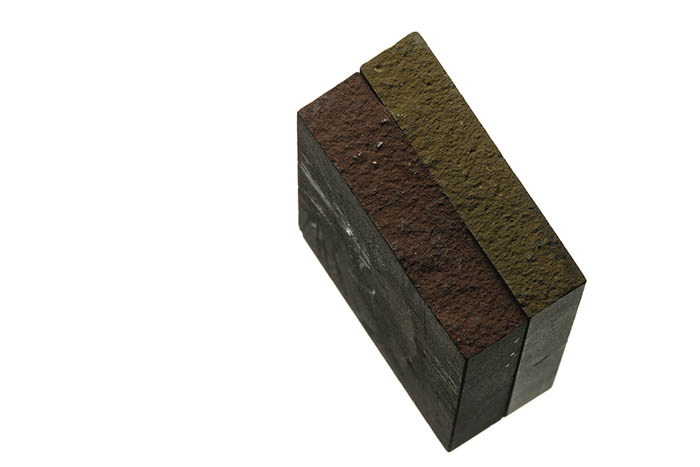
Honing leather is also used for material grinding and blade maintenance. An applied abrasive paste can pull and clean the blade tip absolutely reliably — whether from burrs or during blade maintenance. I often dress my Japanese knives with a fine green silichrome paste and maintain them very easily on the leather alone. This can easily sharpen even a dull knife to the point where it will quite clearly cut through even flyer or newsprint — a demanding test that shows true razor sharpness. The actual dressing on the leather is done dry, just letting the blade slide on the paste under slight pressure. We do not have to follow the angle of the bevel exactly — the leather adapts easily. It is the ideal household helper and I can recommend it as the finishing touch to the whole sharpening process, which reliably allows the knife to shave.
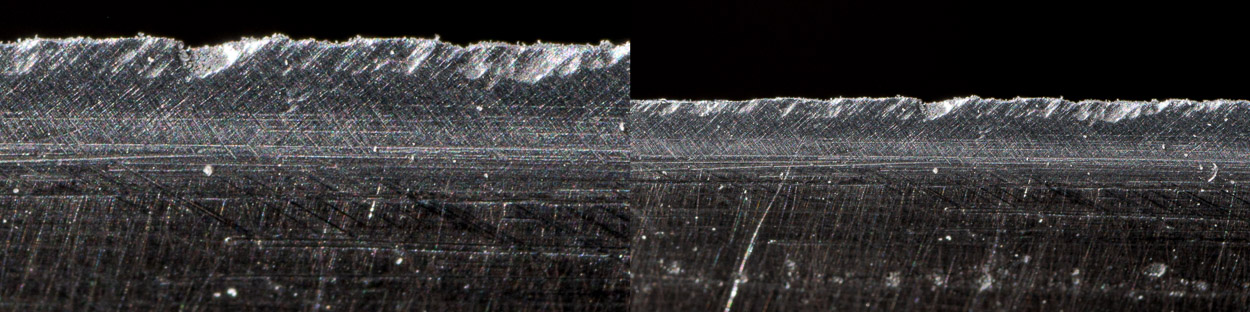
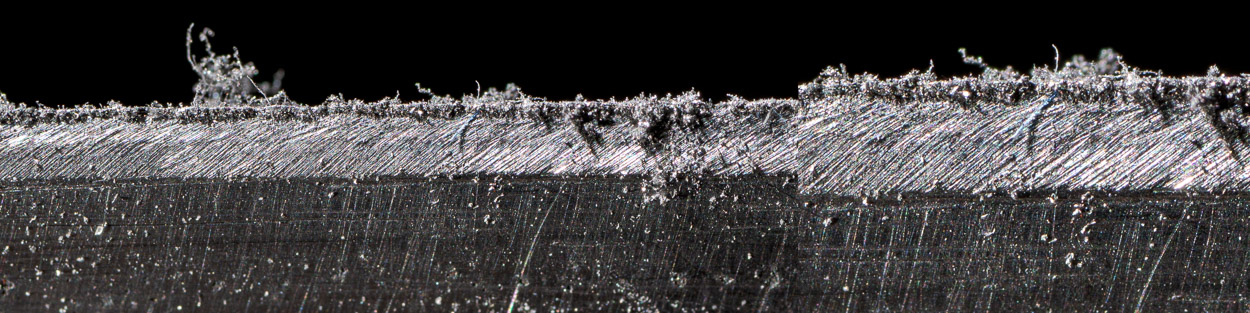
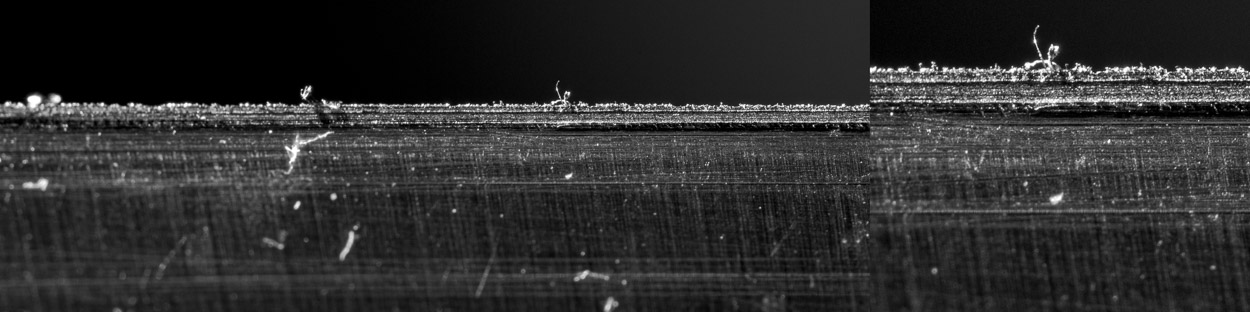
A few photos of the process of sharpening a dull knife, under high magnification, the blade pointing upwards. Images capture the process from preparation through grinding to dressing on leather with abrasive paste.
Before sharpening
damaged blade after use — ready for sharpening
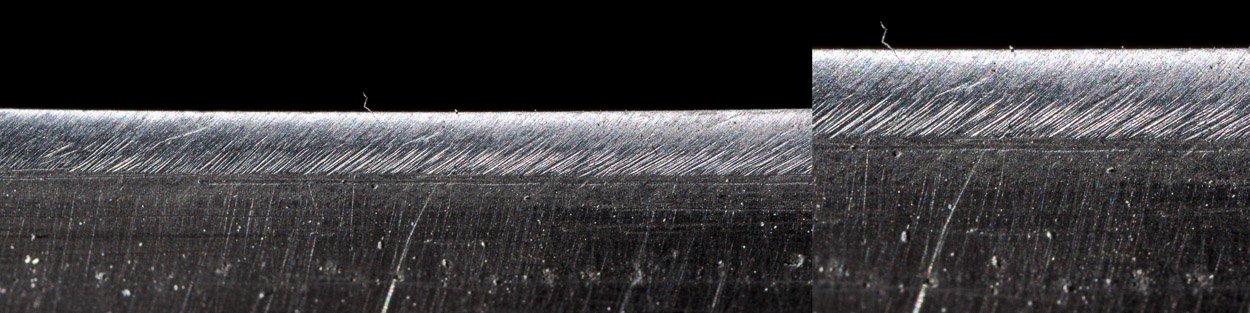
only dressed on a honing leather with coarse abrasive paste (light edge rounding)
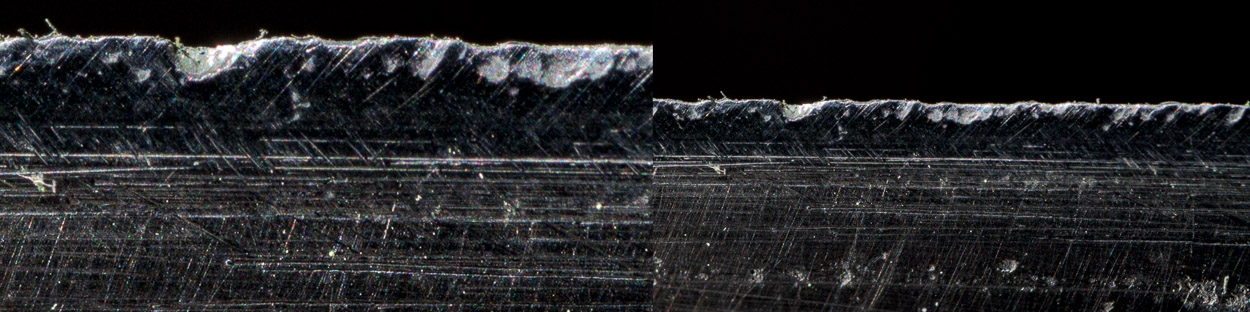
dressed on leather with fine abrasive paste
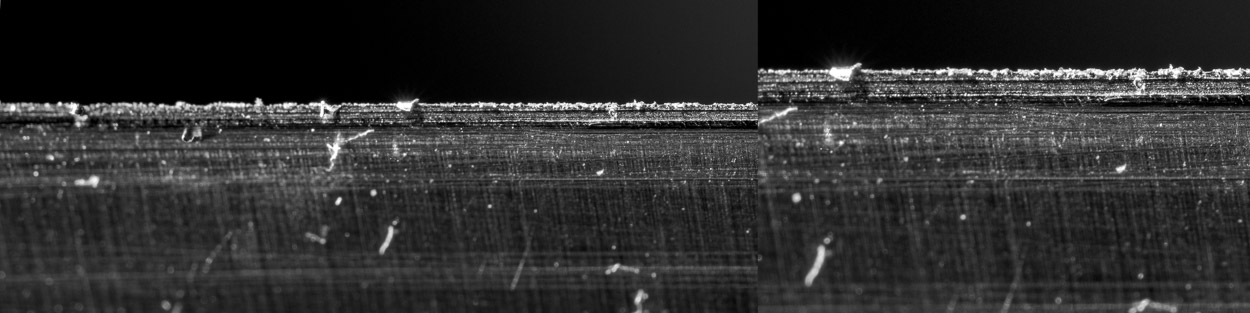
During sharpening
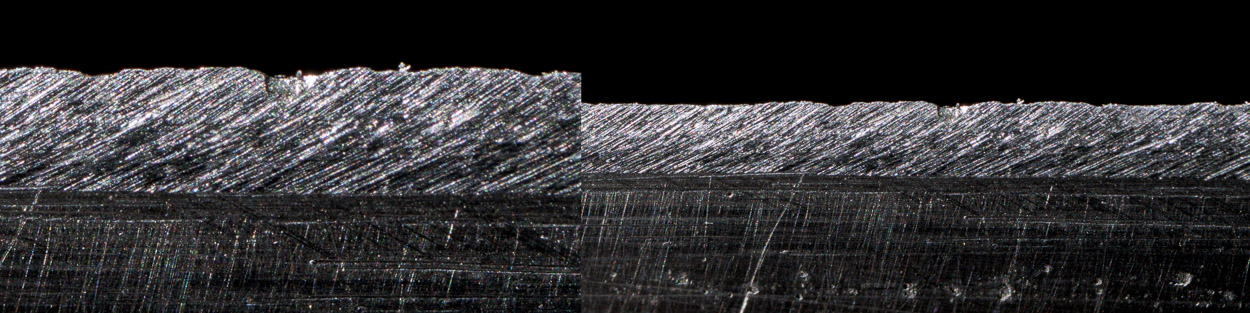
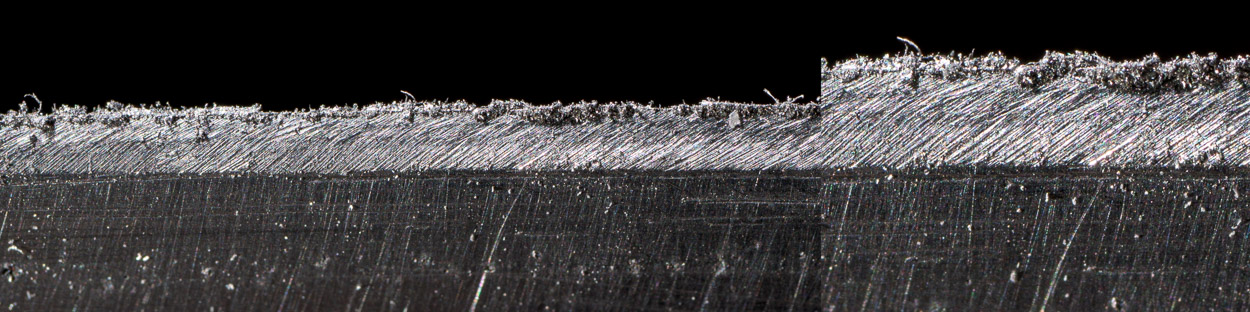
diamond cut, coarse grit
diamond cut, medium grit (note the slight burr on the tip of the blade)
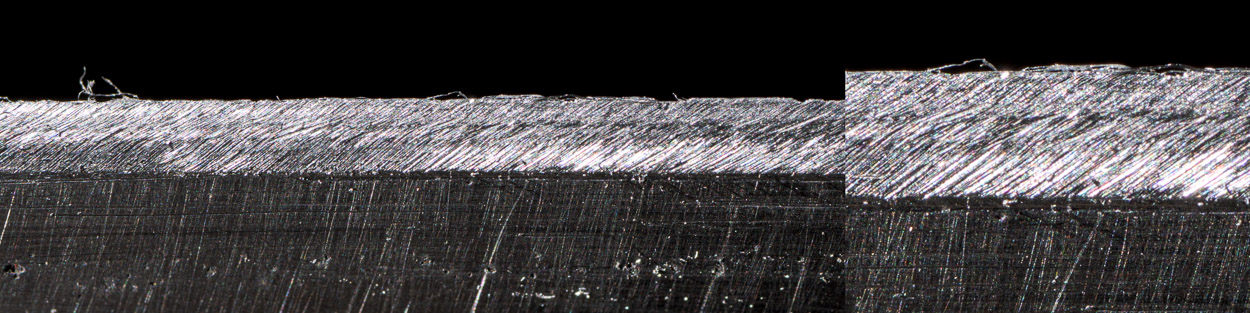
a burr remains on the blade after sharpening — a piece of almost loose metal that needs to be cleaned
wiped after cleaning with a cloth — sharp burr on the blade remains
coarse paste on the dressing leather (cleaned of burrs — note the slight smoothing of the diamond cut indentations at the top)
After sharpening
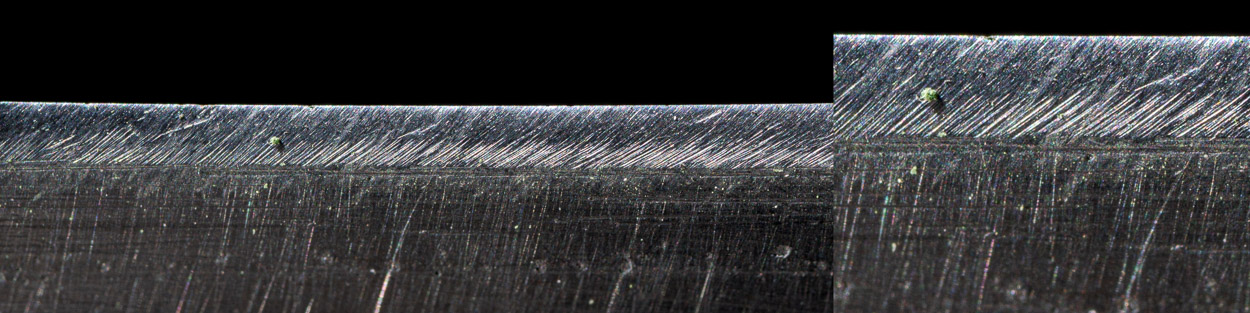
final dressing on fine abrasive paste on the dressing leather (the top of the blade is almost free of indentations)
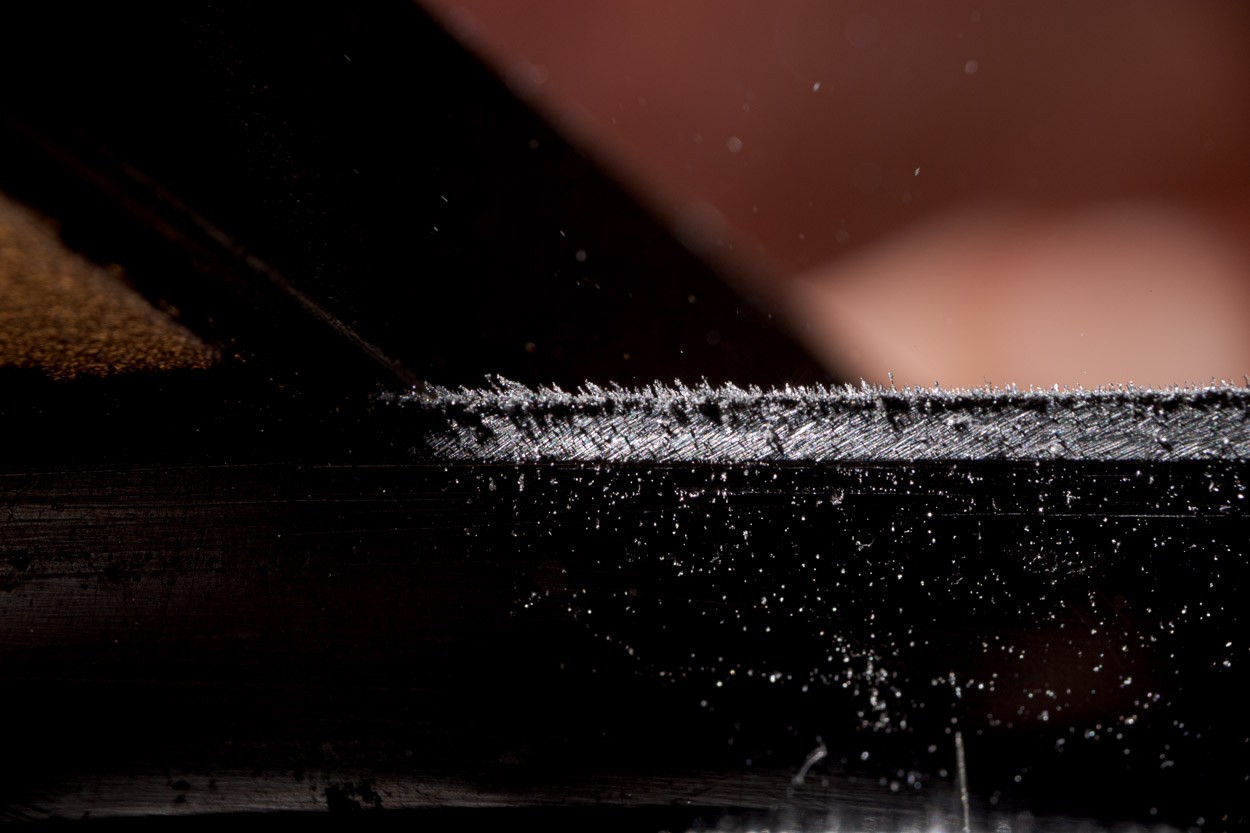
detail of grinding — chips and burr formation on the edge of the blade
Sharpening Stones
Sharpening stones are divided into several basic categories by material, method of use and achievable fineness. Each category has its own strengths and applications.
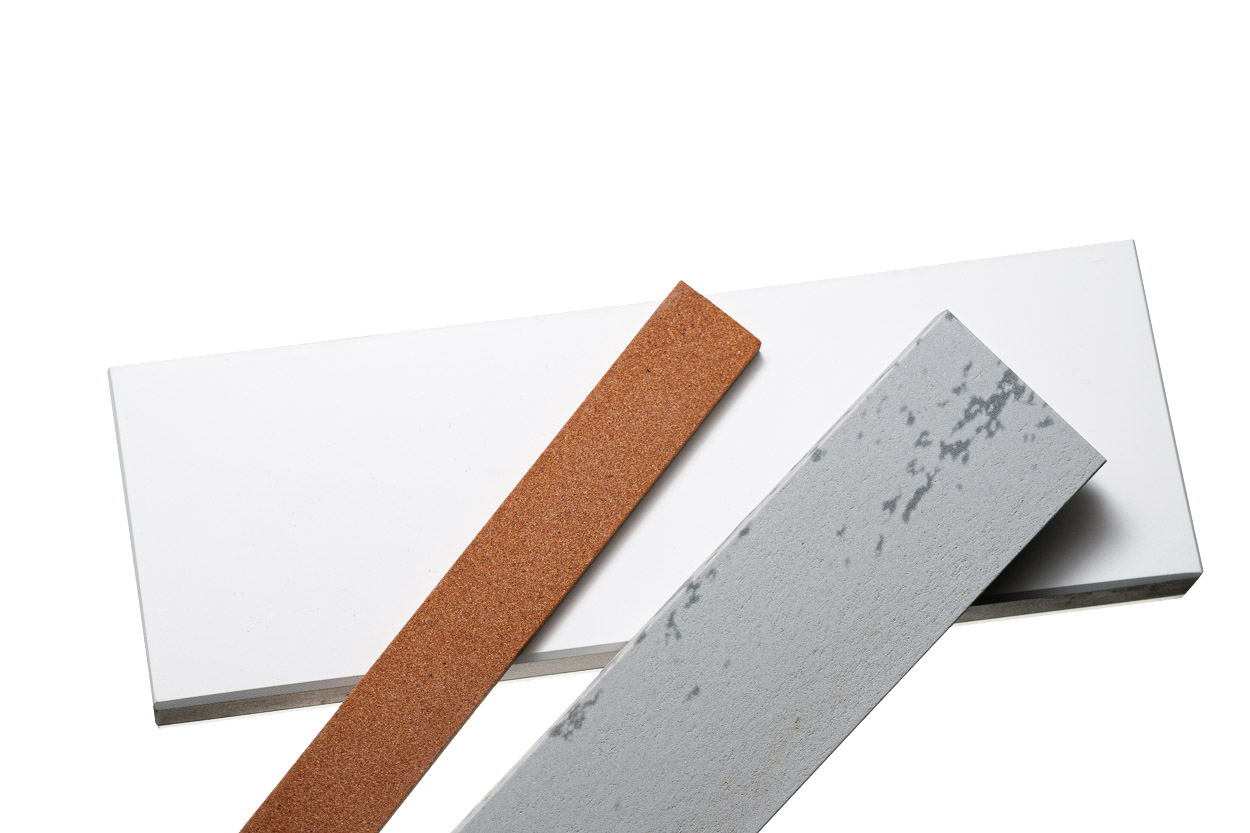
synthetic (water) whetstones
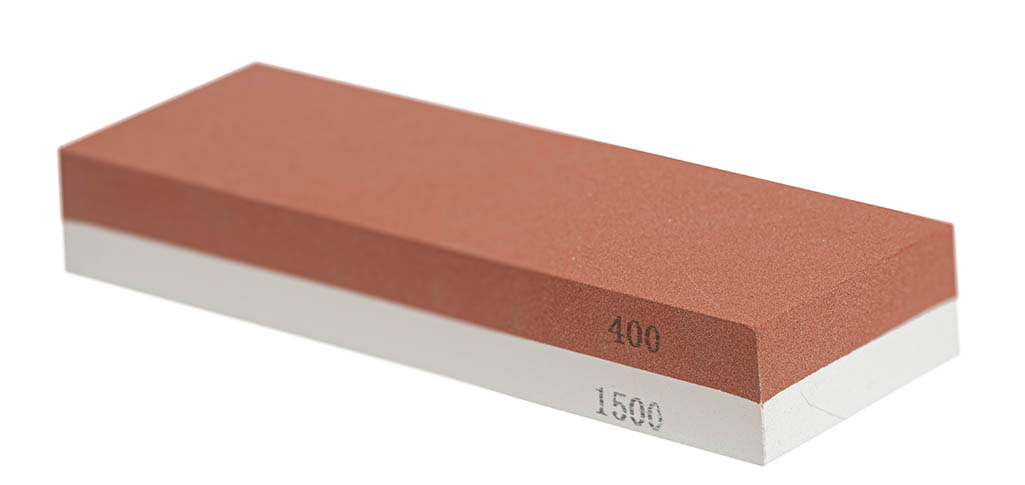
the cheapest solution — synthetic whetstone
Classic synthetic grinding stones, everyone knows them, typical for their double coarseness, soaked in water, cheap — but they don't last very long. Also softer for keeping a proper sharpening angle.
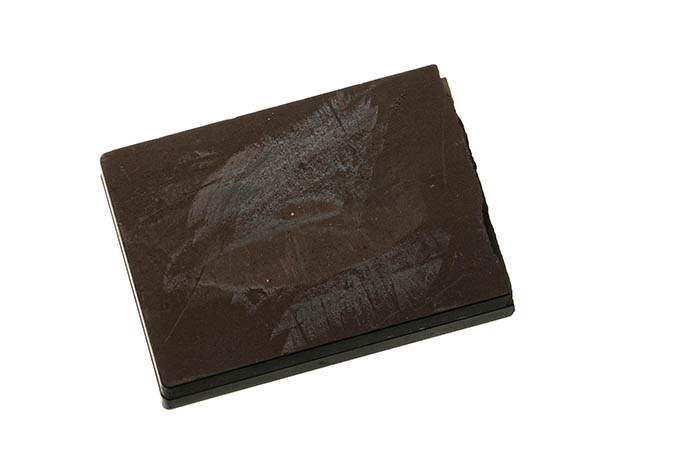
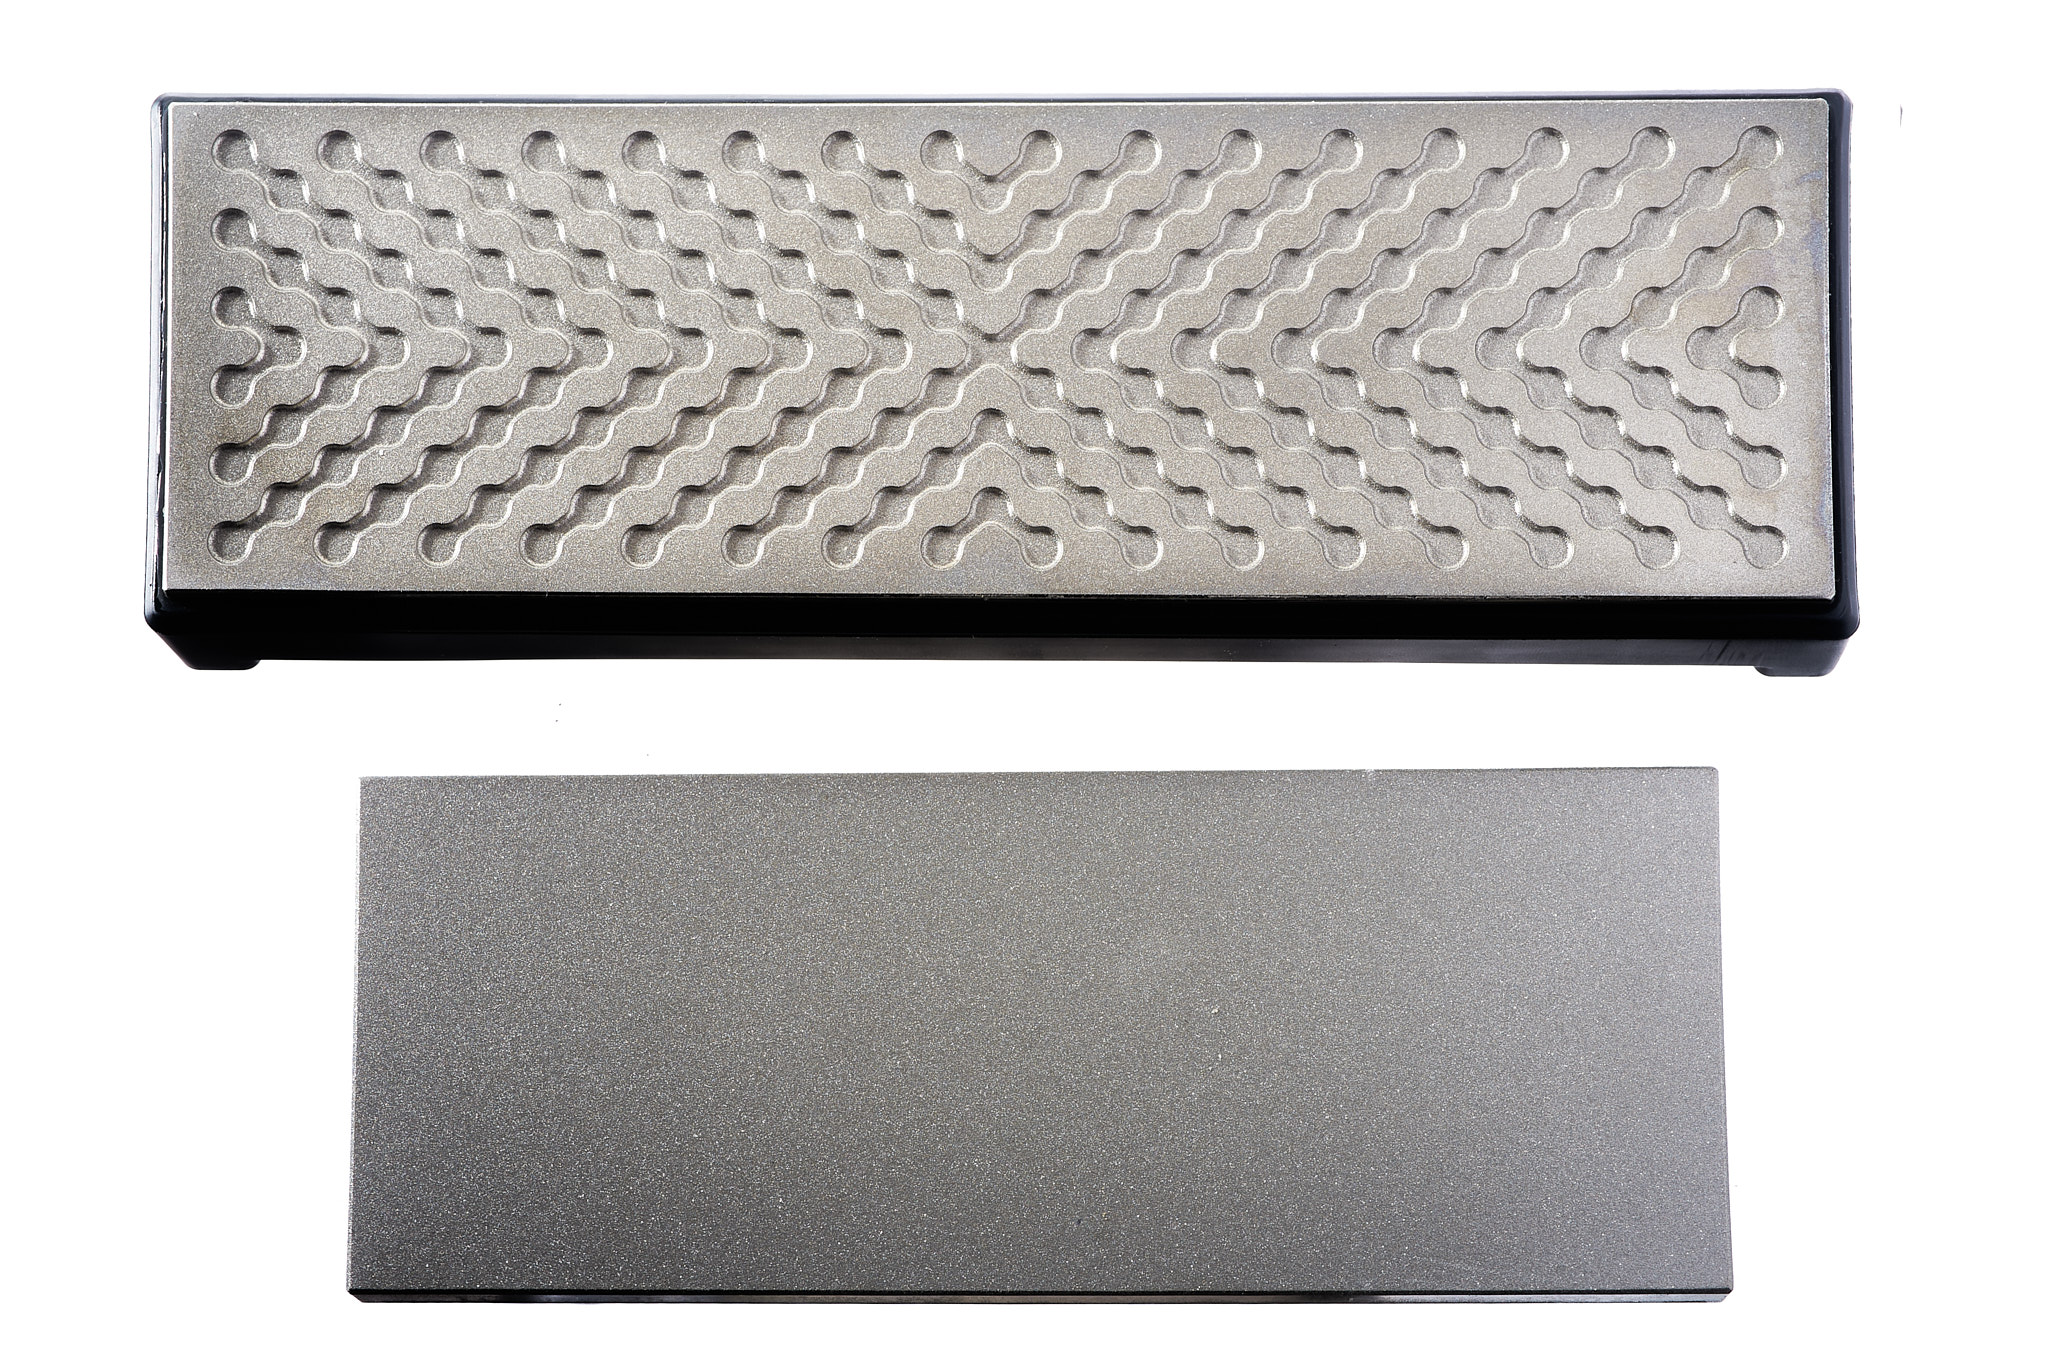
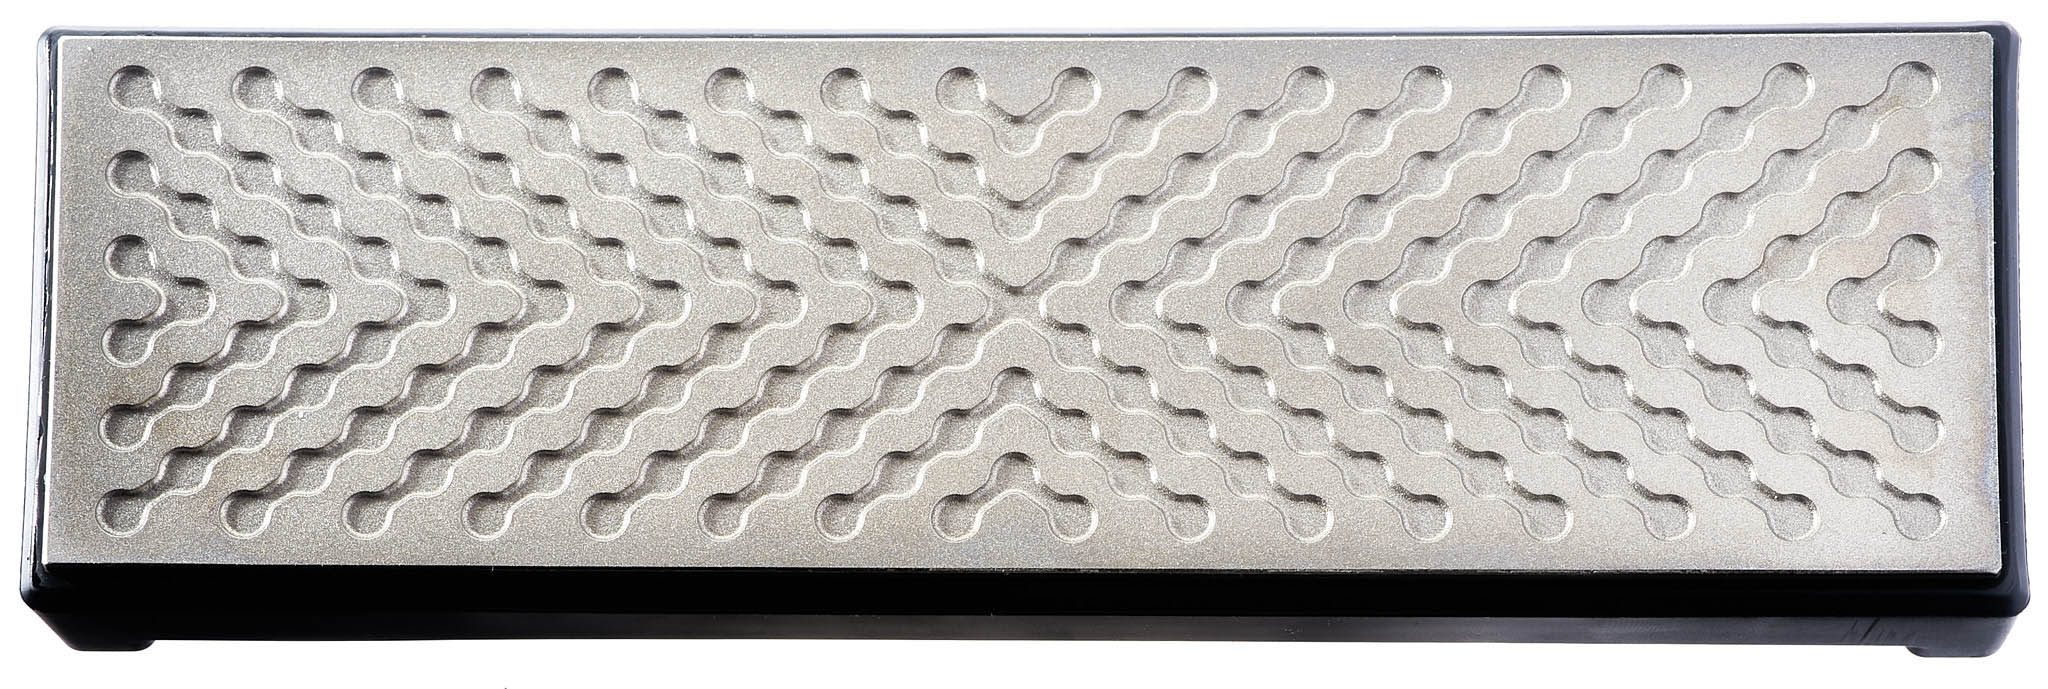
diamond stones
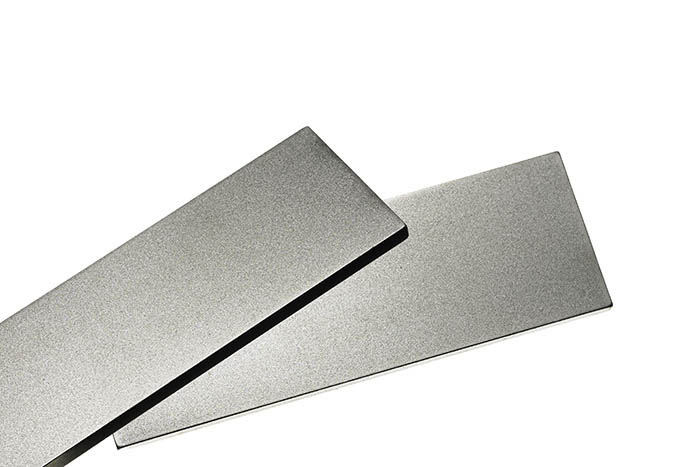
long-lasting flatness and perfect results
Diamond grinding stones — more precisely metal plates on which a layer of artificial diamond is applied.
synthetic corundum

shapton, or also glass stone of white artificial corundum — very hard stones, very similar to natural ones, at a more than tolerable price.
natural stones
Natural stones differ from others in that they have a single coarseness, are natural and do not absorb water.
stone flattening

an essential tool for every sharpener
Lapping plates and flattening stones restore the perfect flatness of worn whetstones. Without a flat stone, consistent and repeatable results are impossible.
honing leather
Jute cowhide fine leather for finishing and dressing the blade with abrasive paste applied to the leather.
jump to sharpening
Synthetic whetstones / waterstones
They are massively widespread, the purchase price is low, but they need to be properly cared for, cleaned and most importantly, used soaked in water. So they're not the cleanest to work with and belong in the garage rather than on the kitchen table.
However, the stones are fragile and can easily break. Also, because they are relatively soft, they wear off quite quickly. They need to be maintained regularly with a levelling / flatenning stone. A deepened stone will ruin your sharpening rather than help. Also, the pores of the abrasive become clogged quite quickly with steel scale, and it is advisable to clean them regularly — e.g. with a coarser stone or a cleaning eraser.
It can also happen that by careless manipulation you will crack the stone. Stone must be aligned, flattened and reground with a levelling stone, which is a necessity if you buy a synthetic abrasive stone.
As for the actual choice of grinding stone, it is always a question of what steel you are primarily grinding. If you intend to maintain the edge, often only stones with a finer grit will suffice. But if you need to align teeth, or more ripples at the tip of the blade, a coarser stone should be used. This will remove the material more quickly, but will leave indentations — grooves that join together at the tip of the blade, leaving a sort of micropile on the blade. This is a problem, because it is this micro-grain, with the tooth tips, that causes the blade to become dull again very quickly.
As a rule of thumb, coarsenesses should be combined at half the coarseness of the grain. For example, if we start at 400 grit, we should continue at 800, then 1600, then 3200, and so on. In practice, more realistic combinations are 400, 800, 1500, 3000, 6000 etc. For softer stainless steels a grinding grit of 1500–2000 will often suffice; for harder Japanese type steels, or carbon steels, then the coarser the better.
a broken stone
clogged pores in the abrasive stone
Diamond sharpening stones

With these grinding stones you do not have to deal with levelling as the material is very durable. However, the diamond grit may break off from the substrate over time. Grinding on the more expensive diamond inserts in the dimensions of a classic stone gives much better control over the bevel angle during actual grinding — they do not need water, they are ground dry. You don't have to clean up as much afterwards. If you use the stone properly it will last for years; just keep it away from water (the metal plate could rust). I recommend using the stone dry and cleaning it periodically with an old toothbrush.
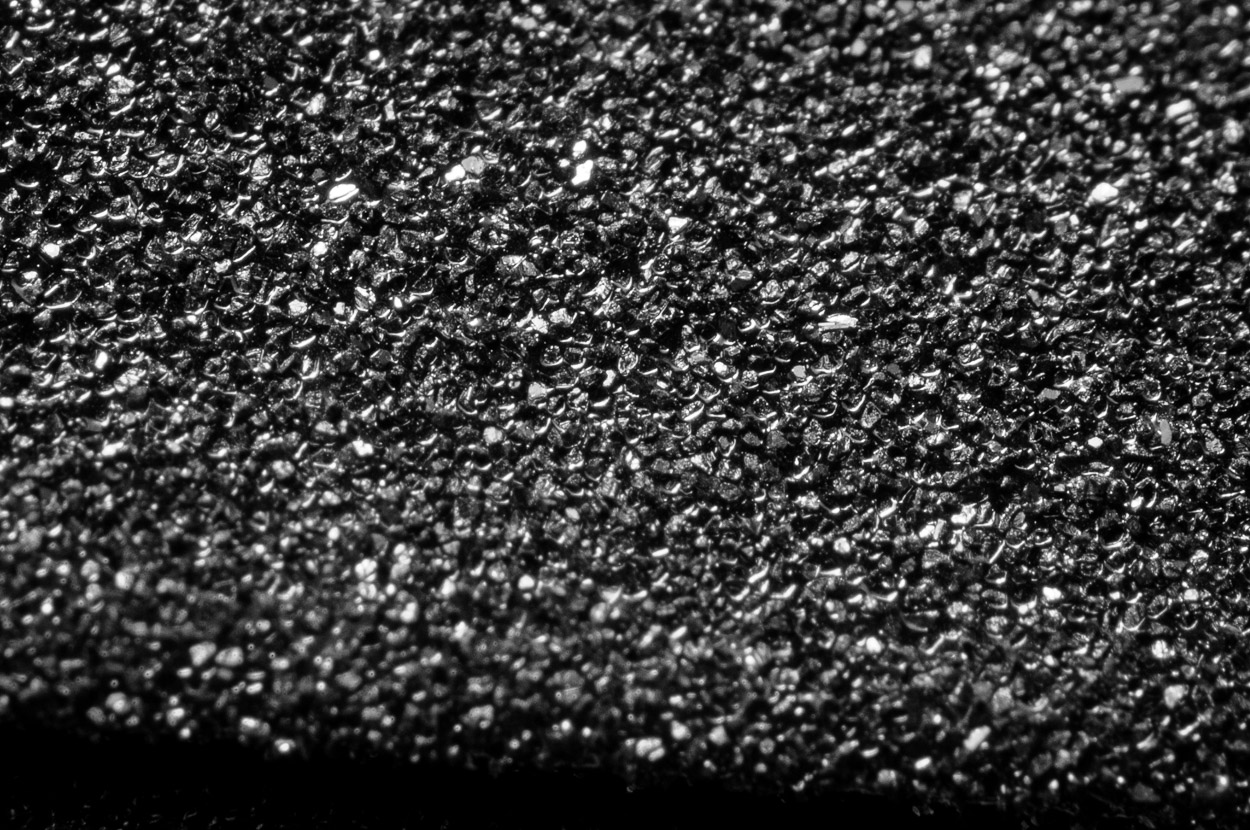
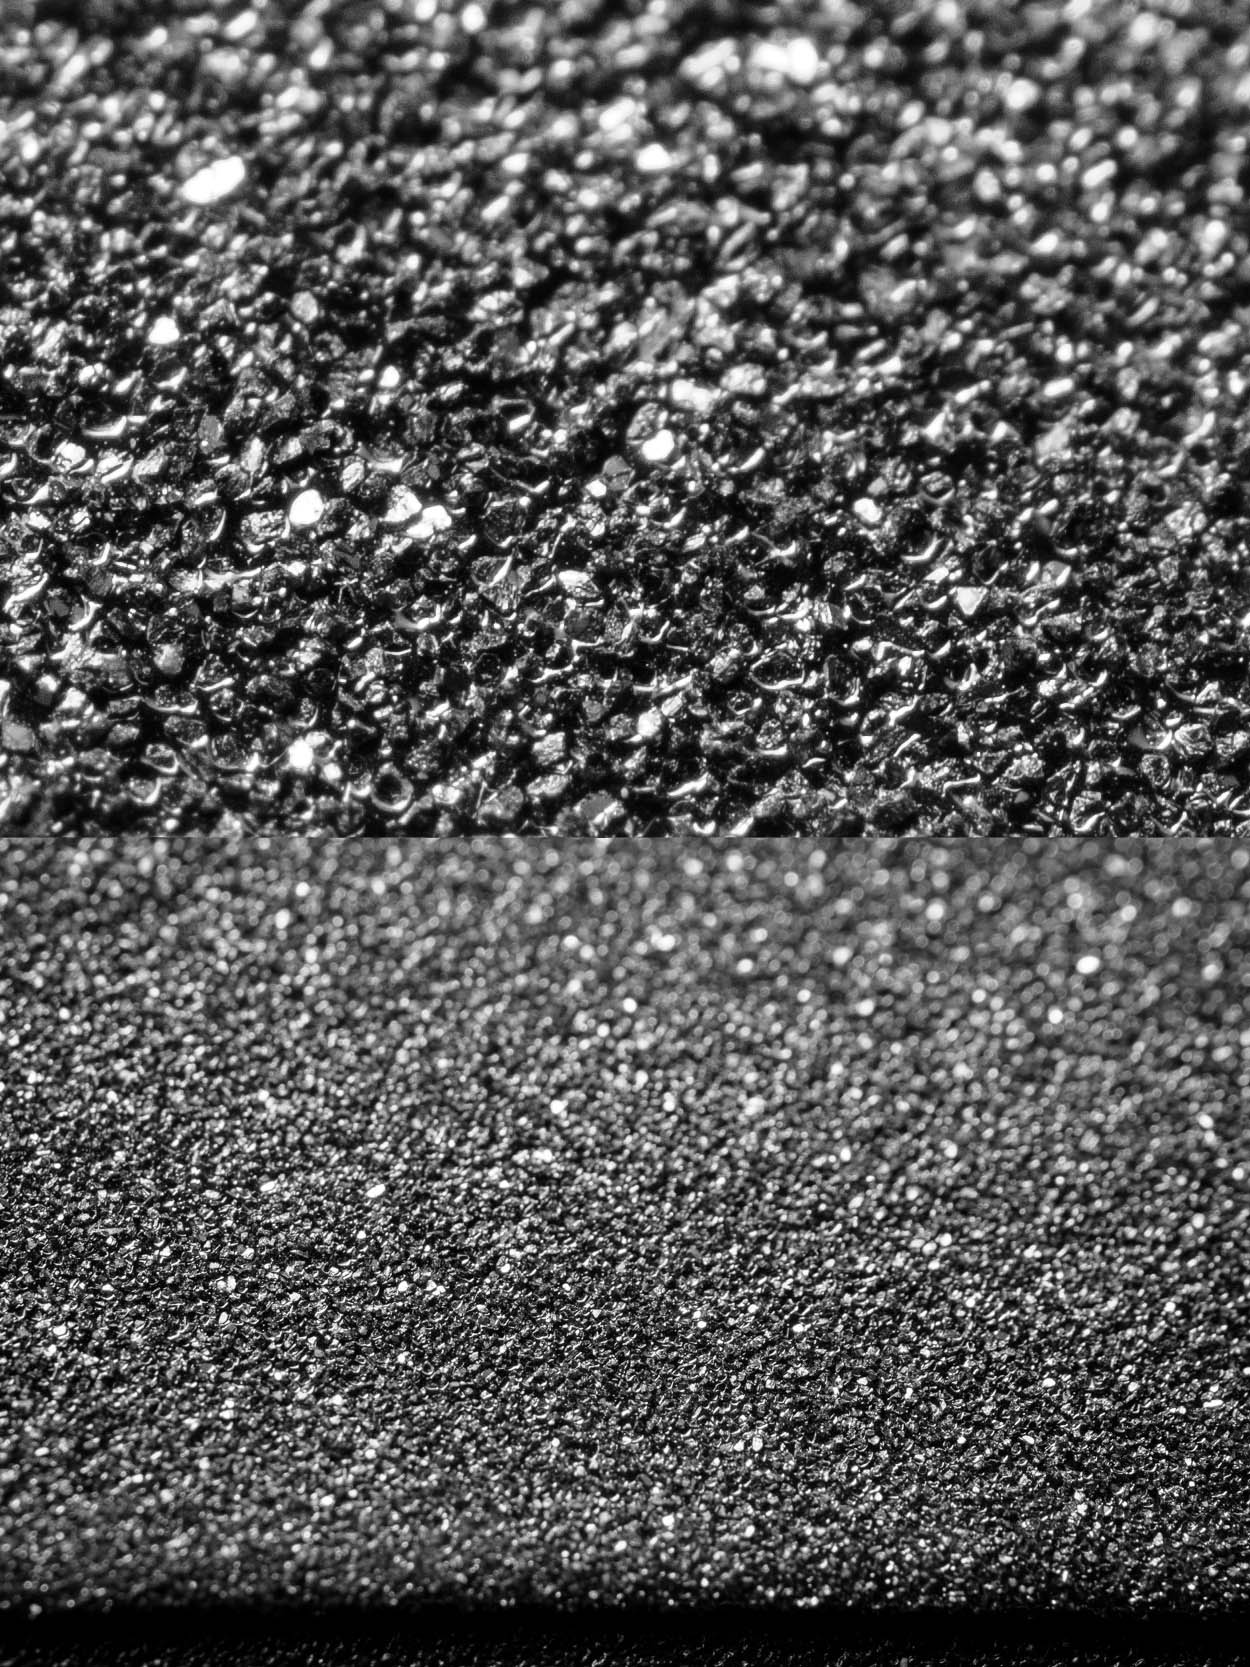
Cutting grain under high magnification — individual artificial diamond crystals can be distinguished
The belt is dusted with a fraction of artificial diamond, which with its high hardness can easily grind even the hardest material — maxamet, ZDP189, elmax, etc. The diamond stone is very durable and its higher initial investment will be evident by years of use. A universal diamond roughness of 600–800 grit is ideal if purchasing only one. It is neither too fine (where the cut would not be as noticeable) nor too coarse (where you would then have to align deep indentations).
Diamond grinding leaves the most indentations of all grinding stones. The diamond really scrapes and removes the material, and although it has a fast removal rate, we must then reckon with some alignment of these indentations — preferably with a grinding wheel of higher fineness. If I were to choose only a minimalist option for any steel, I would choose just diamond and a dressing leather for the final cleaning and a razor-sharp bevel.
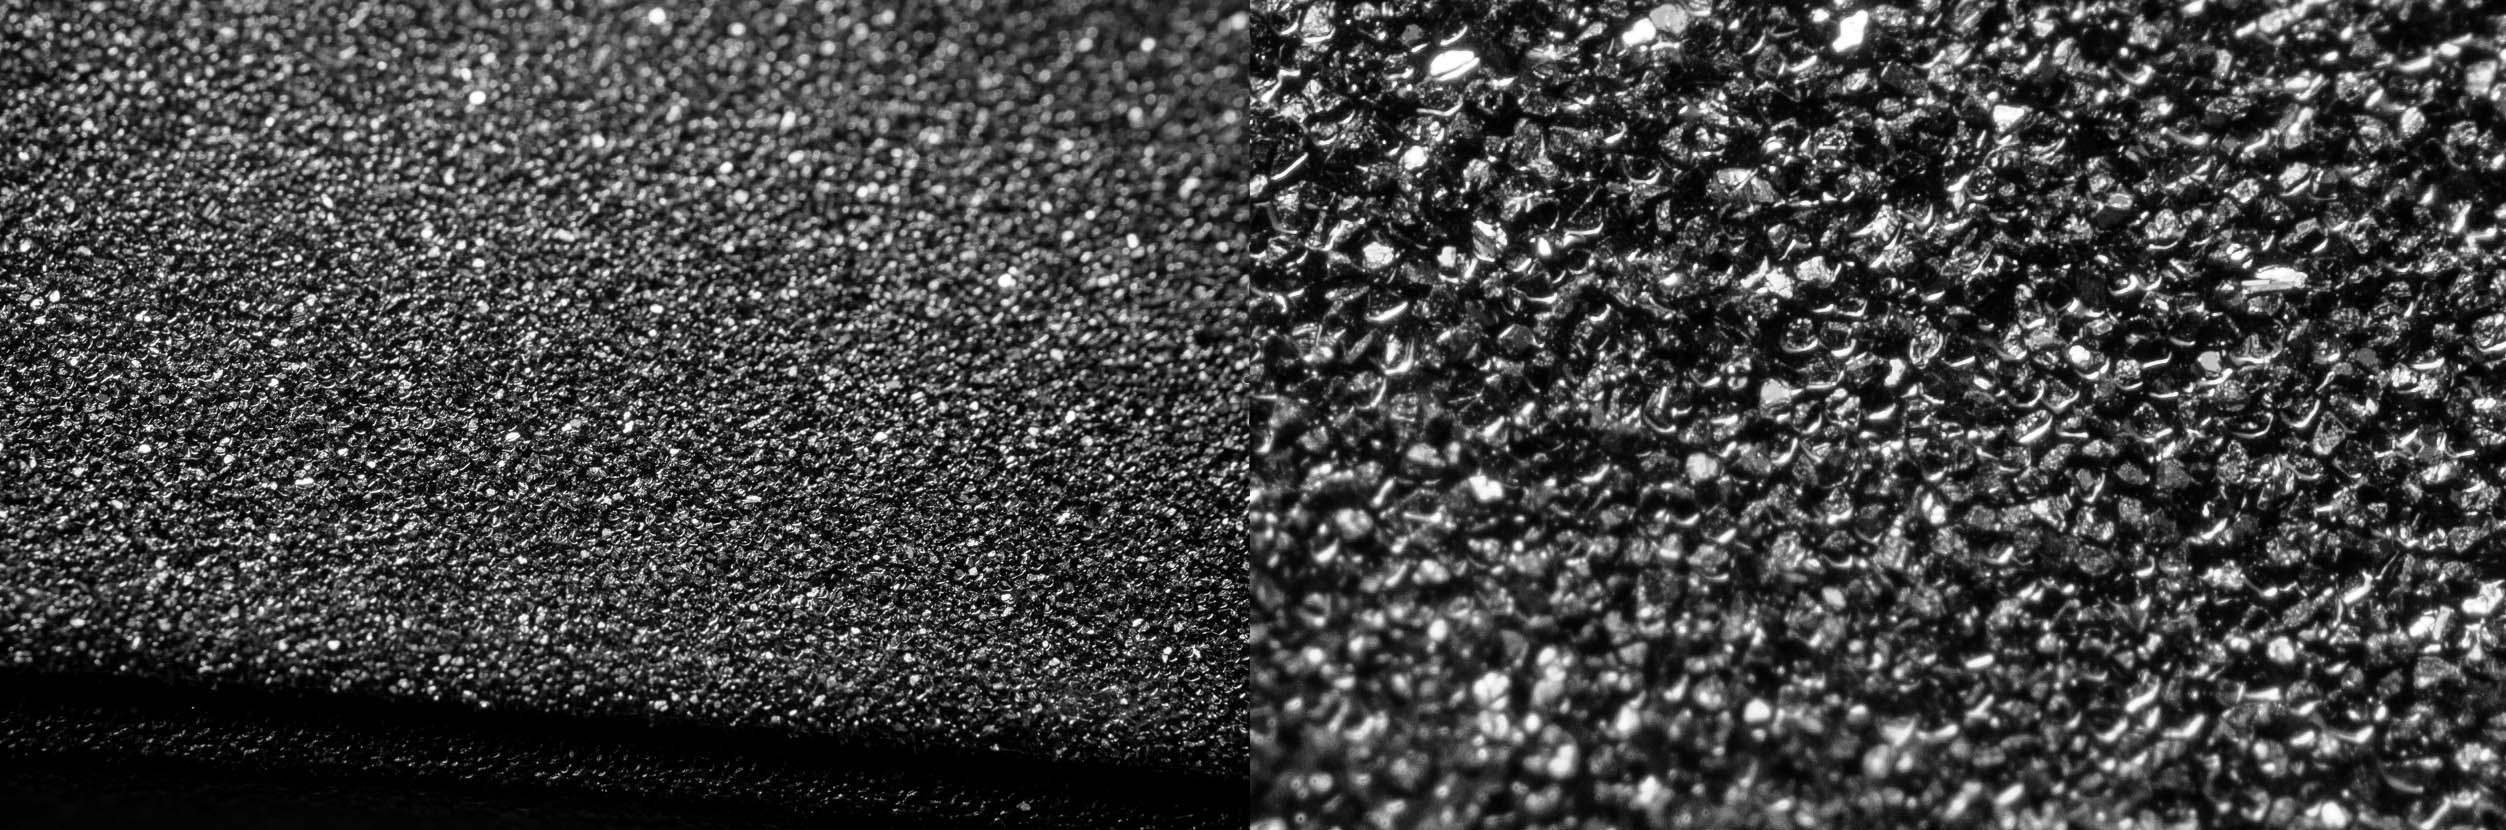
new diamond of roughness 240 (right part 2× magnification)
used diamond of roughness 240 (right part 2× zoom) — visible diamond breakage
broken grain on a diamond of roughness 240 — the area is almost without diamonds, bare side
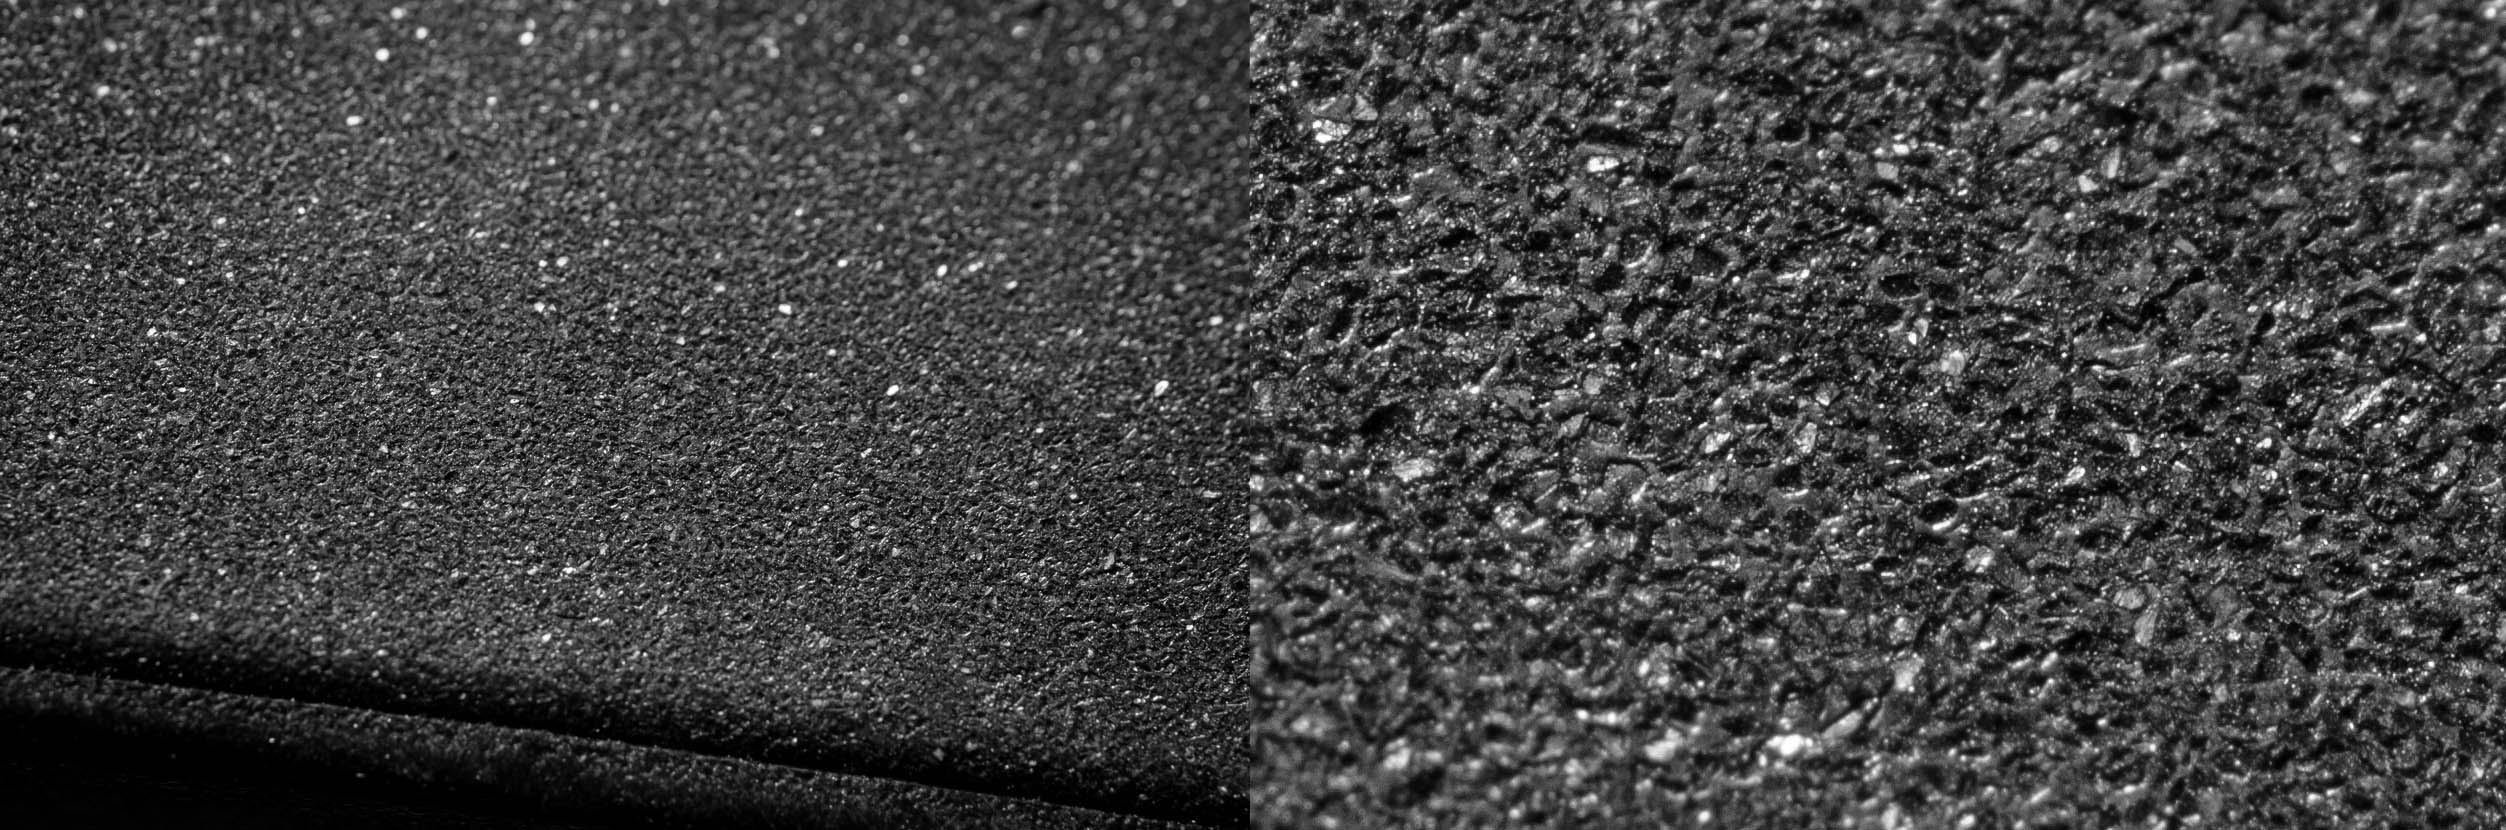
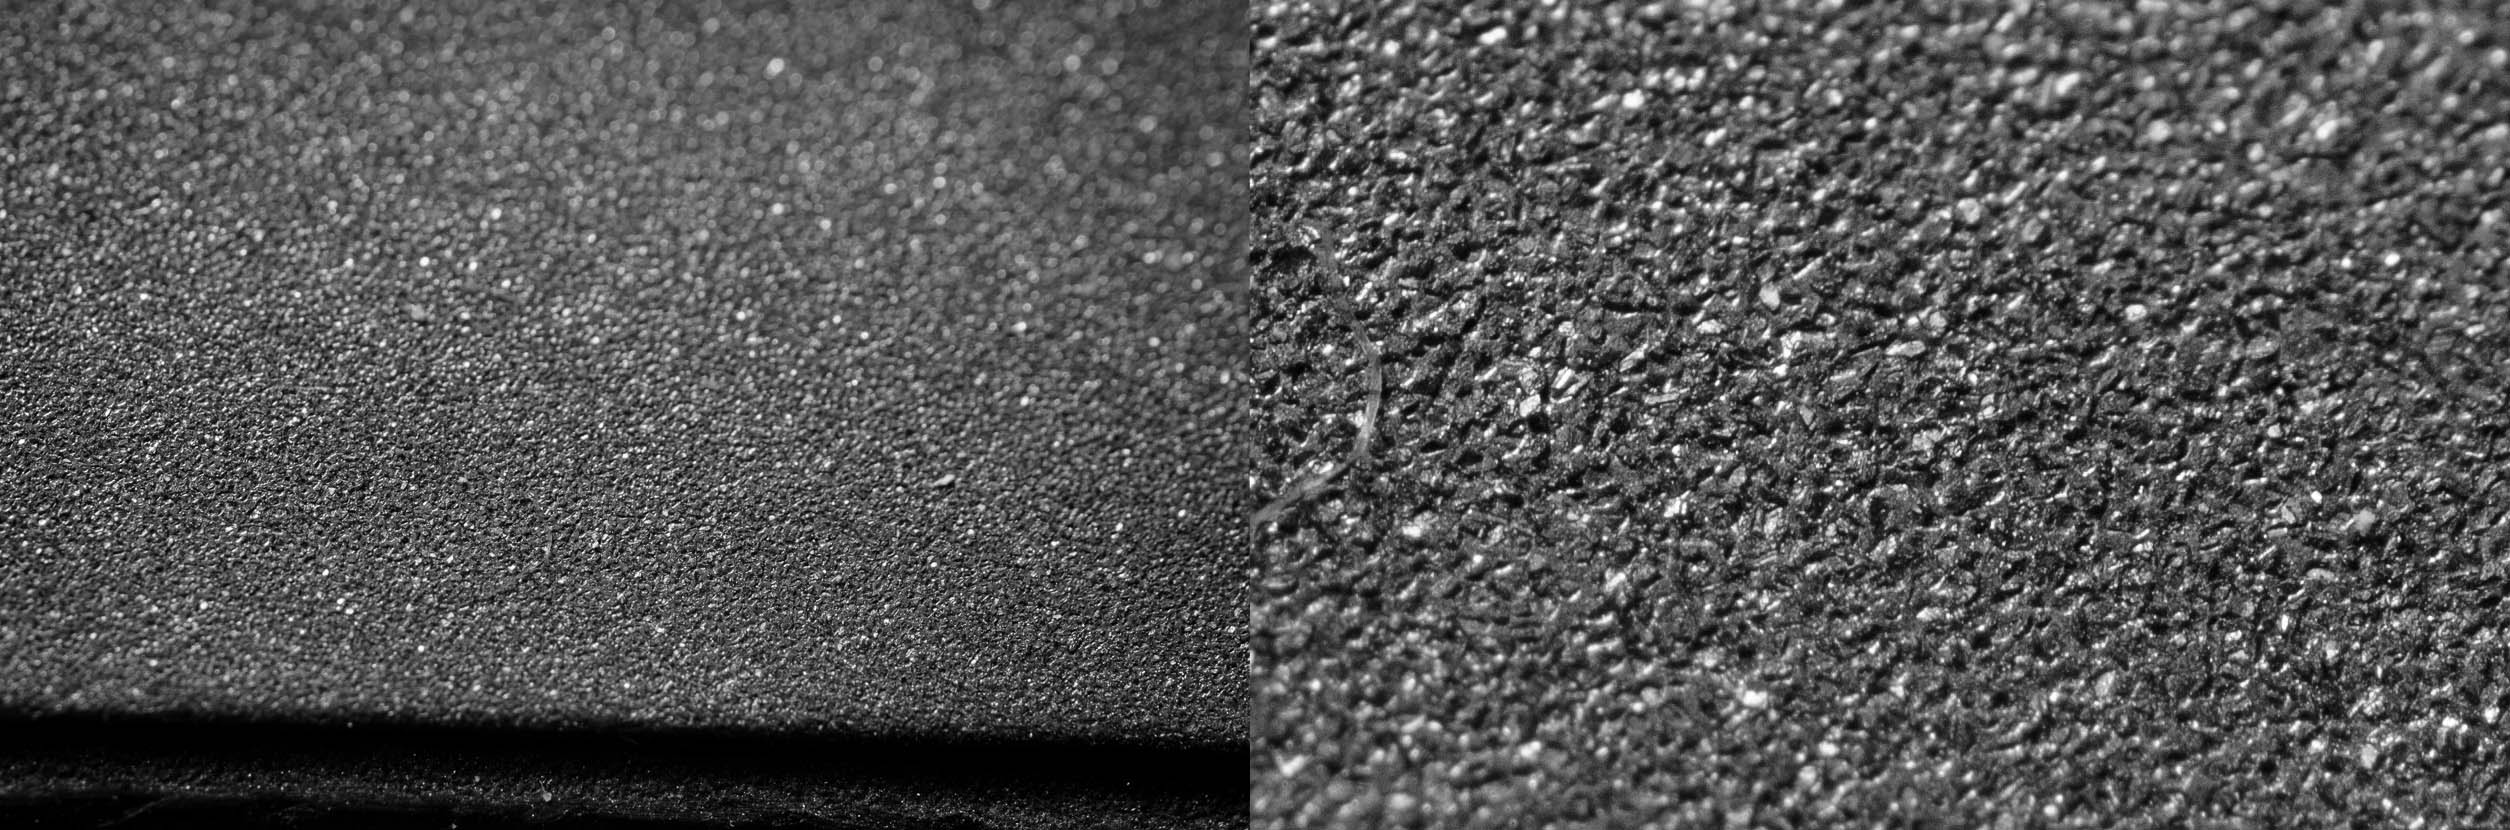
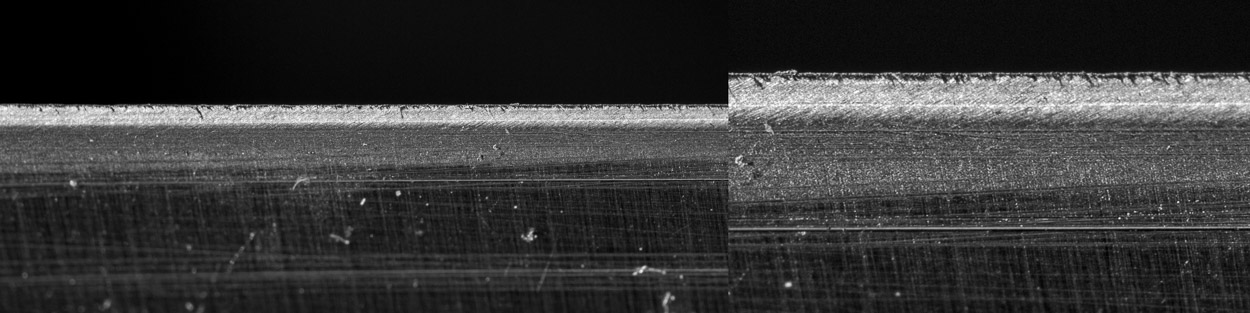
Comparison between diamond roughnesses
roughness 240 (part above 2× enlarged)
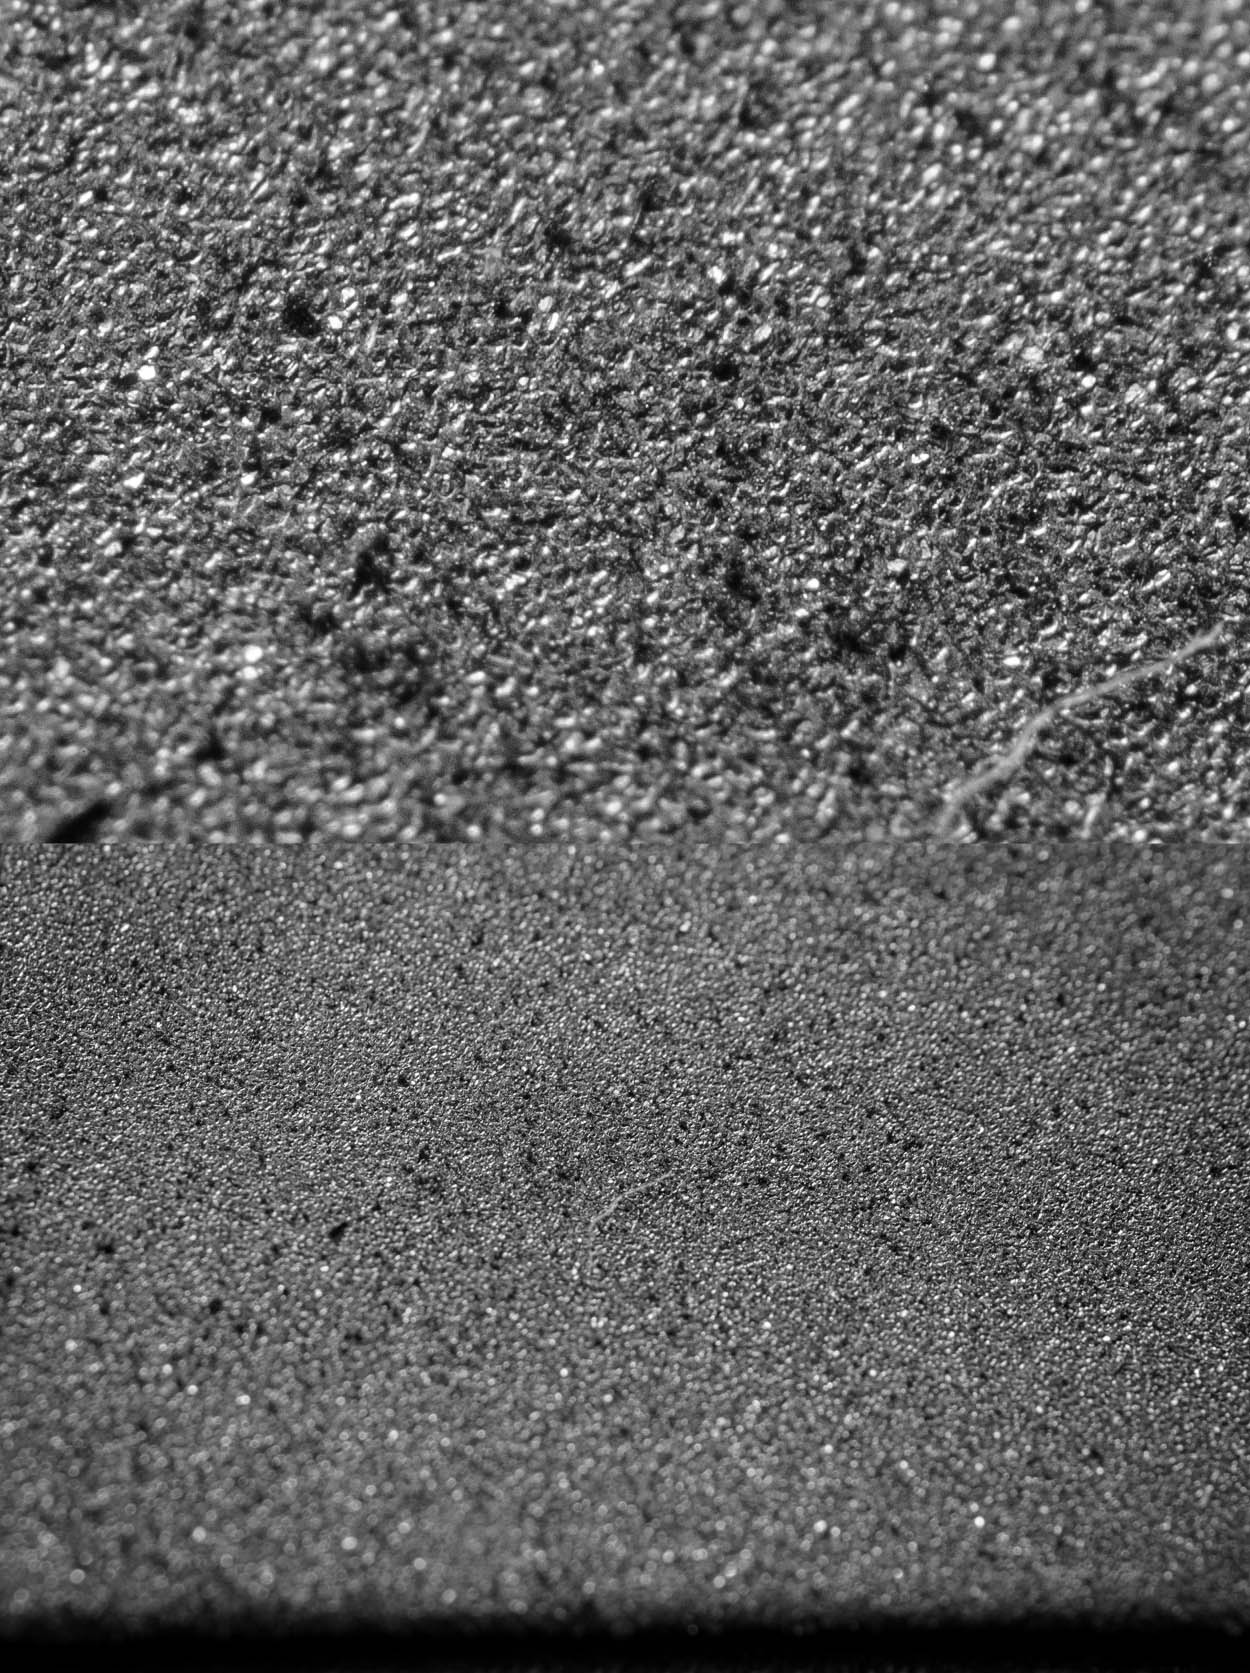
coarseness 600 (part above 2× enlarged)
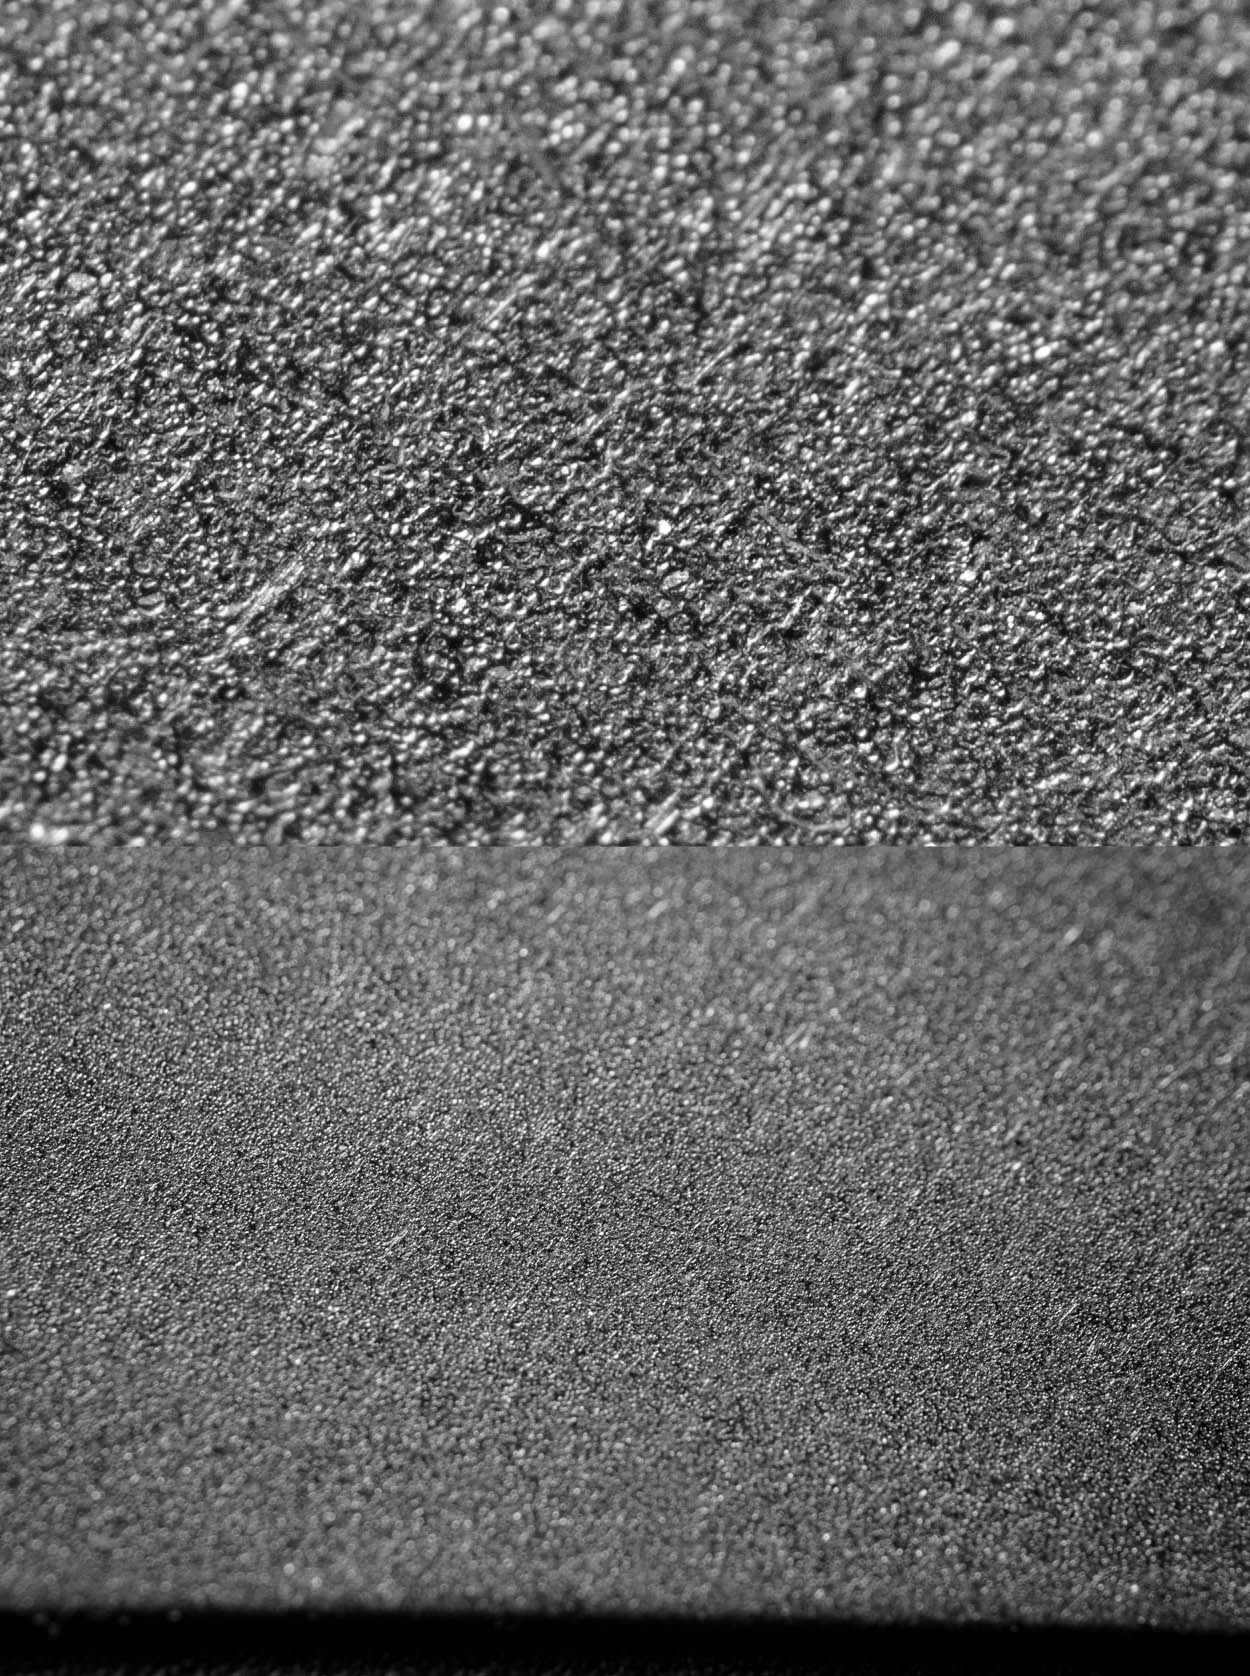
coarseness 1000 (part above 2× enlarged)
jump to sharpening
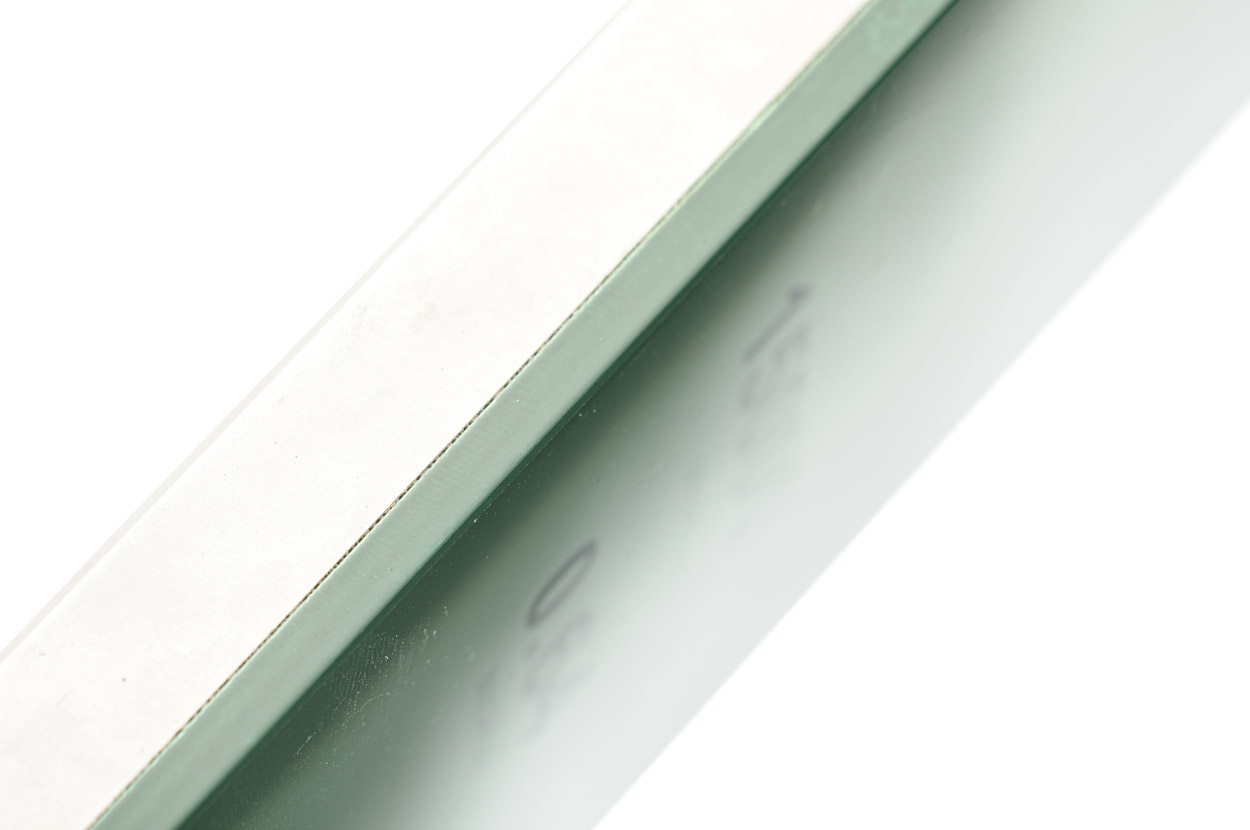
Shapton / Glass — synthetic corundum
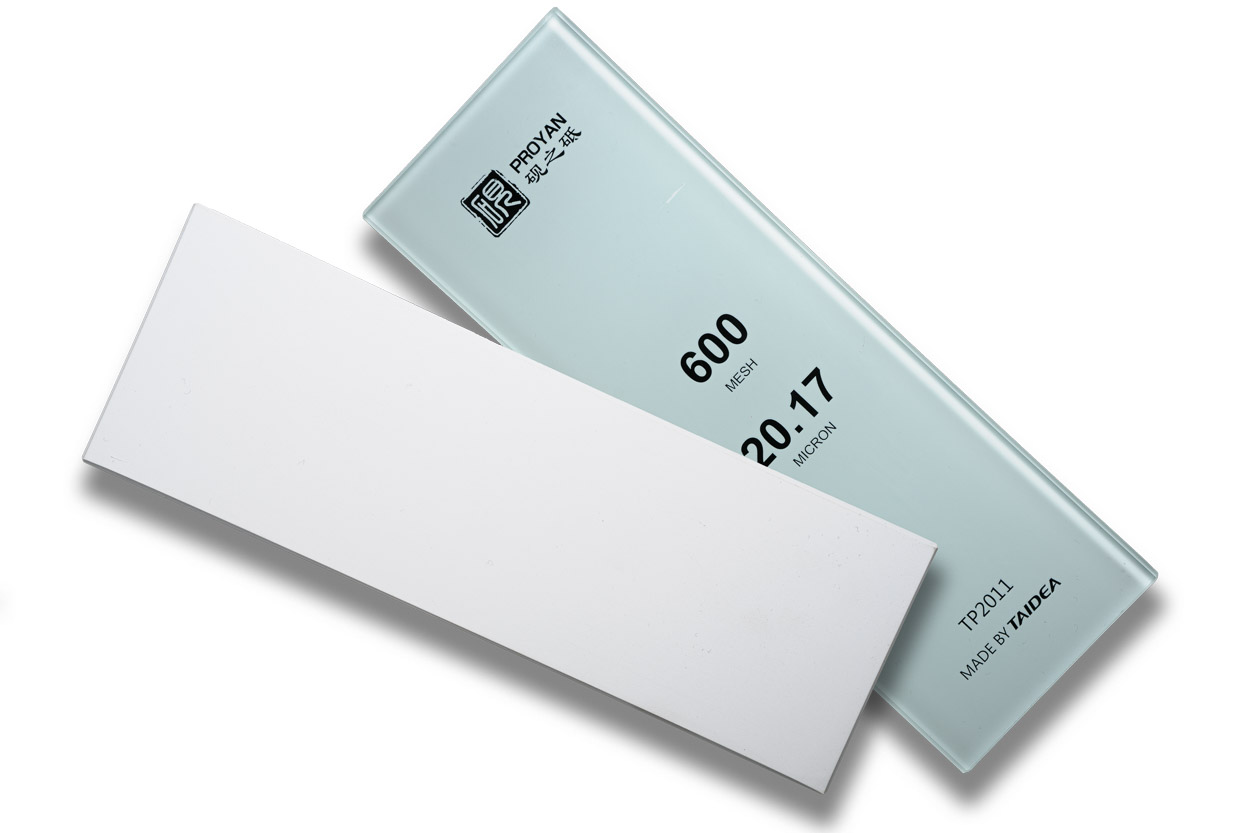
Professional solution of artificial corundum — shapton stone or glass stone (they are called differently). They are very hard stones, similar to natural stones, at an affordable price. They are non-absorbent, so they can be used easily both with water and with honing oil. There is no need to soak the stone for a long time before using it, just really wet it when grinding. Material removal is brisk and consistent. Often the artificial corundum is glued to a glass plate, which prevents the stone from breaking and increases its life.
Typically corundum stones are approximately 19 mm in height, 5 mm of which is glass plate. The high variance of grit coarseness from 200–30,000 gives a great opportunity to mix and match and progress evenly in multiple coarsenesses — in short, ideal. Artificial corundum performs excellently and I can recommend it as an intermediate between ordinary synthetic grinds that don't last very long and expensive natural stones.
A short video with a demonstration of grinding on a Shapton-Glass stone of 600 grit.
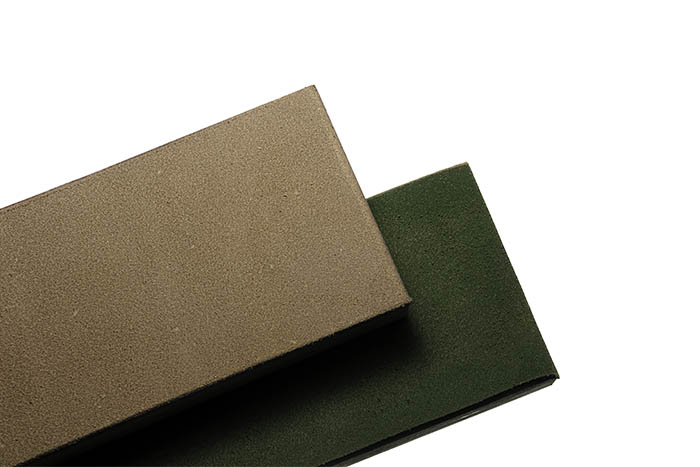
pure white artificial corundum in the shape of a grinding stone
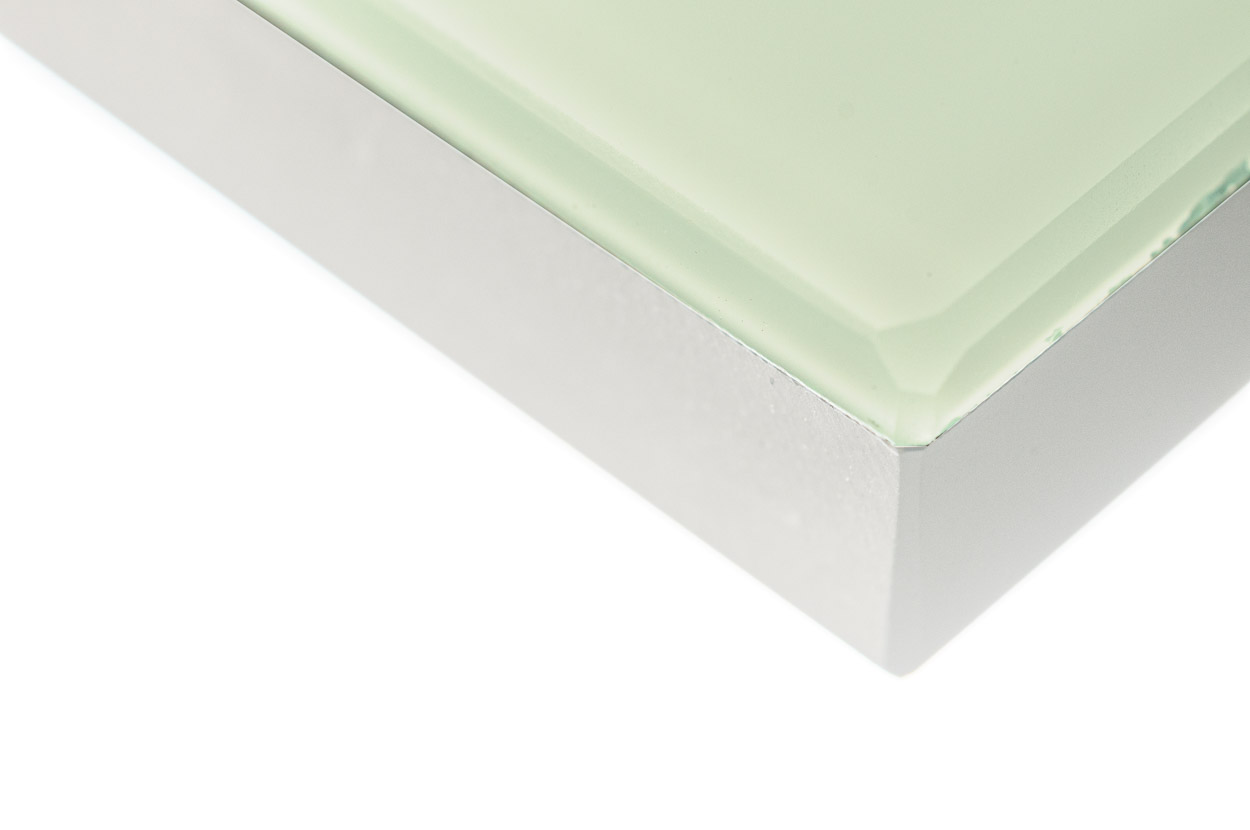
glass surface, serving as a support, glued to the stone
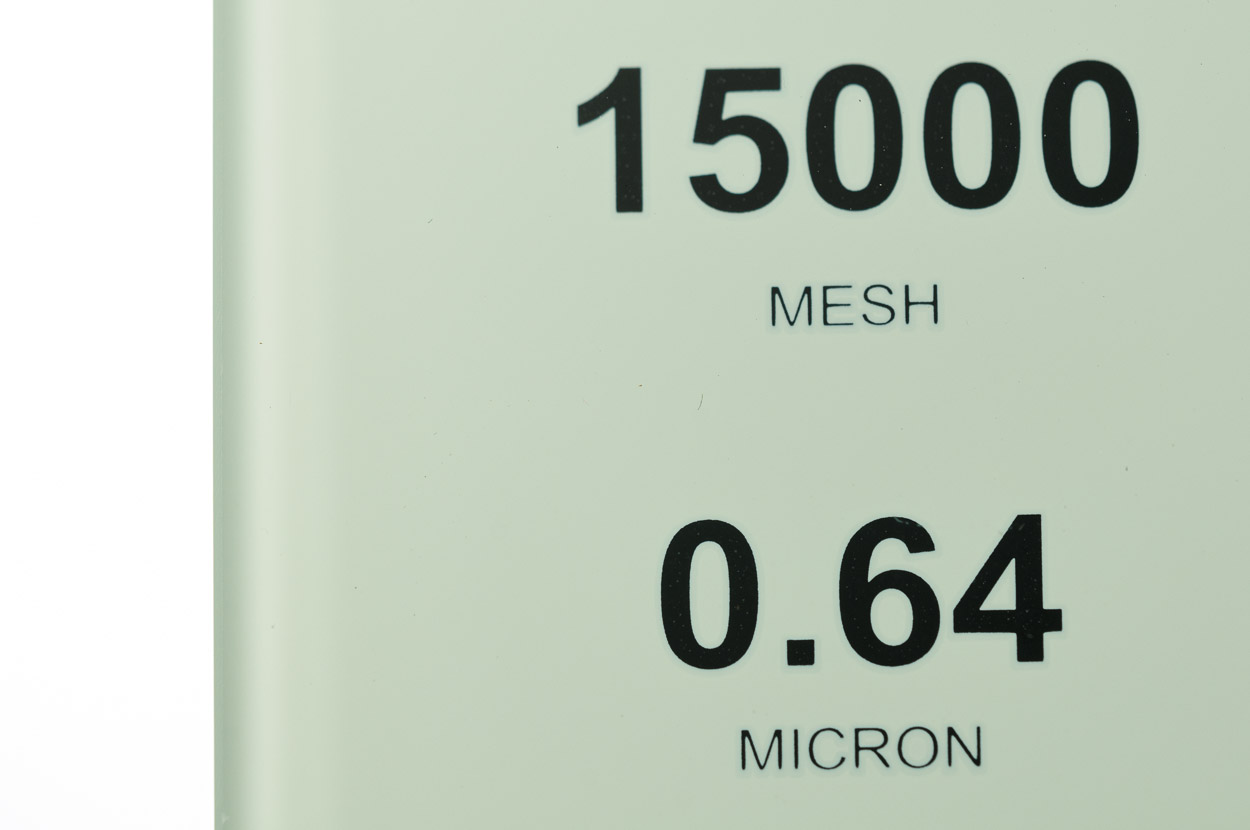
there is a large range of available coarsenesses, building on each other
Natural sharpening stones
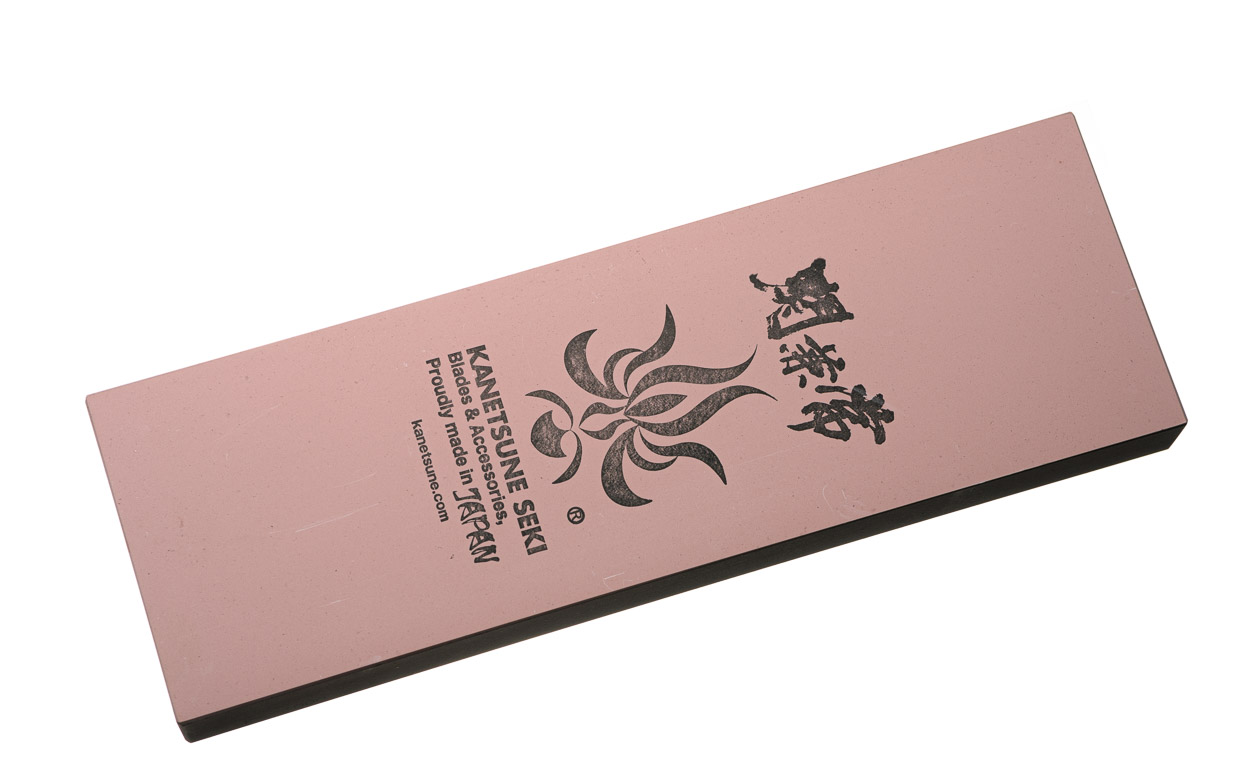
They differ from other stones typically in that they have a single coarseness, they do not absorb water, and they are used more with grinding or honing special oils — which help the steel slide better and make chip removal easier. They come in finer grits and really last for ages. Since they are really very hard, they don't fade and have a great response to hold a facet.
It is also the best option with the best surface grinding result. If you compare the grinding with a diamond stone, the natural stone smooths the surface of the steel rather than scraping it like a diamond. However, they are very expensive — with the minor exception of natural Arkansas, which can be considered reasonably priced, with excellent results. It belongs to the coarser grits, about 800–1500.
However, if we're talking about a classic natural stone, it's a treasure that will be inherited and will last a very long time if handled properly. The surface that the stone leaves behind is already smooth at finer coarsenesses from 3000 grit upwards, and mirror-smooth and shiny at 5000 and above. This also ensures the highest quality of cut, which even on a microscopic level can almost smooth the top of the blade. Re-blunting is then a matter of the hardness of the material used, as the tiny teeth of the saw on the blade are not broken out.
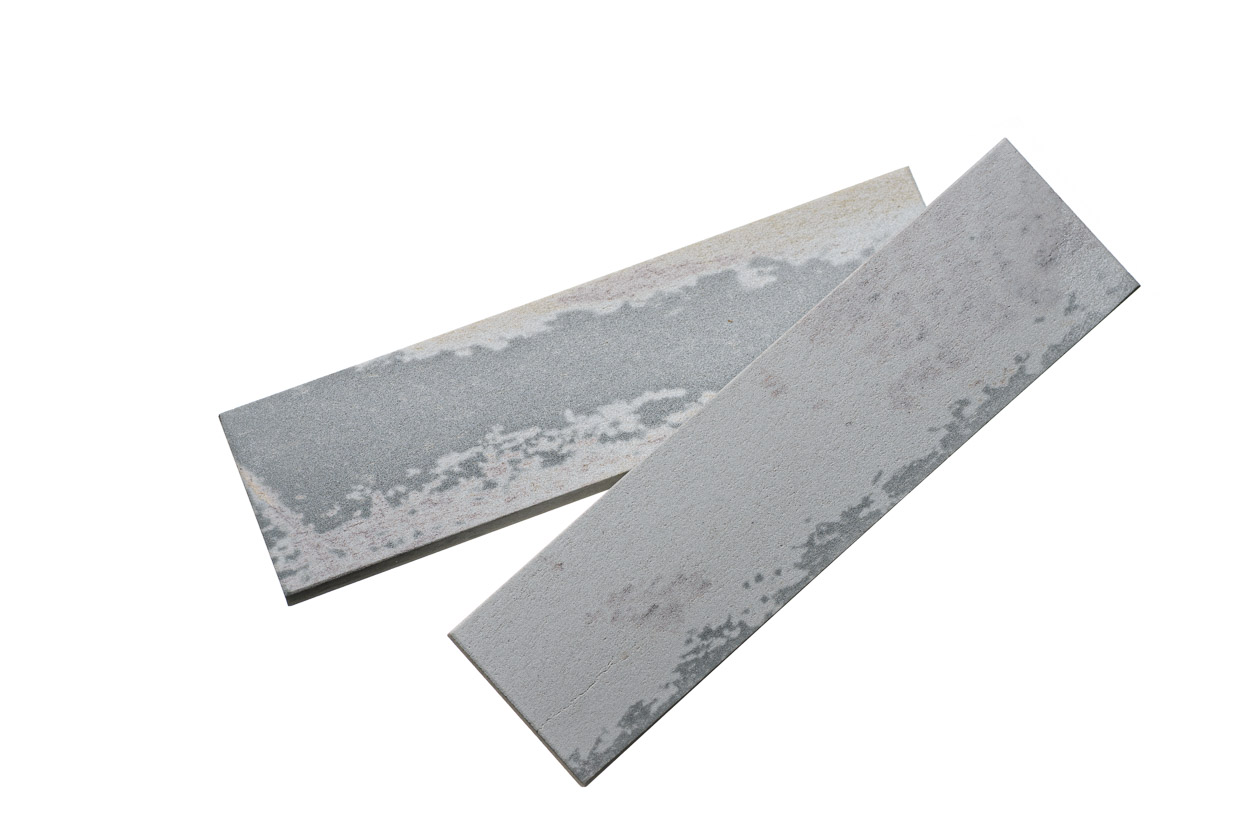
affordable natural Arkansas stone
Flattening sharpening stones
Synthetic water stones gradually wear unevenly during sharpening — a hollow develops in the middle of the stone, making it impossible to grind the bevel evenly. (Every stone wears down over time, but standard synthetics do so very quickly. Therefore, flattening is most necessary—or more accurately, 'most frequent' would be the more precise term.) Instead of a flat surface, you end up grinding on a concave dish, and the bevel comes out slightly curved rather than perfectly flat. This matters most with finer grits, where the final result counts the most. Lapping plates and flattening stones remove this unevenness and restore perfect flatness. Without regular flattening, consistent and repeatable results are impossible — and no matter how expensive your stone is, it cannot perform properly if it is not flat.
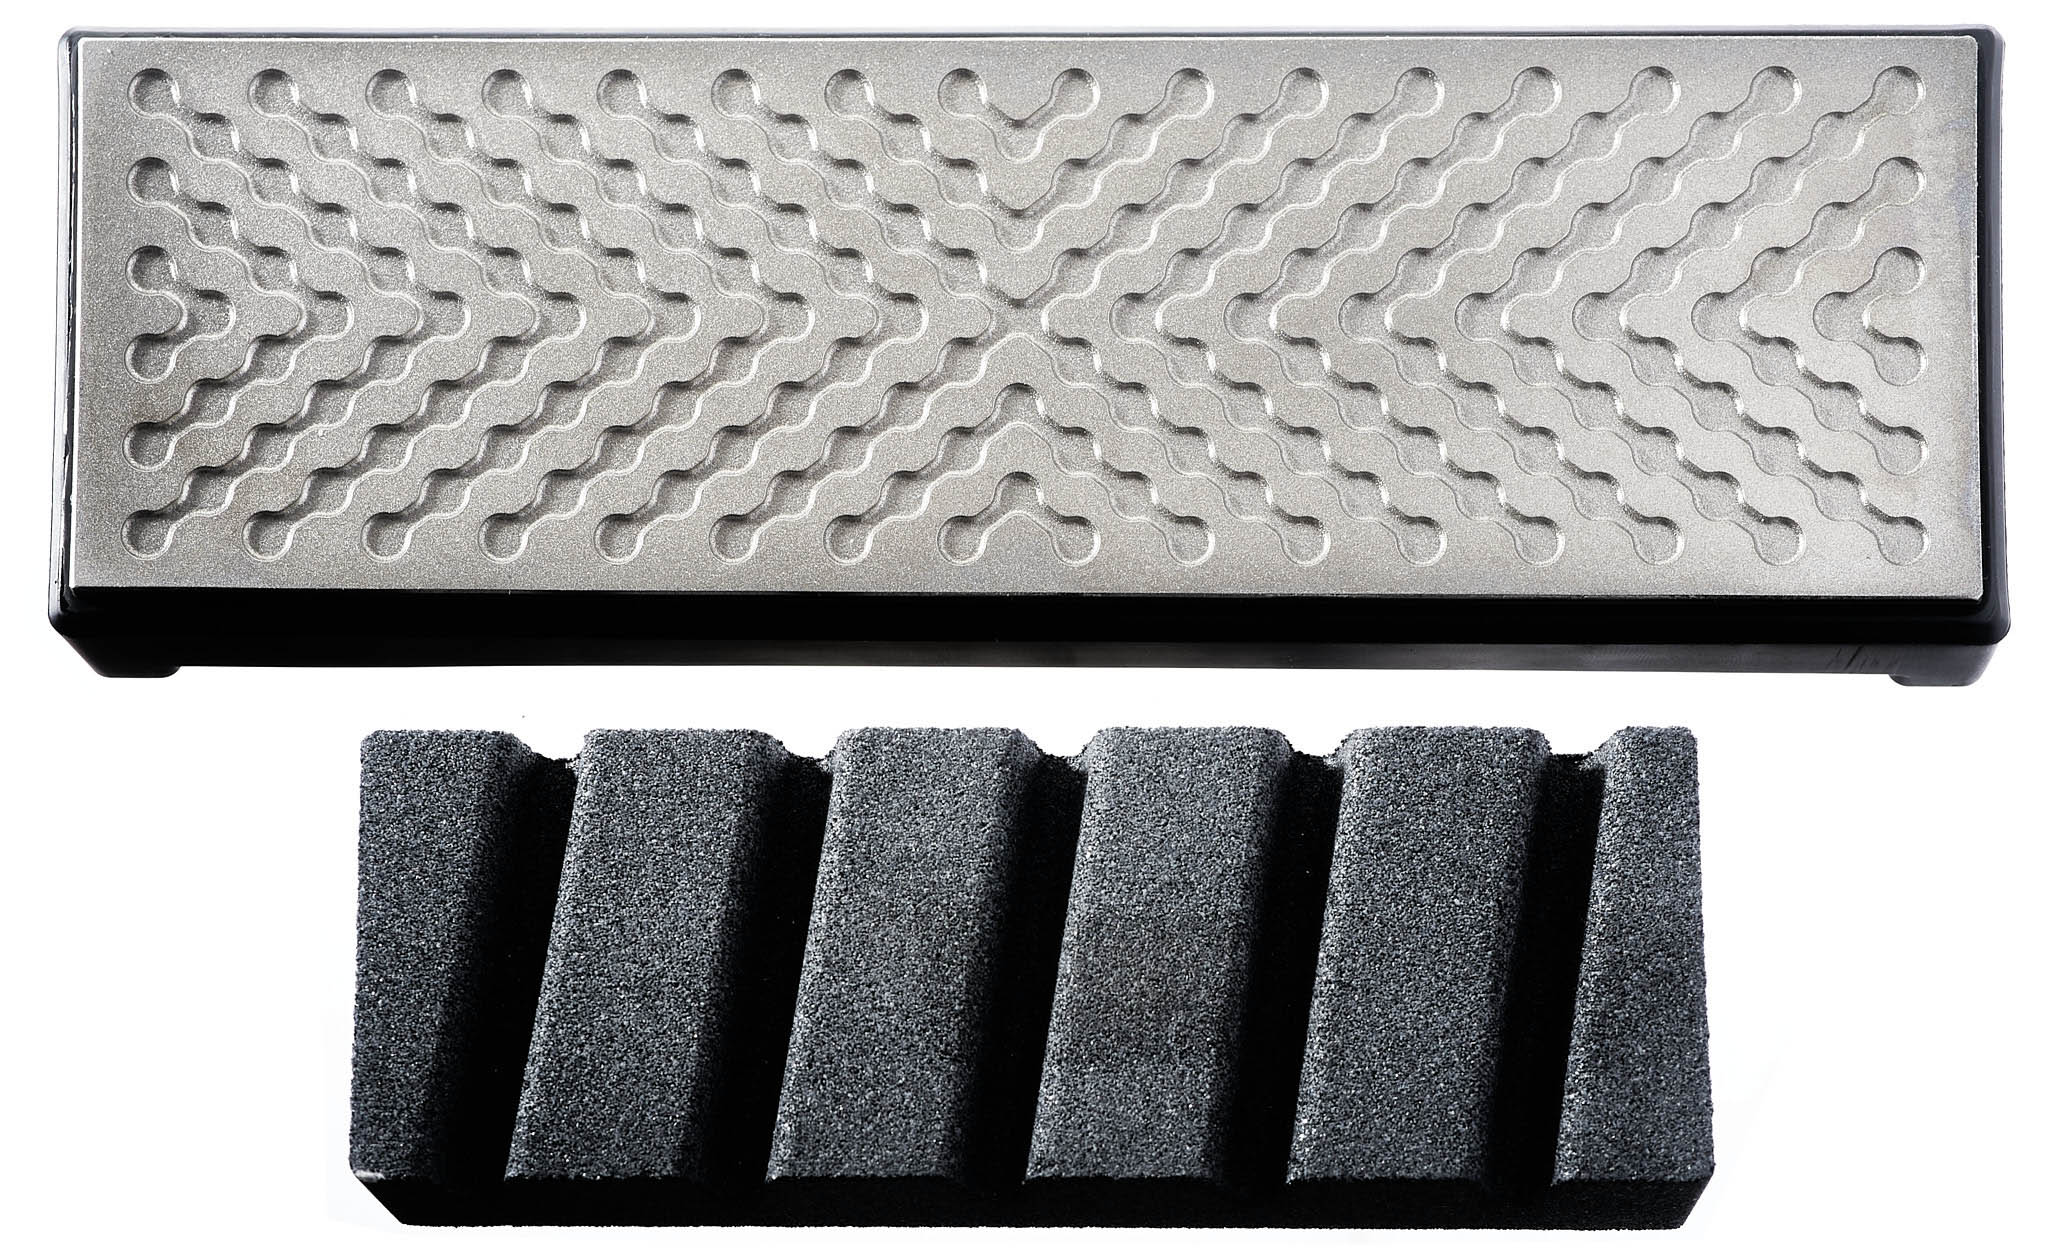
Naniwa Flattening Stone 60 grit
Naniwa is one of Japan's most respected manufacturers of sharpening stones and accessories. Their 60 grit flattening stone is designed for fast and effective removal of larger hollows caused by wear. The coarse grit cuts aggressively — even a heavily dished stone can be flattened in a reasonable time.
Dimensions 170×55×30 mm and weight 450 g ensure stable handling. Suitable for longitudinal flattening along the stone length (classic knife sharpening), as well as across the width — for example when flattening stones for chisels or plane blades, where absolute flatness is particularly critical.
Before use, soak both the flattening stone and the stone being flattened in water for approximately 5 minutes. Work under constant moisture, moving the flattening stone across the entire surface. Mark the surface with a pencil in several places to track progress — once all pencil marks have disappeared across the full width, the stone is flat. Made in Japan.
size comparison 250mm Shapton vs 170mm Naniwa
size comparison 250mm Shapton vs 170mm Naniwa
Naniwa 170mm flattening stone
DMT Dia-Flat Lapping Plate 8″ (203 mm) — 95 micron
An American diamond lapping plate with a solid flat surface. The 95 micron grit corresponds to approximately 180 grit — an aggressive cut that removes material quickly even from harder stones. The uninterrupted flat surface adds a practical bonus: the plate can also be used as a standalone diamond sharpening surface.
However, the smooth surface comes with a limitation. With finer stones of 3000 grit and above, the slurry produced during flattening has nowhere to go — the stone effectively suctions itself to the plate. For this reason the DMT Dia-Flat 8″ is best suited for coarser stones up to approximately 2000 grit. Flatness is rated at ±0.0127 mm, which is more than adequate for this purpose.
size comparison 250mm Shapton vs 200mm DMT
DMT Dia-Flat Lapping Plate 10″ (250 mm) — 95 micron
Technically identical to the 8″ version, but in the larger 250 mm format. The larger surface makes a noticeable difference in comfort — the stone seats more stably on the plate, strokes are more even, and the whole process is more precise and less tiring. If you flatten stones regularly or work with longer stones, the larger format is well worth it.
Performance and limitations are the same as the 8″ version — best for stones up to approximately 2000 grit, smooth surface without channels. Flatness is rated at ±0.0127 mm, which is more than adequate for coarse flattening.
Shapton Diamond Lapping Plate My recommendation for the most precise result
A Japanese premium lapping plate designed specifically for fine stones — and you can see the difference immediately. Unlike the smooth surface of the DMT plates, the Shapton features deliberately shaped channels and raised islands. This is not aesthetics but function: when flattening a fine stone, a thick slurry builds up that would cause the stone to suction onto a smooth plate. The channels drain this slurry efficiently, pressure distributes evenly, and flattening runs smoothly even on very fine stones.
The plate grit is approximately 45 microns — significantly finer than the DMT. This is intentional: a coarser plate would damage a fine stone and undo the carefully prepared surface. If you want to flatten truly fine stones (3000 grit and above), this plate is the only correct choice.
Flatness is guaranteed to less than 0.005 mm — considerably more precise and flat than other manufacturers. That justifies the higher investment. Made in Japan, and the results show it.
Shapton lapping plate — precision in every detail, but a premium investment
So, should you flatten?
If you are unsure which lapping plate is right for you, the answer lies in what stones you are flattening. For coarser stones up to approximately 2000 grit, the DMT Dia-Flat will do the job reliably and at a reasonable price — and it can also be used as a standalone diamond sharpening surface if needed. The larger 10" format offers more comfortable work than the smaller 8". Once you move to finer stones — 3000 grit and above — the situation changes. The smooth surface of the DMT becomes a problem: slurry has nowhere to drain, the stone suctions to the plate, and flattening becomes awkward and imprecise. On top of that, the coarseness of the DMT (~95 microns) is simply not suitable for fine stones — it can damage the surface and effectively ruin the stone. This is exactly where the Shapton Diamond Lapping Plate comes in. The deliberately shaped channels and raised islands drain the slurry, suction is not an issue, and the finer grit of ~45 microns will not damage fine stones. Add to that a guaranteed flatness under 0.005 mm — more than twice as precise as the DMT. That is why the Shapton costs more, and that is why the investment pays off. If you want to care for fine stones properly, the Shapton is the right choice.
Honing leather with abrasive paste

jute leather without and with abrasive paste, which allows the blade to be pulled out
Honing a blade on leather is a concept in itself. Everyone's heard of it — our grandfathers used to sharpen and maintain their razors that way. As easy as it was then, it's still easy today. It's no longer a hanging belt, but a soft cowhide leather on a solid core where we can lean the knife properly and pull the blade out.
The main factor is the abrasive paste that is put into the leather. In my experience, abrasive paste applied on the reverse side works better. For very fine pastes, use the face side. Abrasive pastes are basically of three types:
The first — silichromes and their ilk — have a very good yield, are long-lasting and affordable.
The second option is diamond paste, which is oil-based with diamond grains in the mixture of varying coarseness. The disadvantage is the need to refresh the surface of the leather before use by adding another layer of paste, which washes out during dressing.
The third option is basically used for the delicate face side of the leather — gentle oils or pastes designed more to keep the leather from drying out. The dressing agent is then the leather itself and it really just serves to clean the top of the blade of burrs.
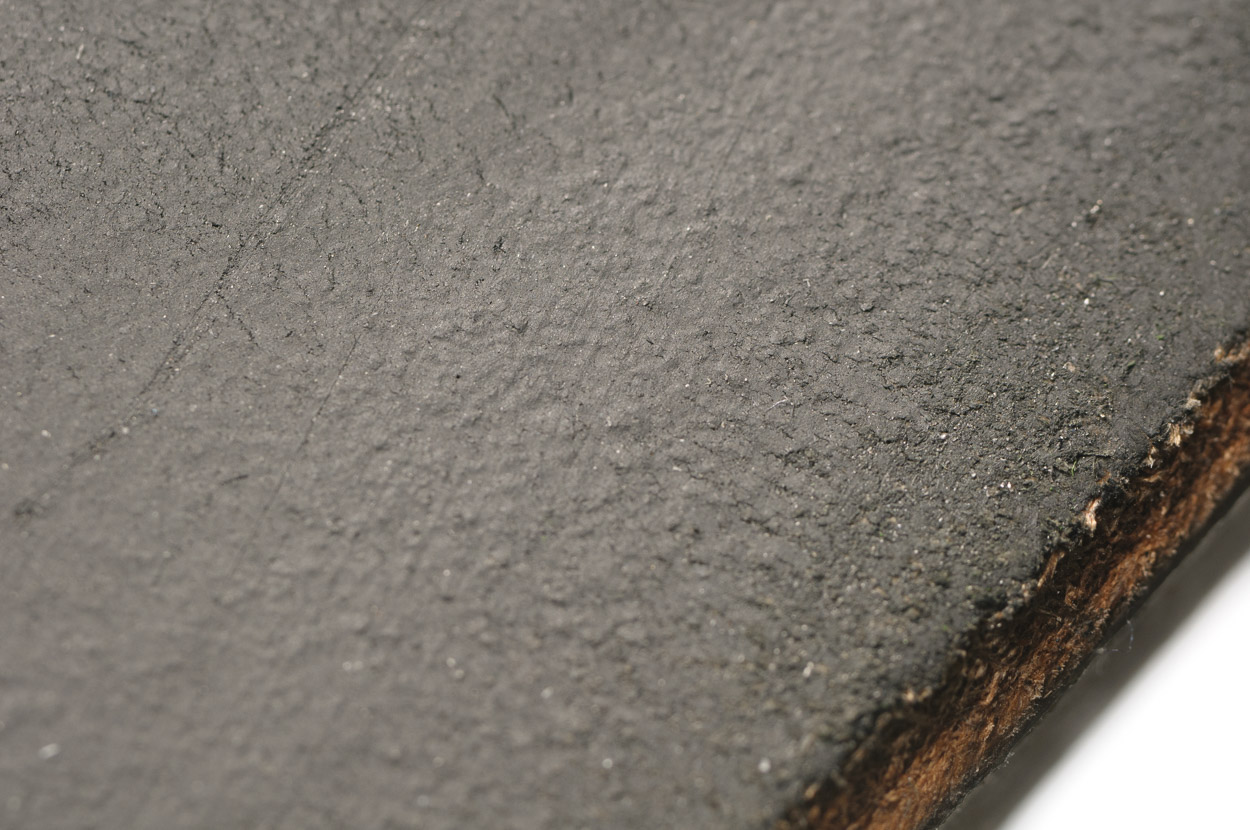
honing leather with coarse paste (close-up)
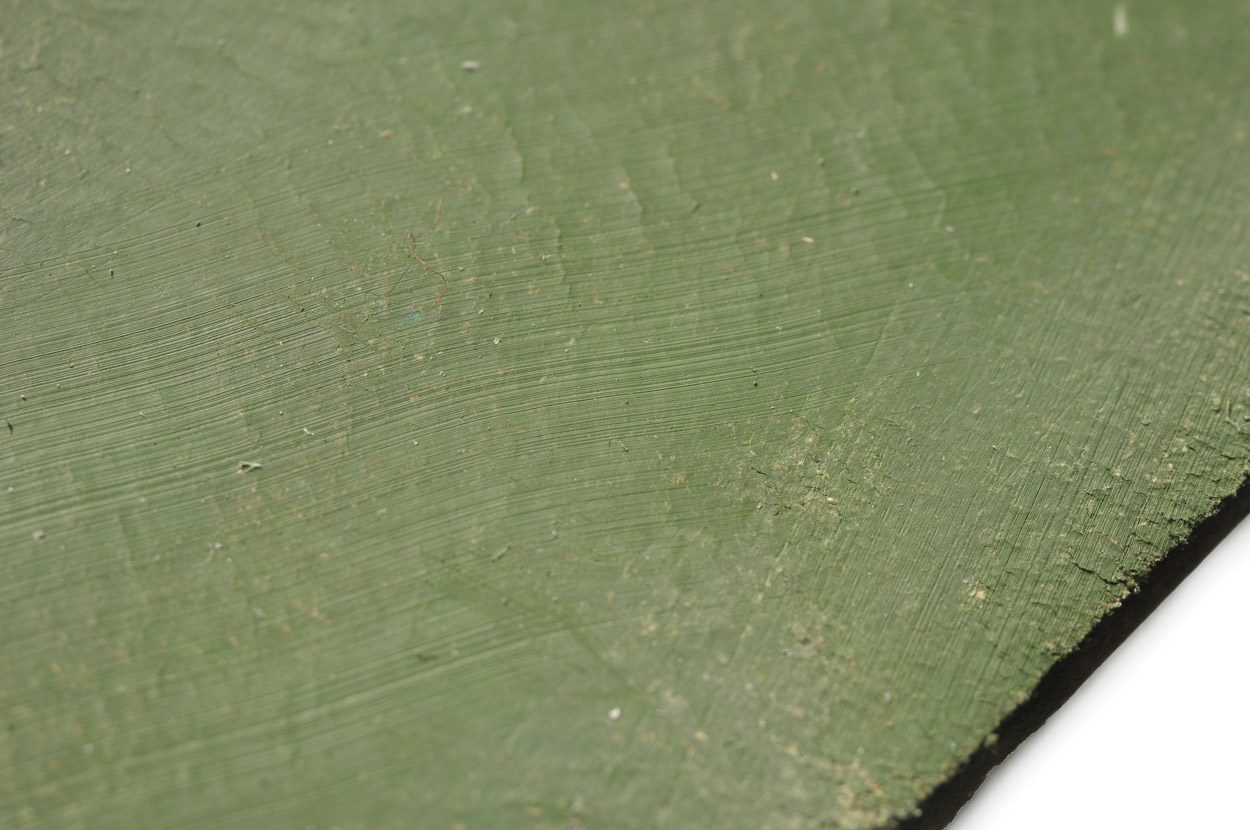
honing leather with fine paste (close-up)
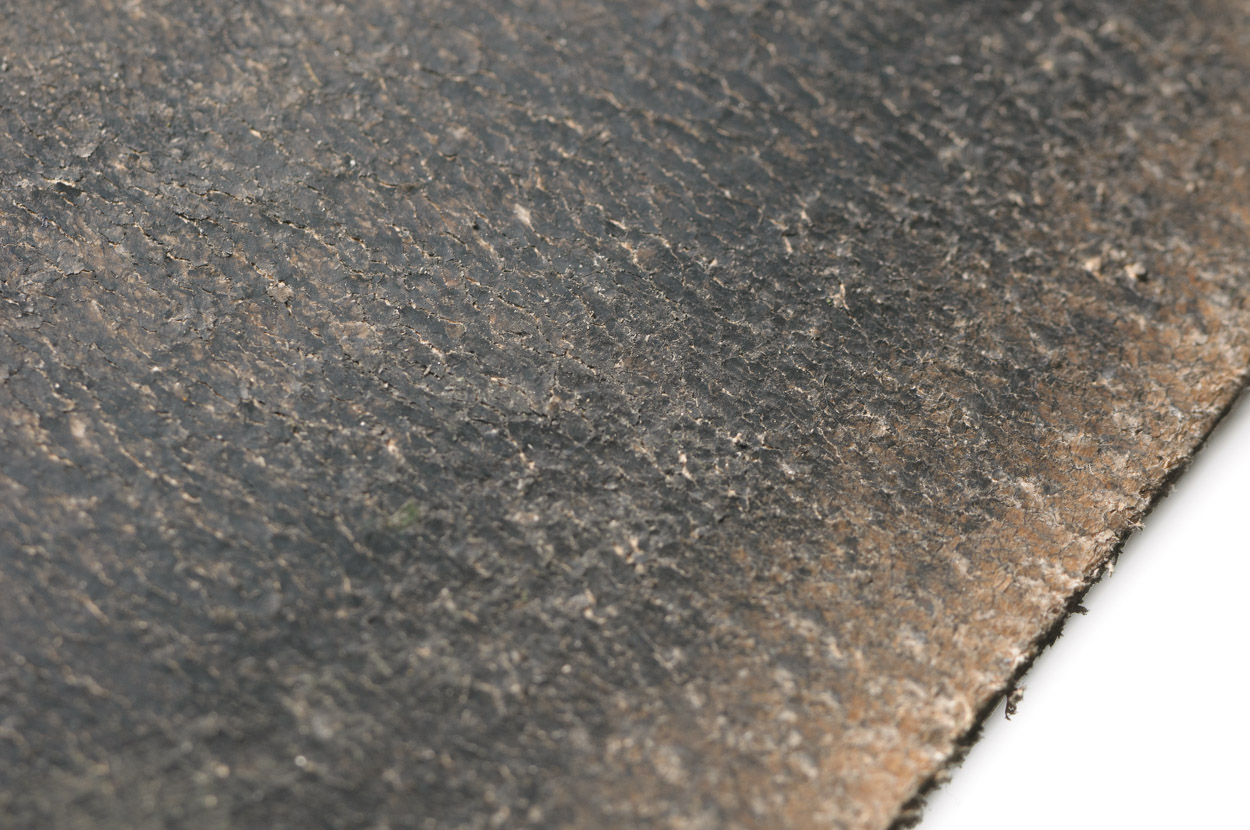
honing leather with very fine paste (close-up)
The best price/performance ratio is offered by leather impregnated with silichrome paste. From the very coarse (comparable to 400–600 grit sandpaper), through the most-used green (1500–2000 grit range), to the very fine white (around 6,000 grit). The green paste has an ideal ratio of removal speed to finish quality. On a Japanese carbon knife, at about 100 strokes, it can bring a dull knife back to high cutting performance — shaving and effortlessly cutting through newsprint.
The pictures above show the dressing leathers in use with individual pastes under scrutiny. The first is the thickest which has a very brisk removal but leaves the steel milky scratched. The green paste is the most versatile. The last, finest paste is white, but the black bristle is actually abraded steel material — it's more of a polishing paste, leaving a very high shine and perfectly smoothing even the finest burrs.
Jump to sharpening
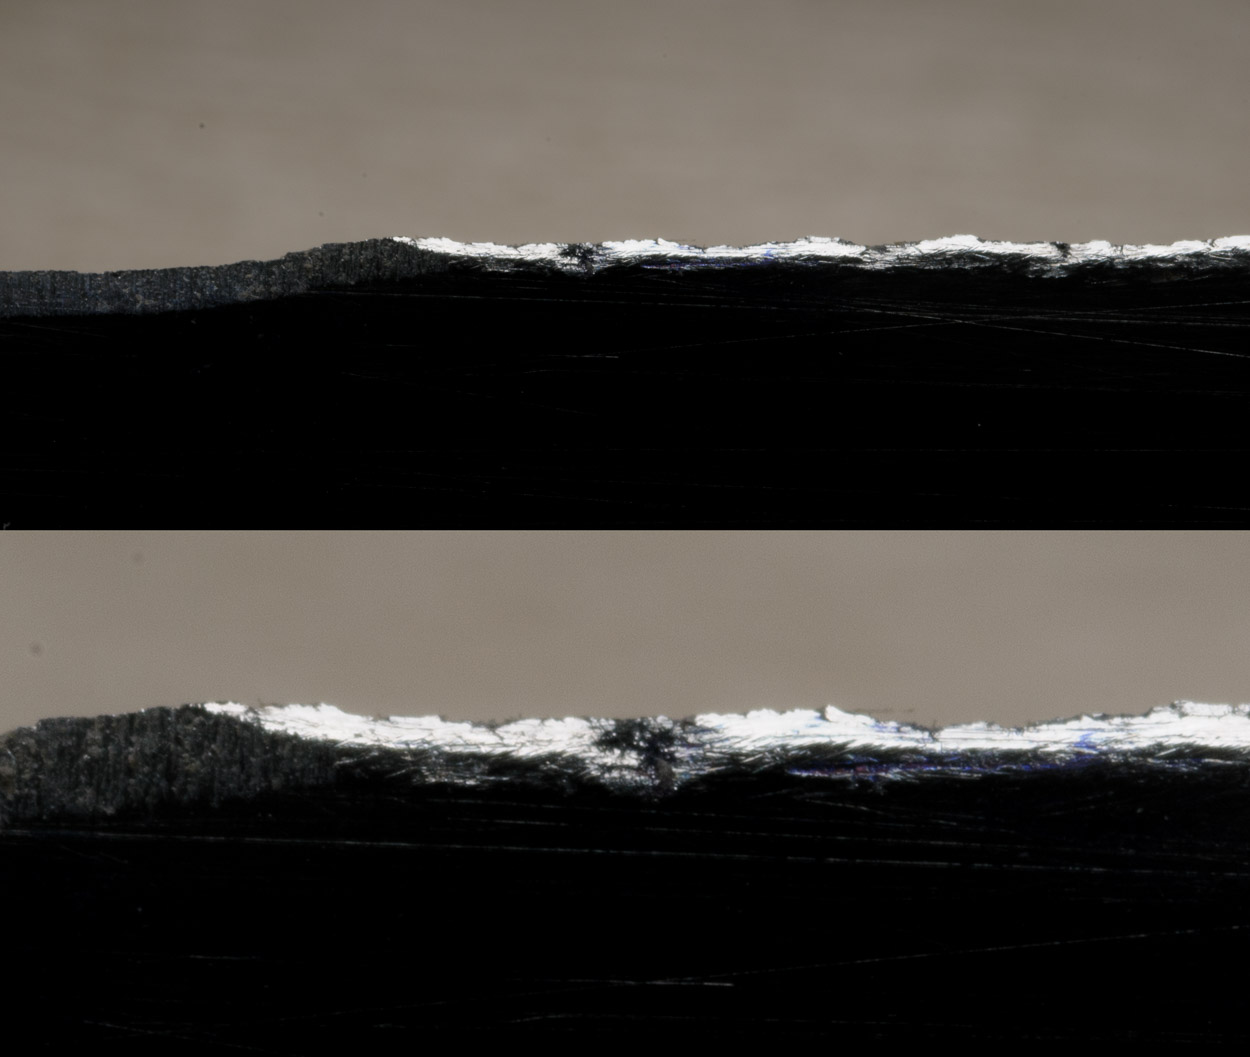
Damaged blade under the microscope
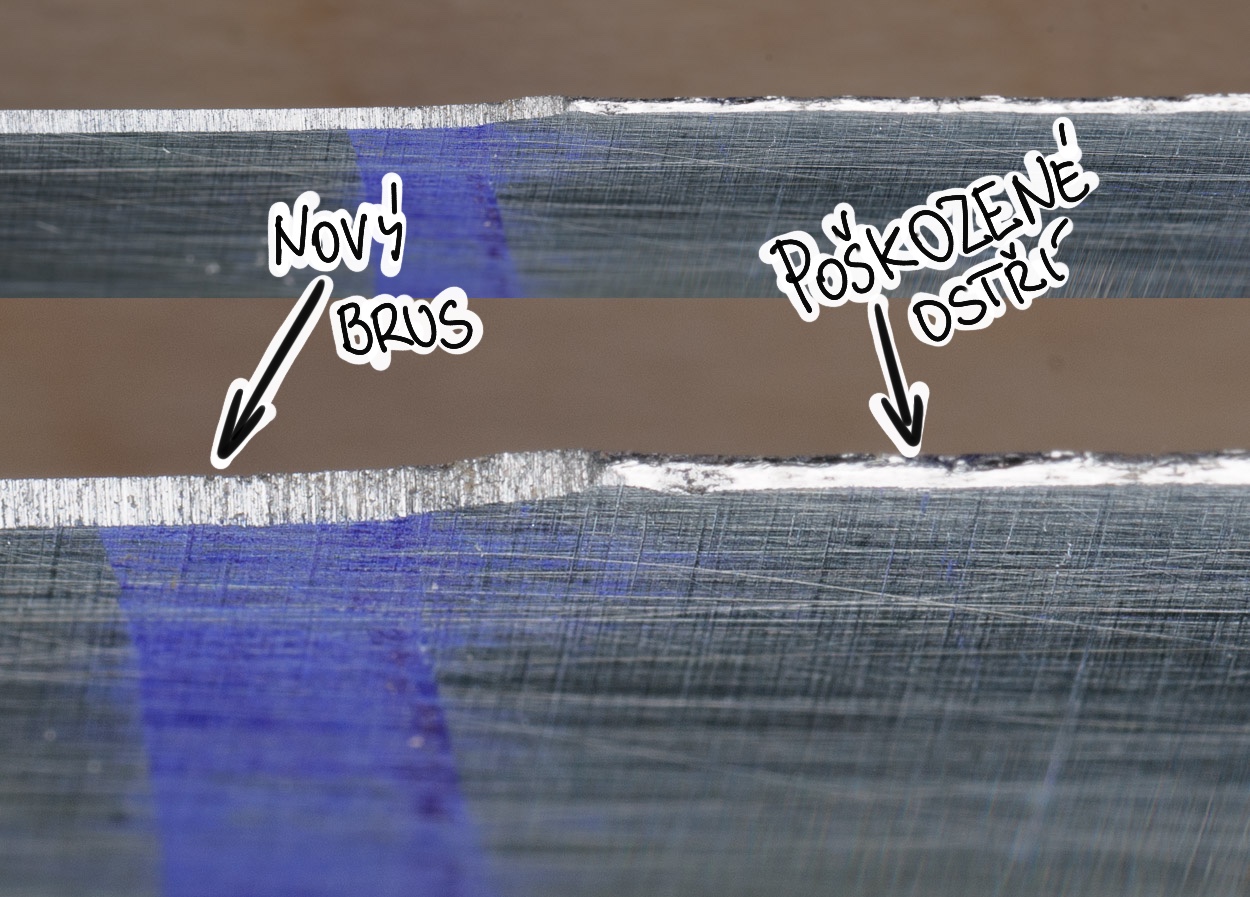
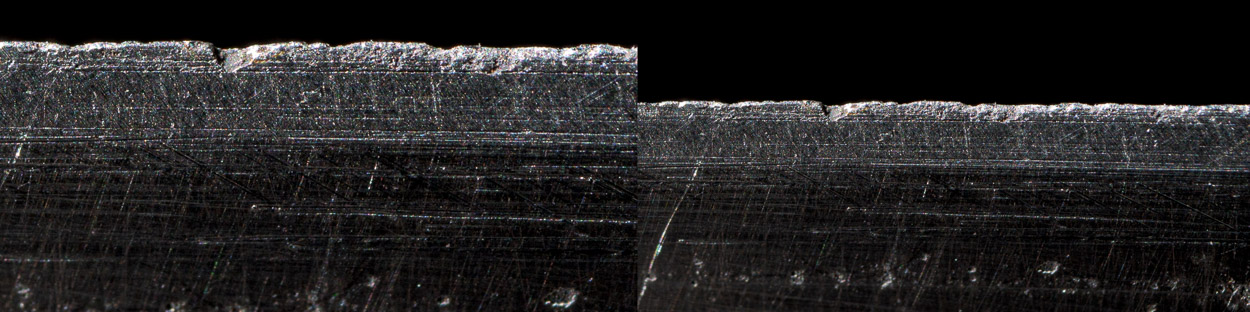
After sharpening — fresh cut on the left / damaged blade on the right
The damaged and broken blade of the knife, which was ground with a carbide broaching sharpener (under a microscope), can be seen how the blade is wavy. During the broaching the knife practically jumps slightly because the steel does not want to give, and cracks, breakage and noticeable damage to the blade occur.

broken and damaged blade
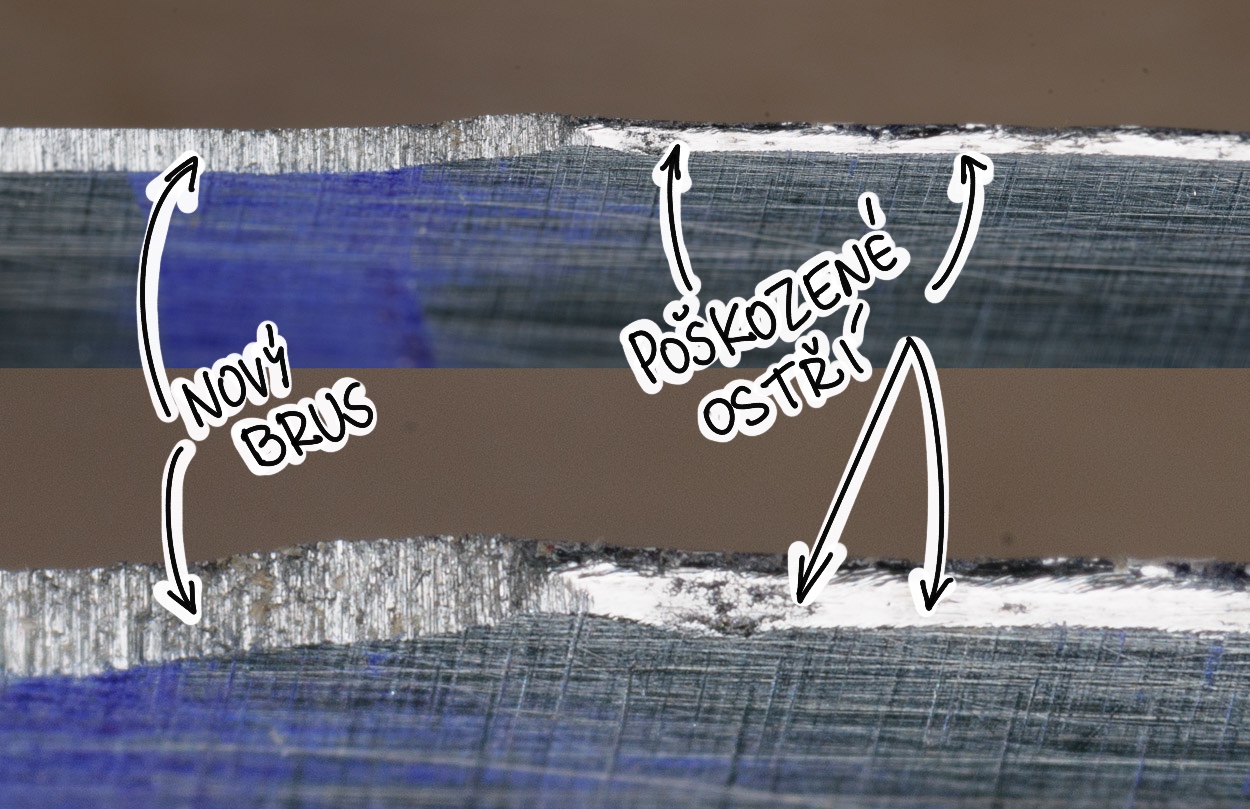
comparison of parts after the new grinding and before grinding the material
bent blade, broken and damaged blade
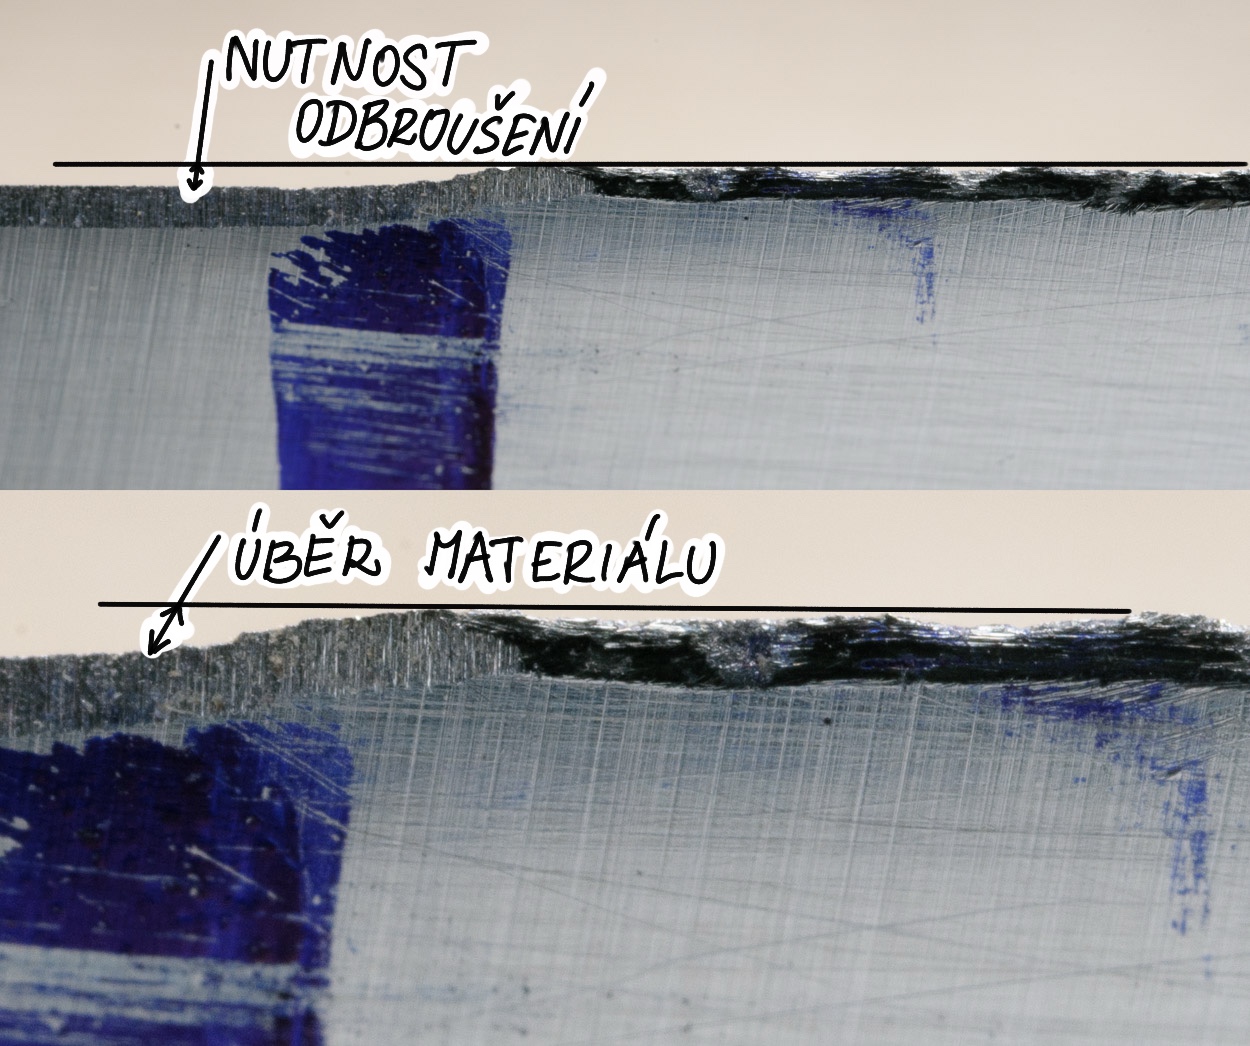
when grinding, it is necessary to grind away more material to get below the level of breakage
Blade after use with carbide pull-out sharpening
Example of a pull-out grinder with carbide edges to pull off the blade
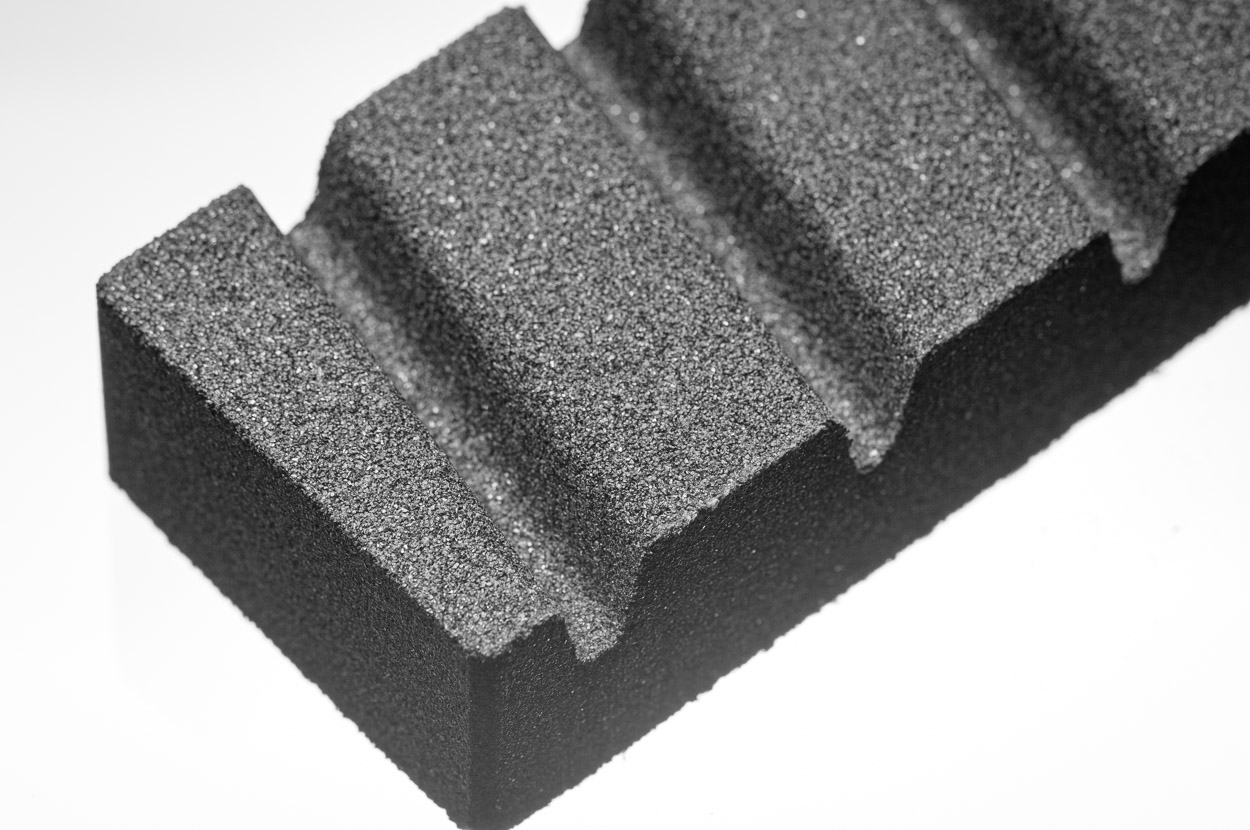
Comparison of sharpening a kitchen knife in an inappropriate but functional way — sharpening (knife regularly maintained on a broaching grinder with a carbide knife).
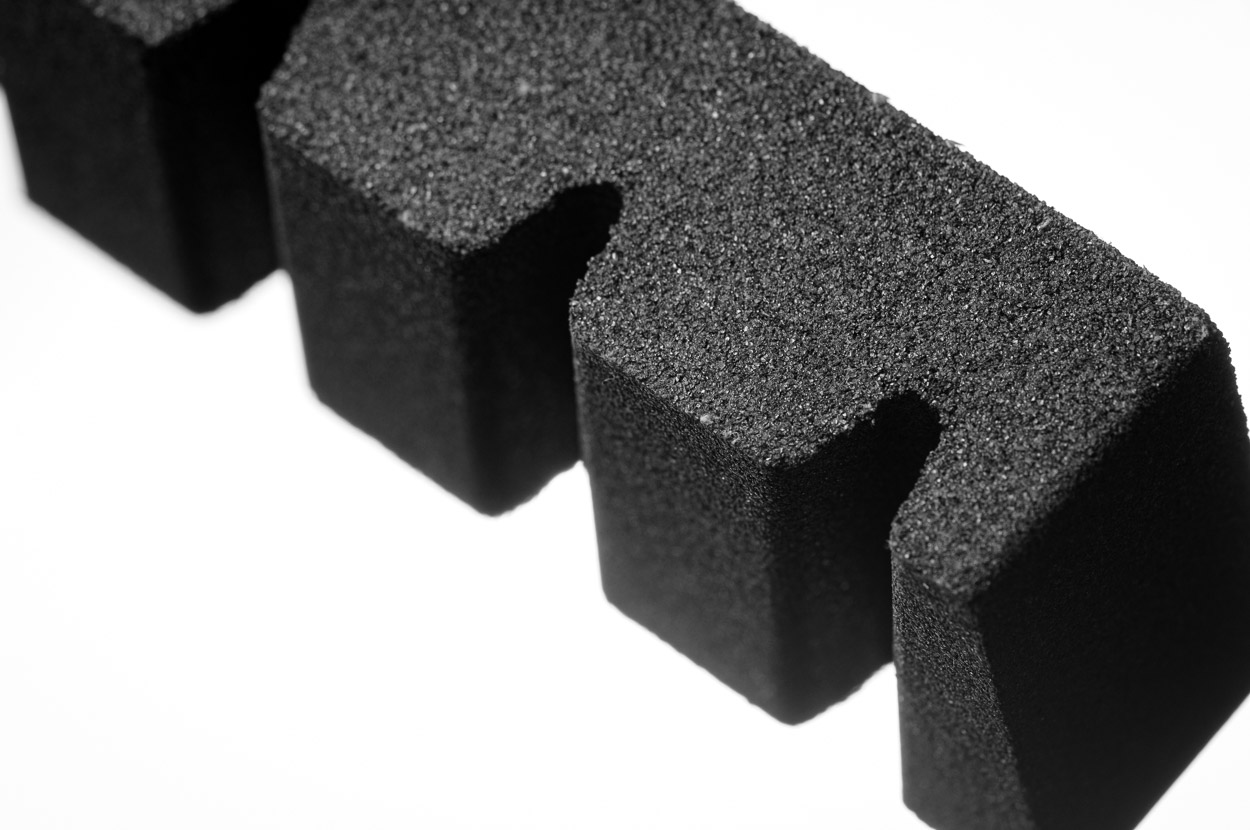
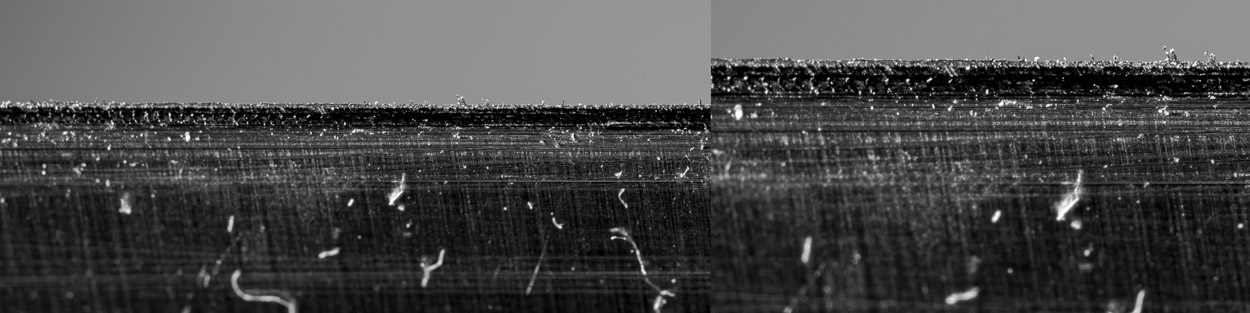
Grinding on a classic pull-out grinder with carbide knives — a rail has formed. The top of the blade is degraded in the same way along its entire length — high burr, rather like a saw, which holds quite firmly.
Continued — gradually pulled 5 more times. A smaller saw is visible above the rail, but still noticeable along its length.
A few rubs on the honing leather with abrasive paste, which grinds the resulting rail. The strong burr after about 20 rubs still holds, but is much less noticeable. Another 20 or so strokes on both sides removes the burr and the knife is sharpened. Without maintenance, sharpening on this type of sharpener is unsuitable, as the resulting thick burr remains quite firmly attached to the knife, and the resulting rail weakens the blade just below the tip. The blade then grinds and, more importantly, breaks loose quite briskly — similar to the previous pictures of the damaged blade before diamond grinding was applied.
Angle guides
The guides help to hold the sharpened knife at the correct angle to the grinding stone. For finishing — stropping on leather for maintaining a relatively sharp knife — a precise angle is not required.

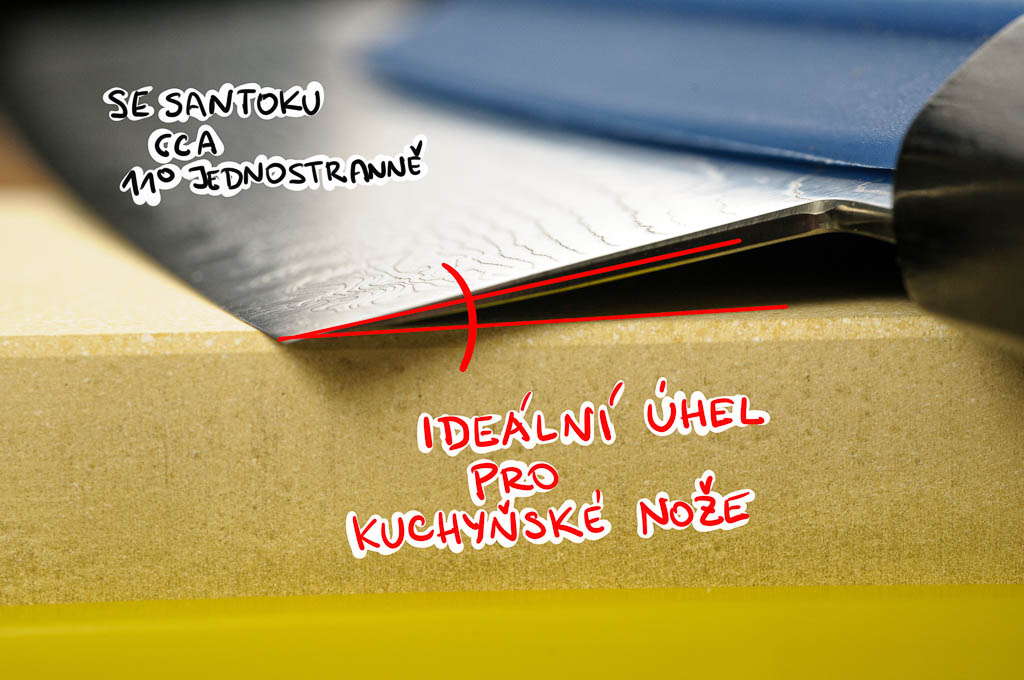
Sharpening guide for Santoku knives with a final angle of 22°
This results in approximately 11° per side. The Santoku is specific in its blade height — once attached to the spine, the guide provides the desired angle for this knife. If the blade height is lower, the resulting angle will be more obtuse when using this guide.
Sharpening guide providing approximately 11° per side
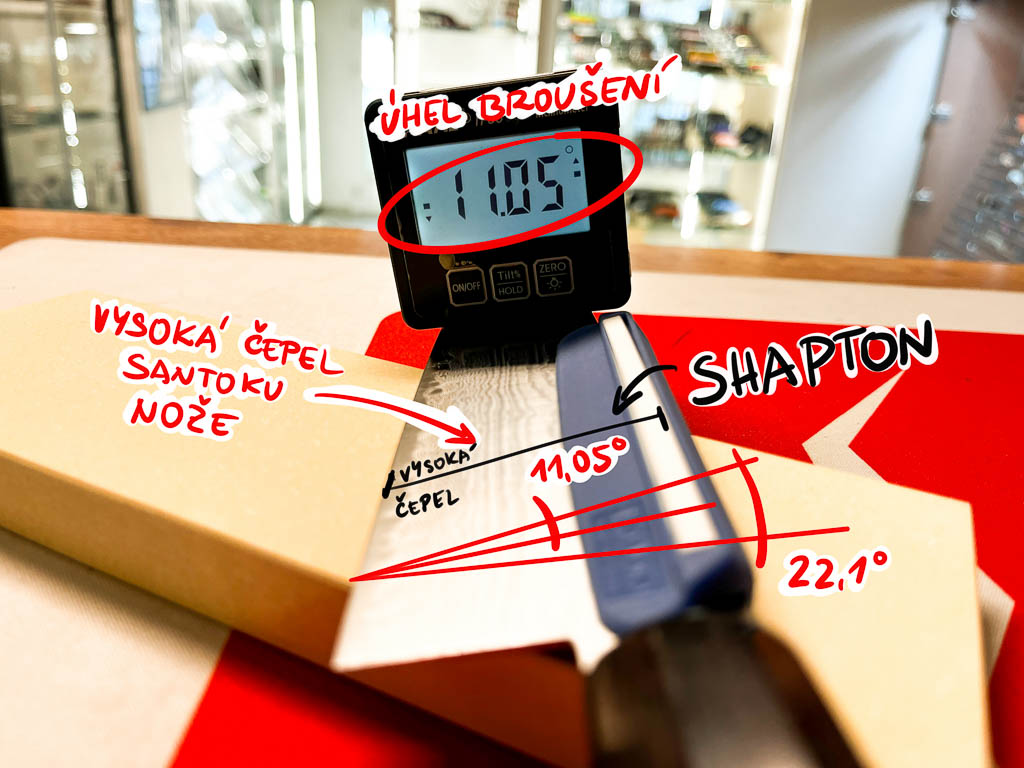
shown in use with a Santoku knife
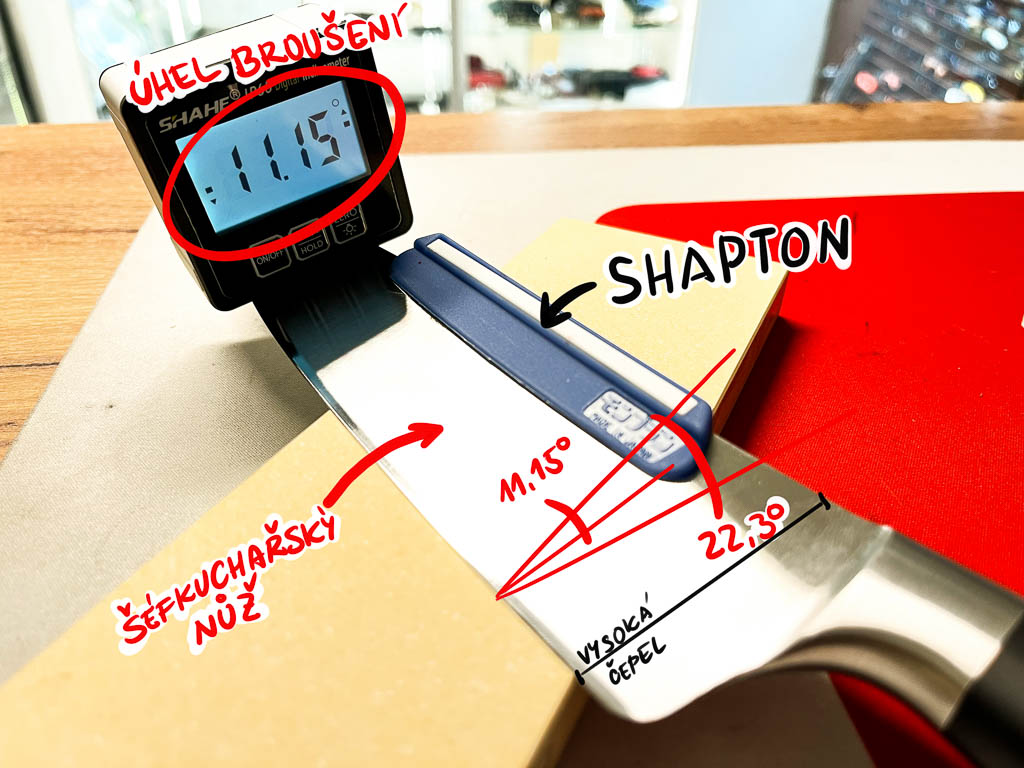
shown in use with a chef's knife
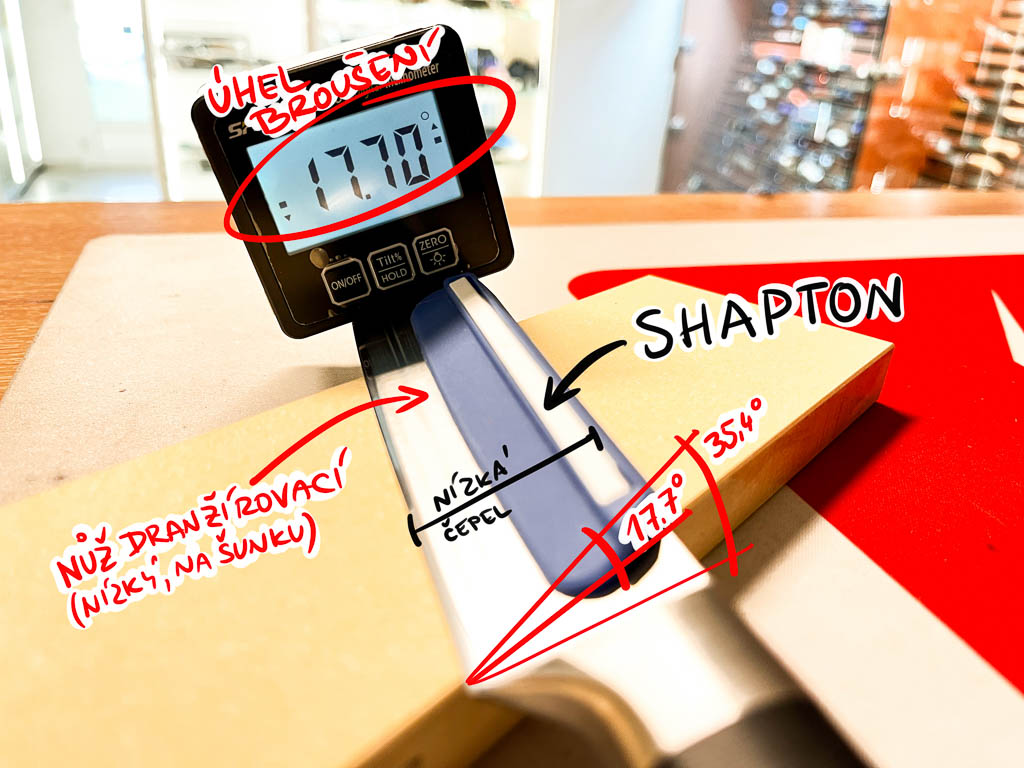
shown in use with a low-profile slicing knife
This tool for maintaining the optimal sharpening angle for Japanese knives is designed as a practical assistant ensuring a constant sharpening angle of 11° — a 22° inclusive angle for a taller Santoku knife. The ceramic strips, carefully placed within the tool, are intentionally chosen for their high durability and ability to slide easily across the whetstone surface. This assistant is specifically designed for Japanese knives with a blade height of about 50 mm.
Buy Shapton sharpening guideSharpening guide for Santoku knives with a final angle of 26°
This results in approximately 13° per side. The Santoku is specific in its height — once attached to the spine, the guide provides the desired angle for this knife. If the blade height is lower, the resulting angle will be more obtuse with this guide.
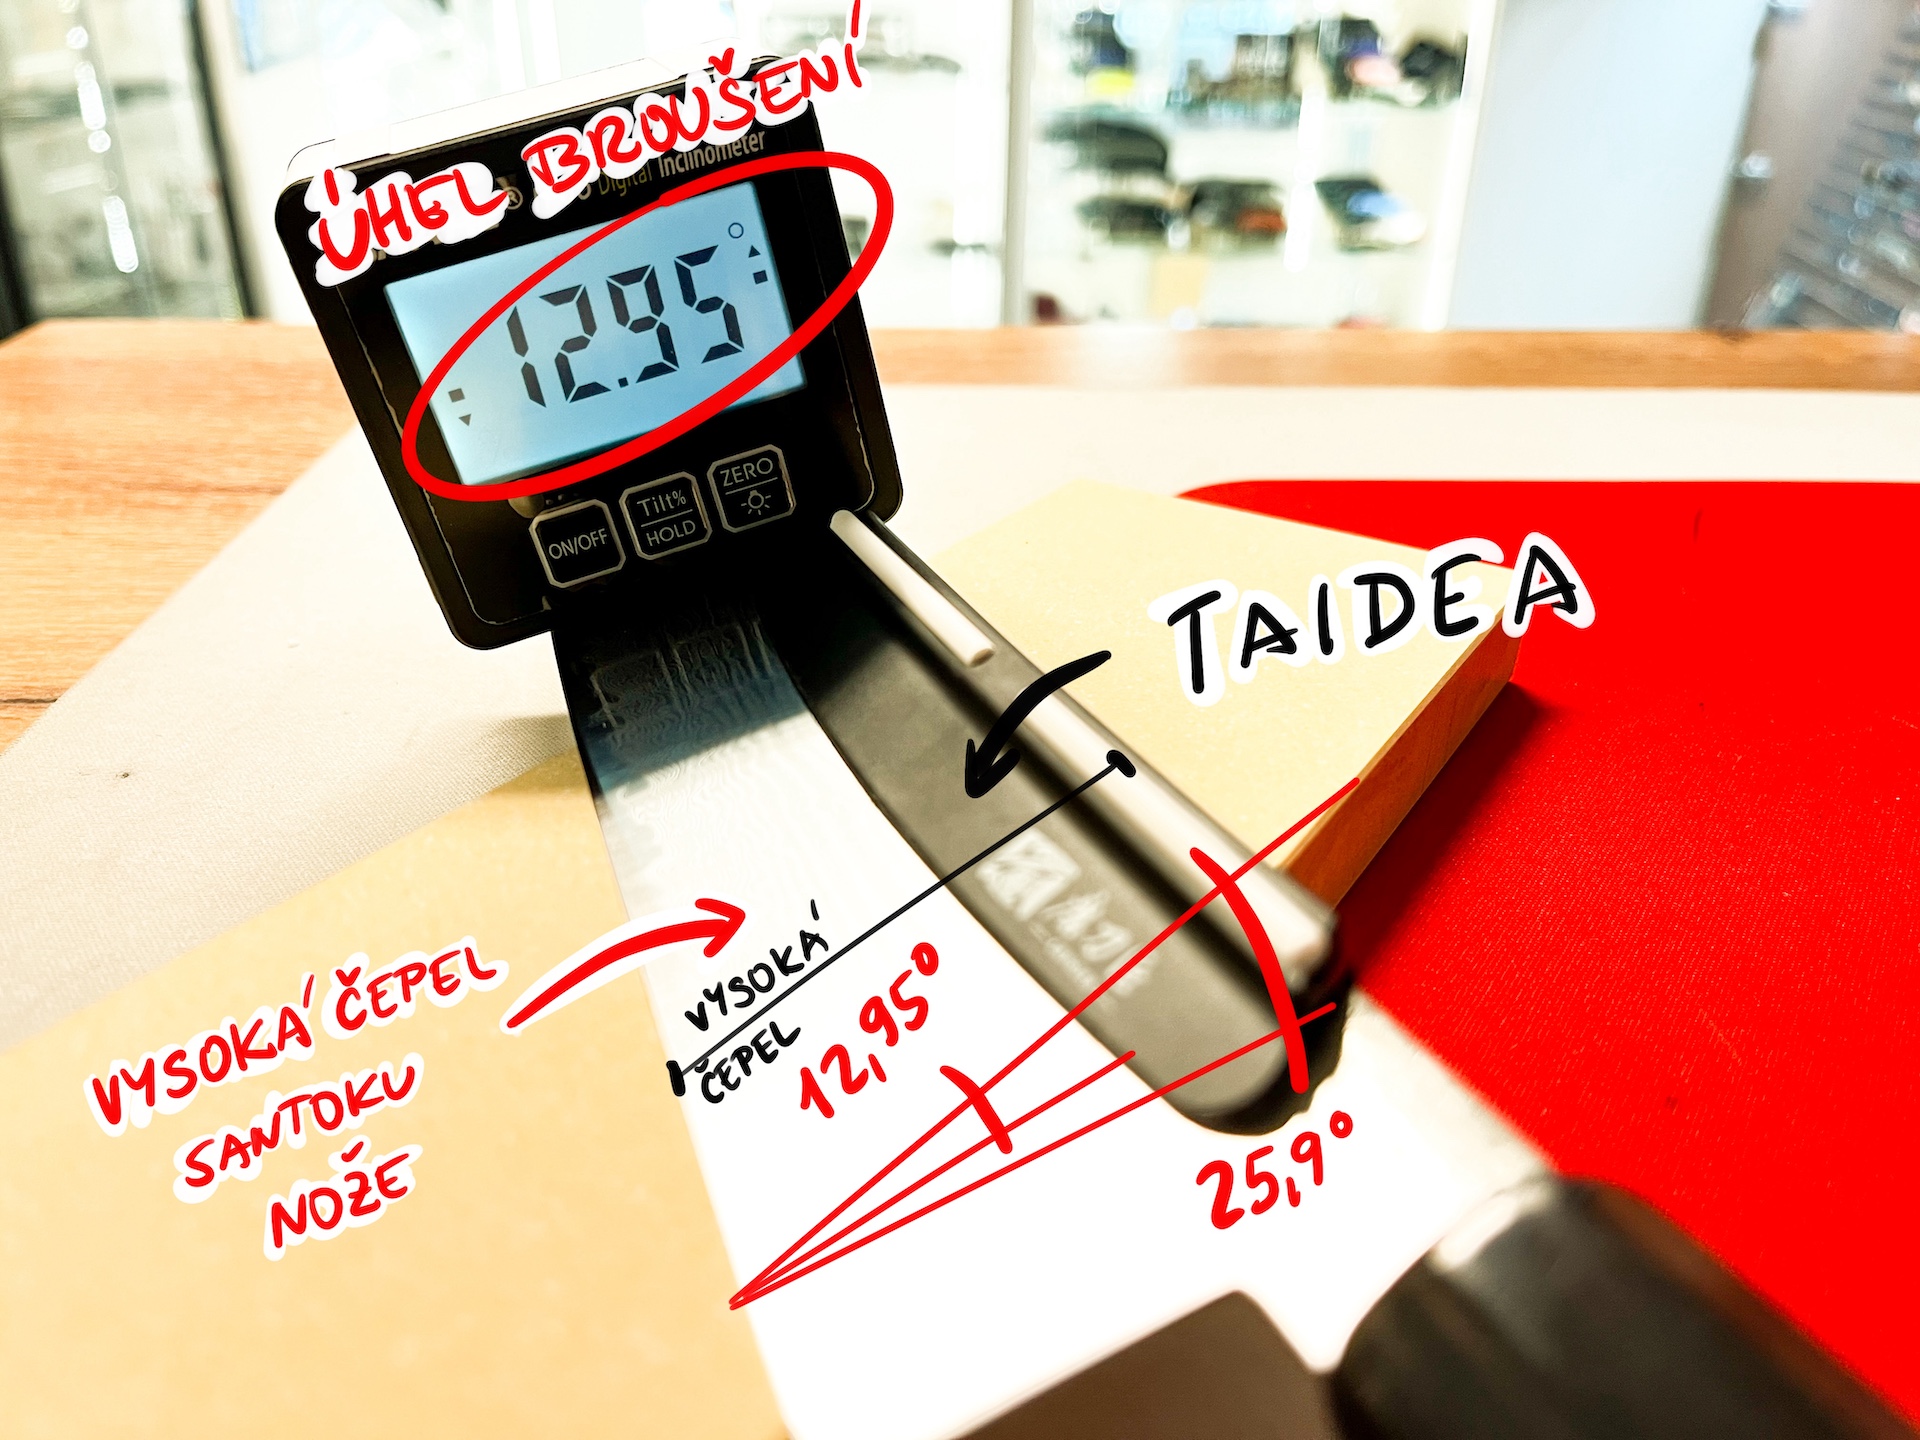
Sharpening assistant by Taidea
This tool for maintaining the optimal sharpening angle of Japanese knives ensures a constant sharpening angle of approximately 13°, resulting in a 26° inclusive angle for a taller Santoku knife. The ceramic strips are intentionally selected for their high durability and ability to slide smoothly across the whetstone surface. This assistant is specifically designed for Japanese knives with a blade height of approximately 50 mm.
Buy Taidea guideComparison between sharpening assistants and resulting angles
* measured at the edge of a blade with a height of approx. 50 mm
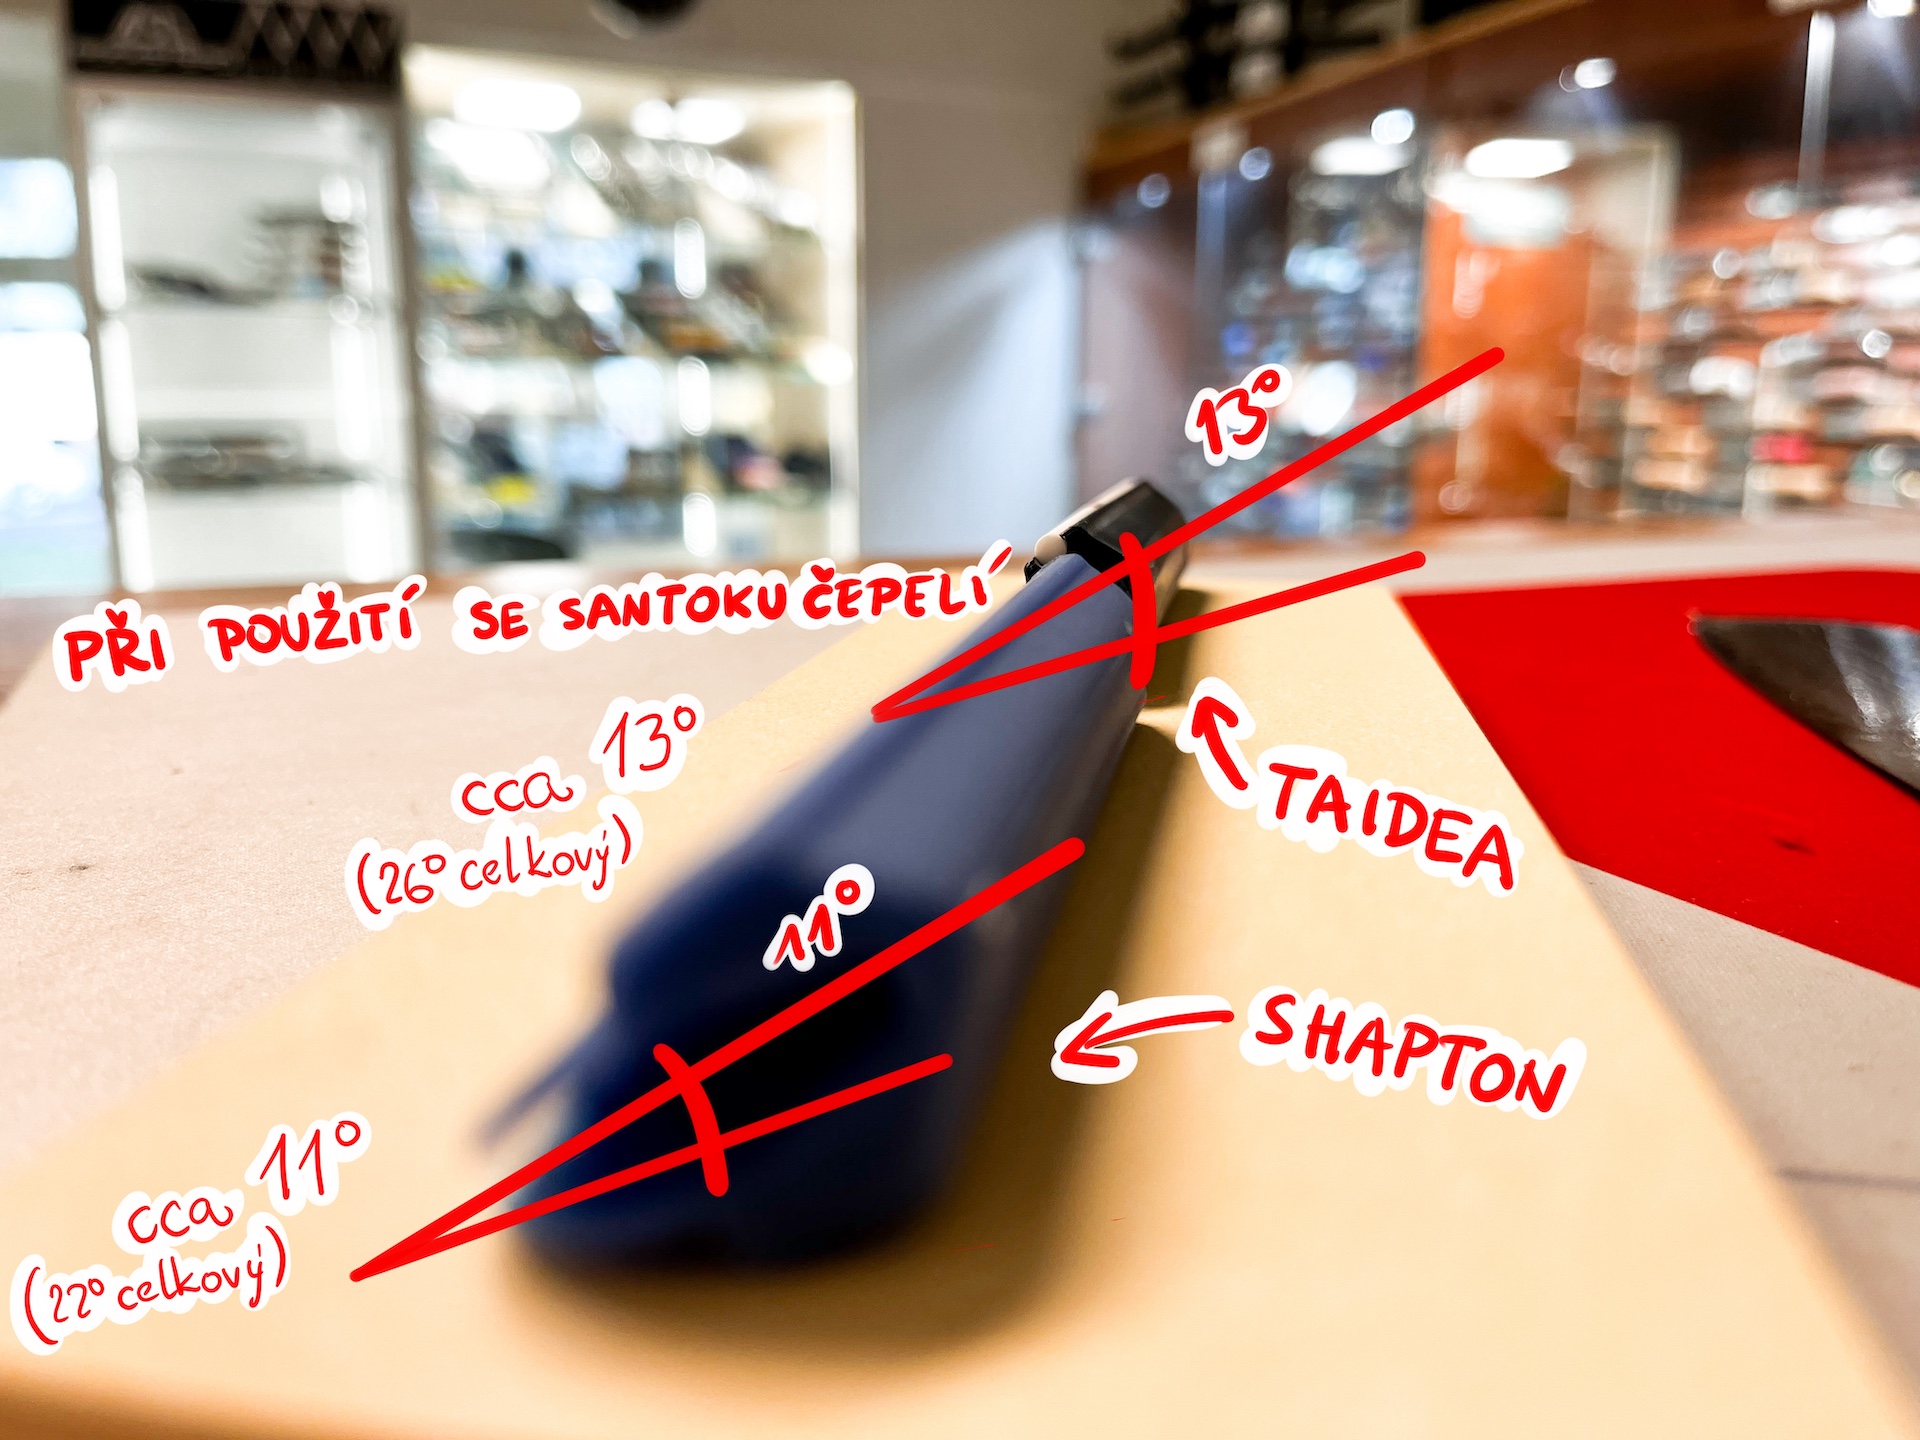
When attached to the spine, the resulting angles differ
Systems helping to maintain the desired angle when sharpening knives
Sharpening systems ensure precise and repeatable maintenance of the chosen sharpening angle. They suit both beginners and experienced users who want consistent results without relying on angle estimation.
Single-sided sharpening systems
Sharpening knives with single-sided sharpening sets
Simple assembly, easy to use, true travel packaging — but varied results.
Lansky Systems

One of the first angle-holding systems where the knife is clamped and the clamp is L-shaped on both sides, featuring four slots providing contact surfaces to hold the hone at a specific angle. While a bit clunky, it works. Available in many variants, differing mainly in the stones used (synthetic vs. diamond).

KMFS VantaEdge Integral Recommended
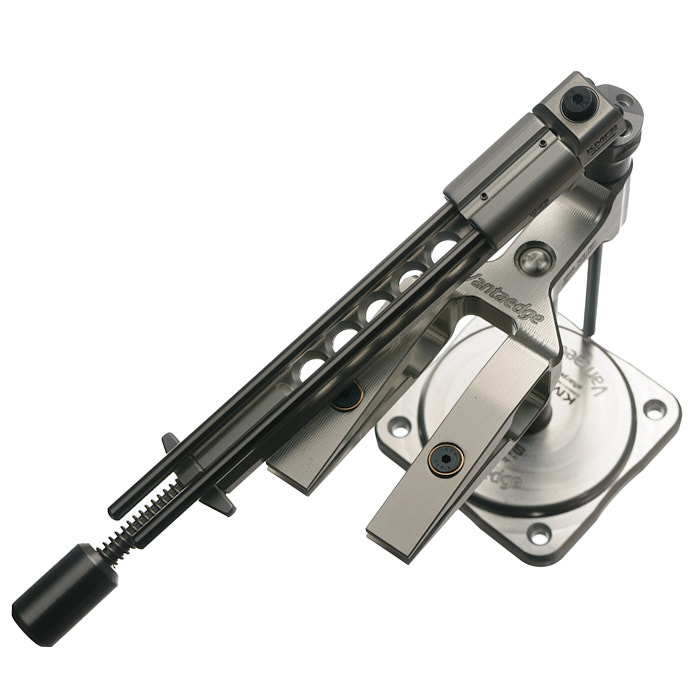
The best single-sided sharpening system. It maintains a precisely set angle regardless of how you clamp the knife or if the tip curves upward. Patented reverse kinematics ensure a very precisely set angle from start to finish, repeatedly, without needing identical clamping. A top-tier machine. Absolute precision guaranteed.
KMFS VantaEdge review
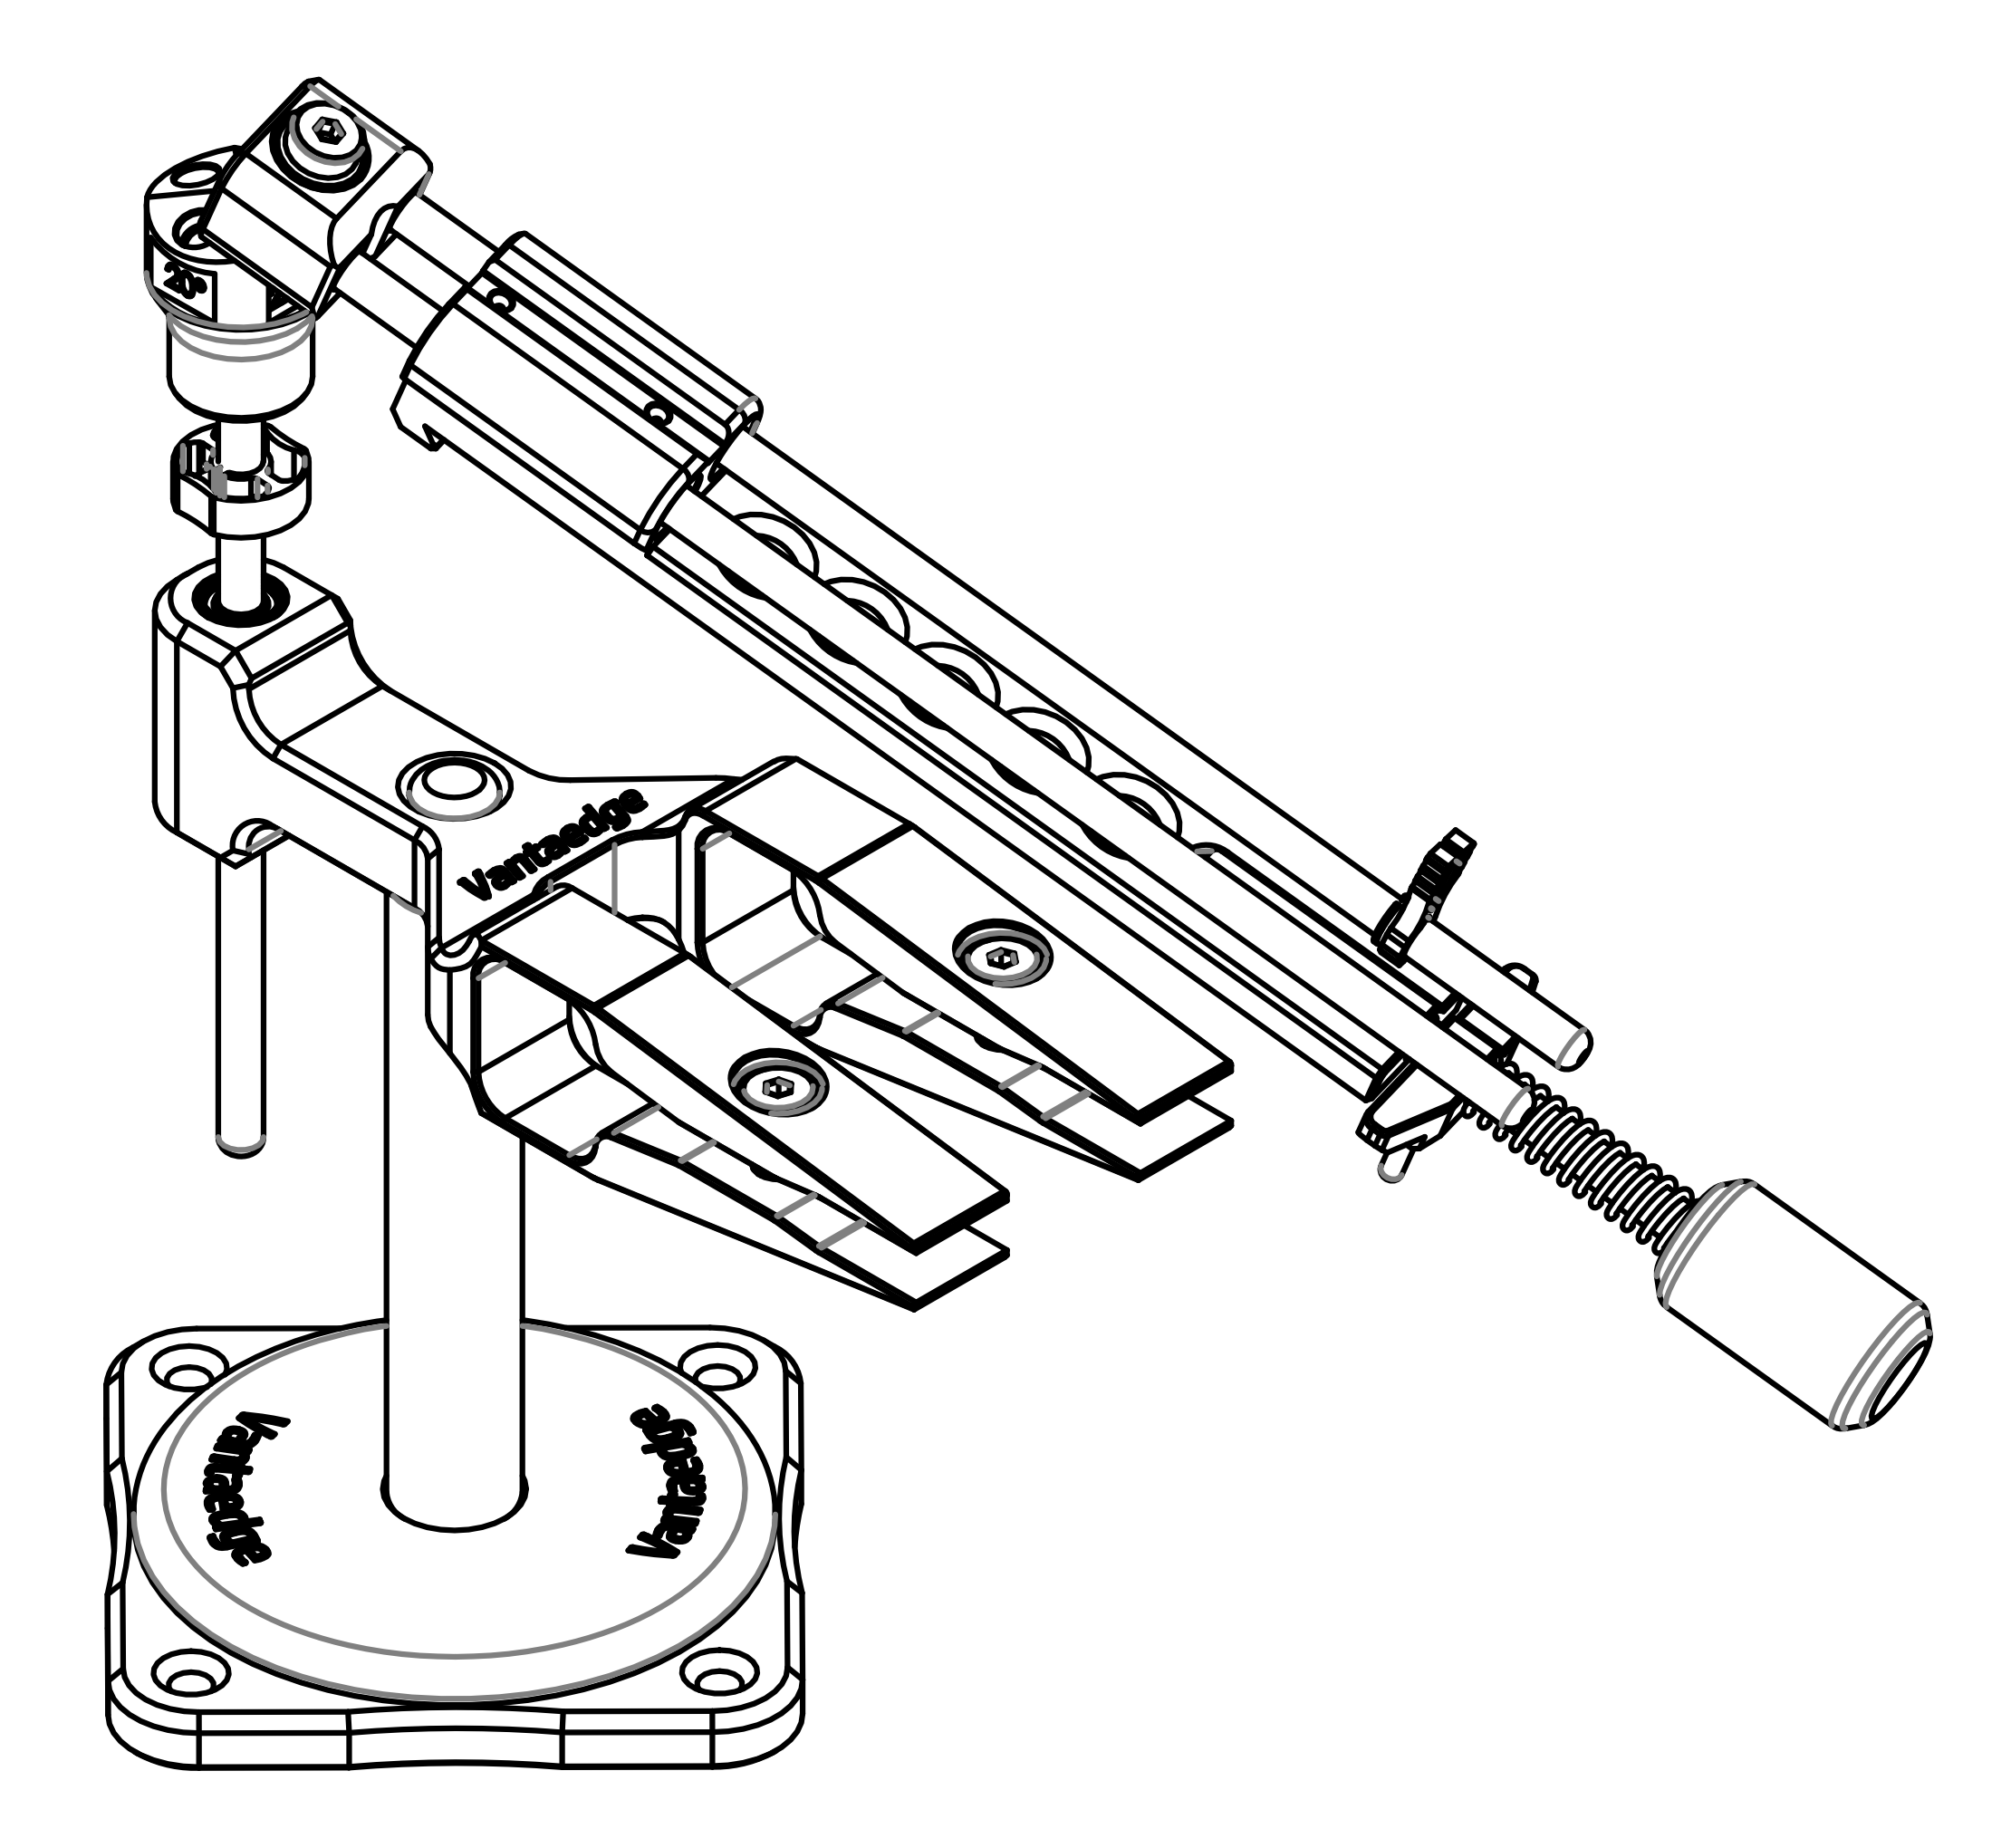 KMFS Vantaedge Precise system
KMFS VantaEdge Integral — instruction manual
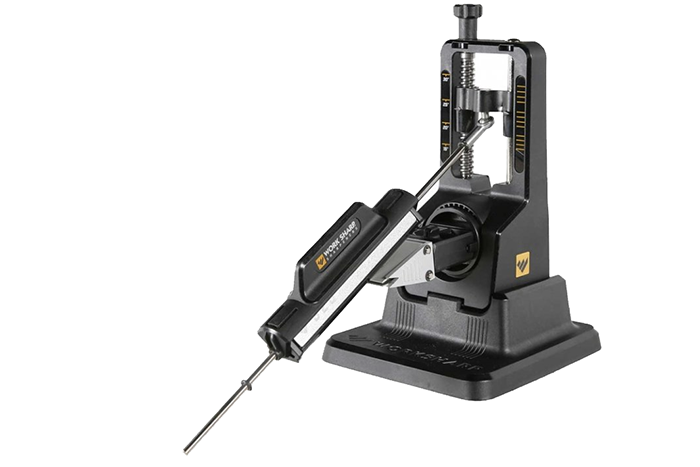
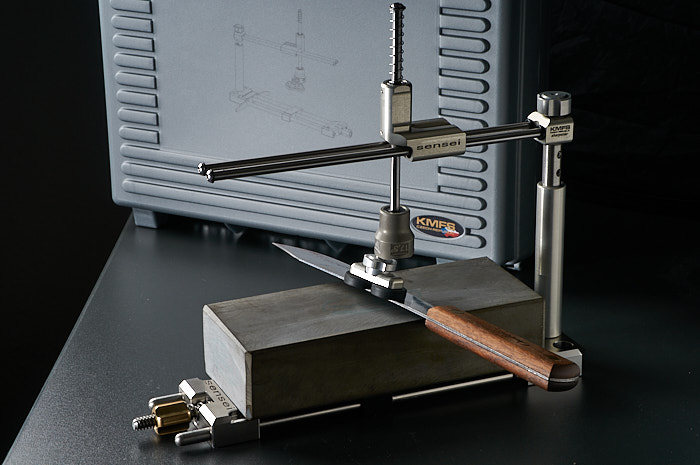
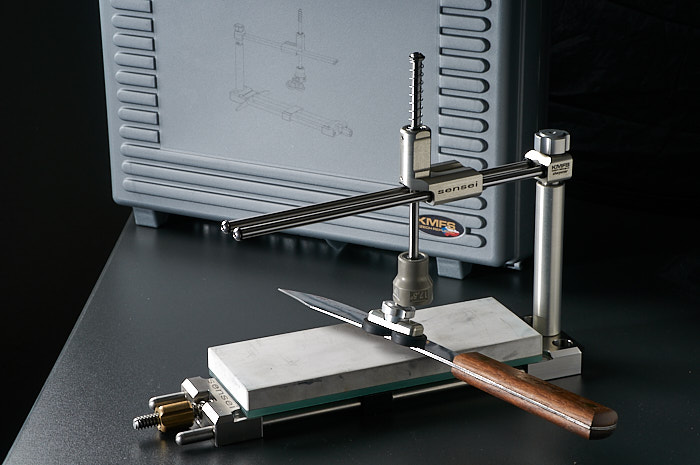
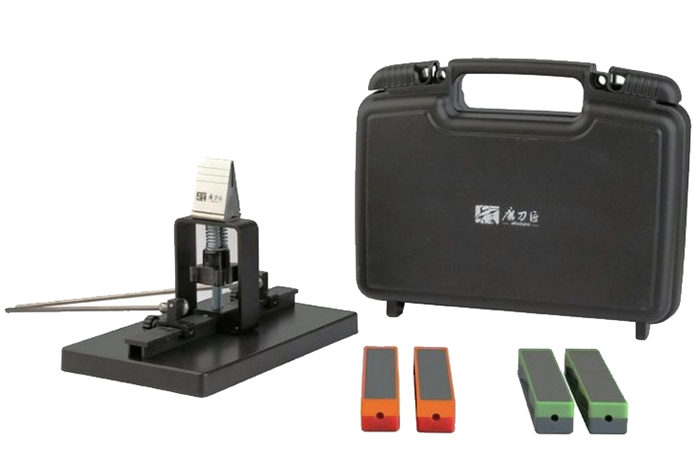
KMFS Sensei

A precision system for maintaining angles on your sharpening stones. KMFS Sensei is a guide for holding the angle while sharpening a knife. The basic set includes a mechanism into which you place your own sharpening stone and sharpen at preset angles. A multi-angle head can be purchased separately.
A revolutionary sharpening system from Czech manufacturer KMFS (Krinner Multi Fix) that changes the rules of edge maintenance. Forget about guessing angles. Sensei combines the freedom of manual sharpening on classic stones with uncompromising engineering precision. Thanks to patented reverse kinematics, the system maintains an absolutely constant angle along the entire length of the blade, even on curved edges. Compatible with any stones (water, diamond, or oil) up to 225 mm in length.
Key features: Precision CNC machined from duralumin alloy ENAW 7075 T651. Preset angles of 15°, 17.5°, 20°, and 22.5°. Dual magnetic clamping with rubber-coated magnets. Guide rods of hardened stainless steel X90CrMoV18. Ideal for kitchen, outdoor and bushcraft knives.
KMFS Sensei review
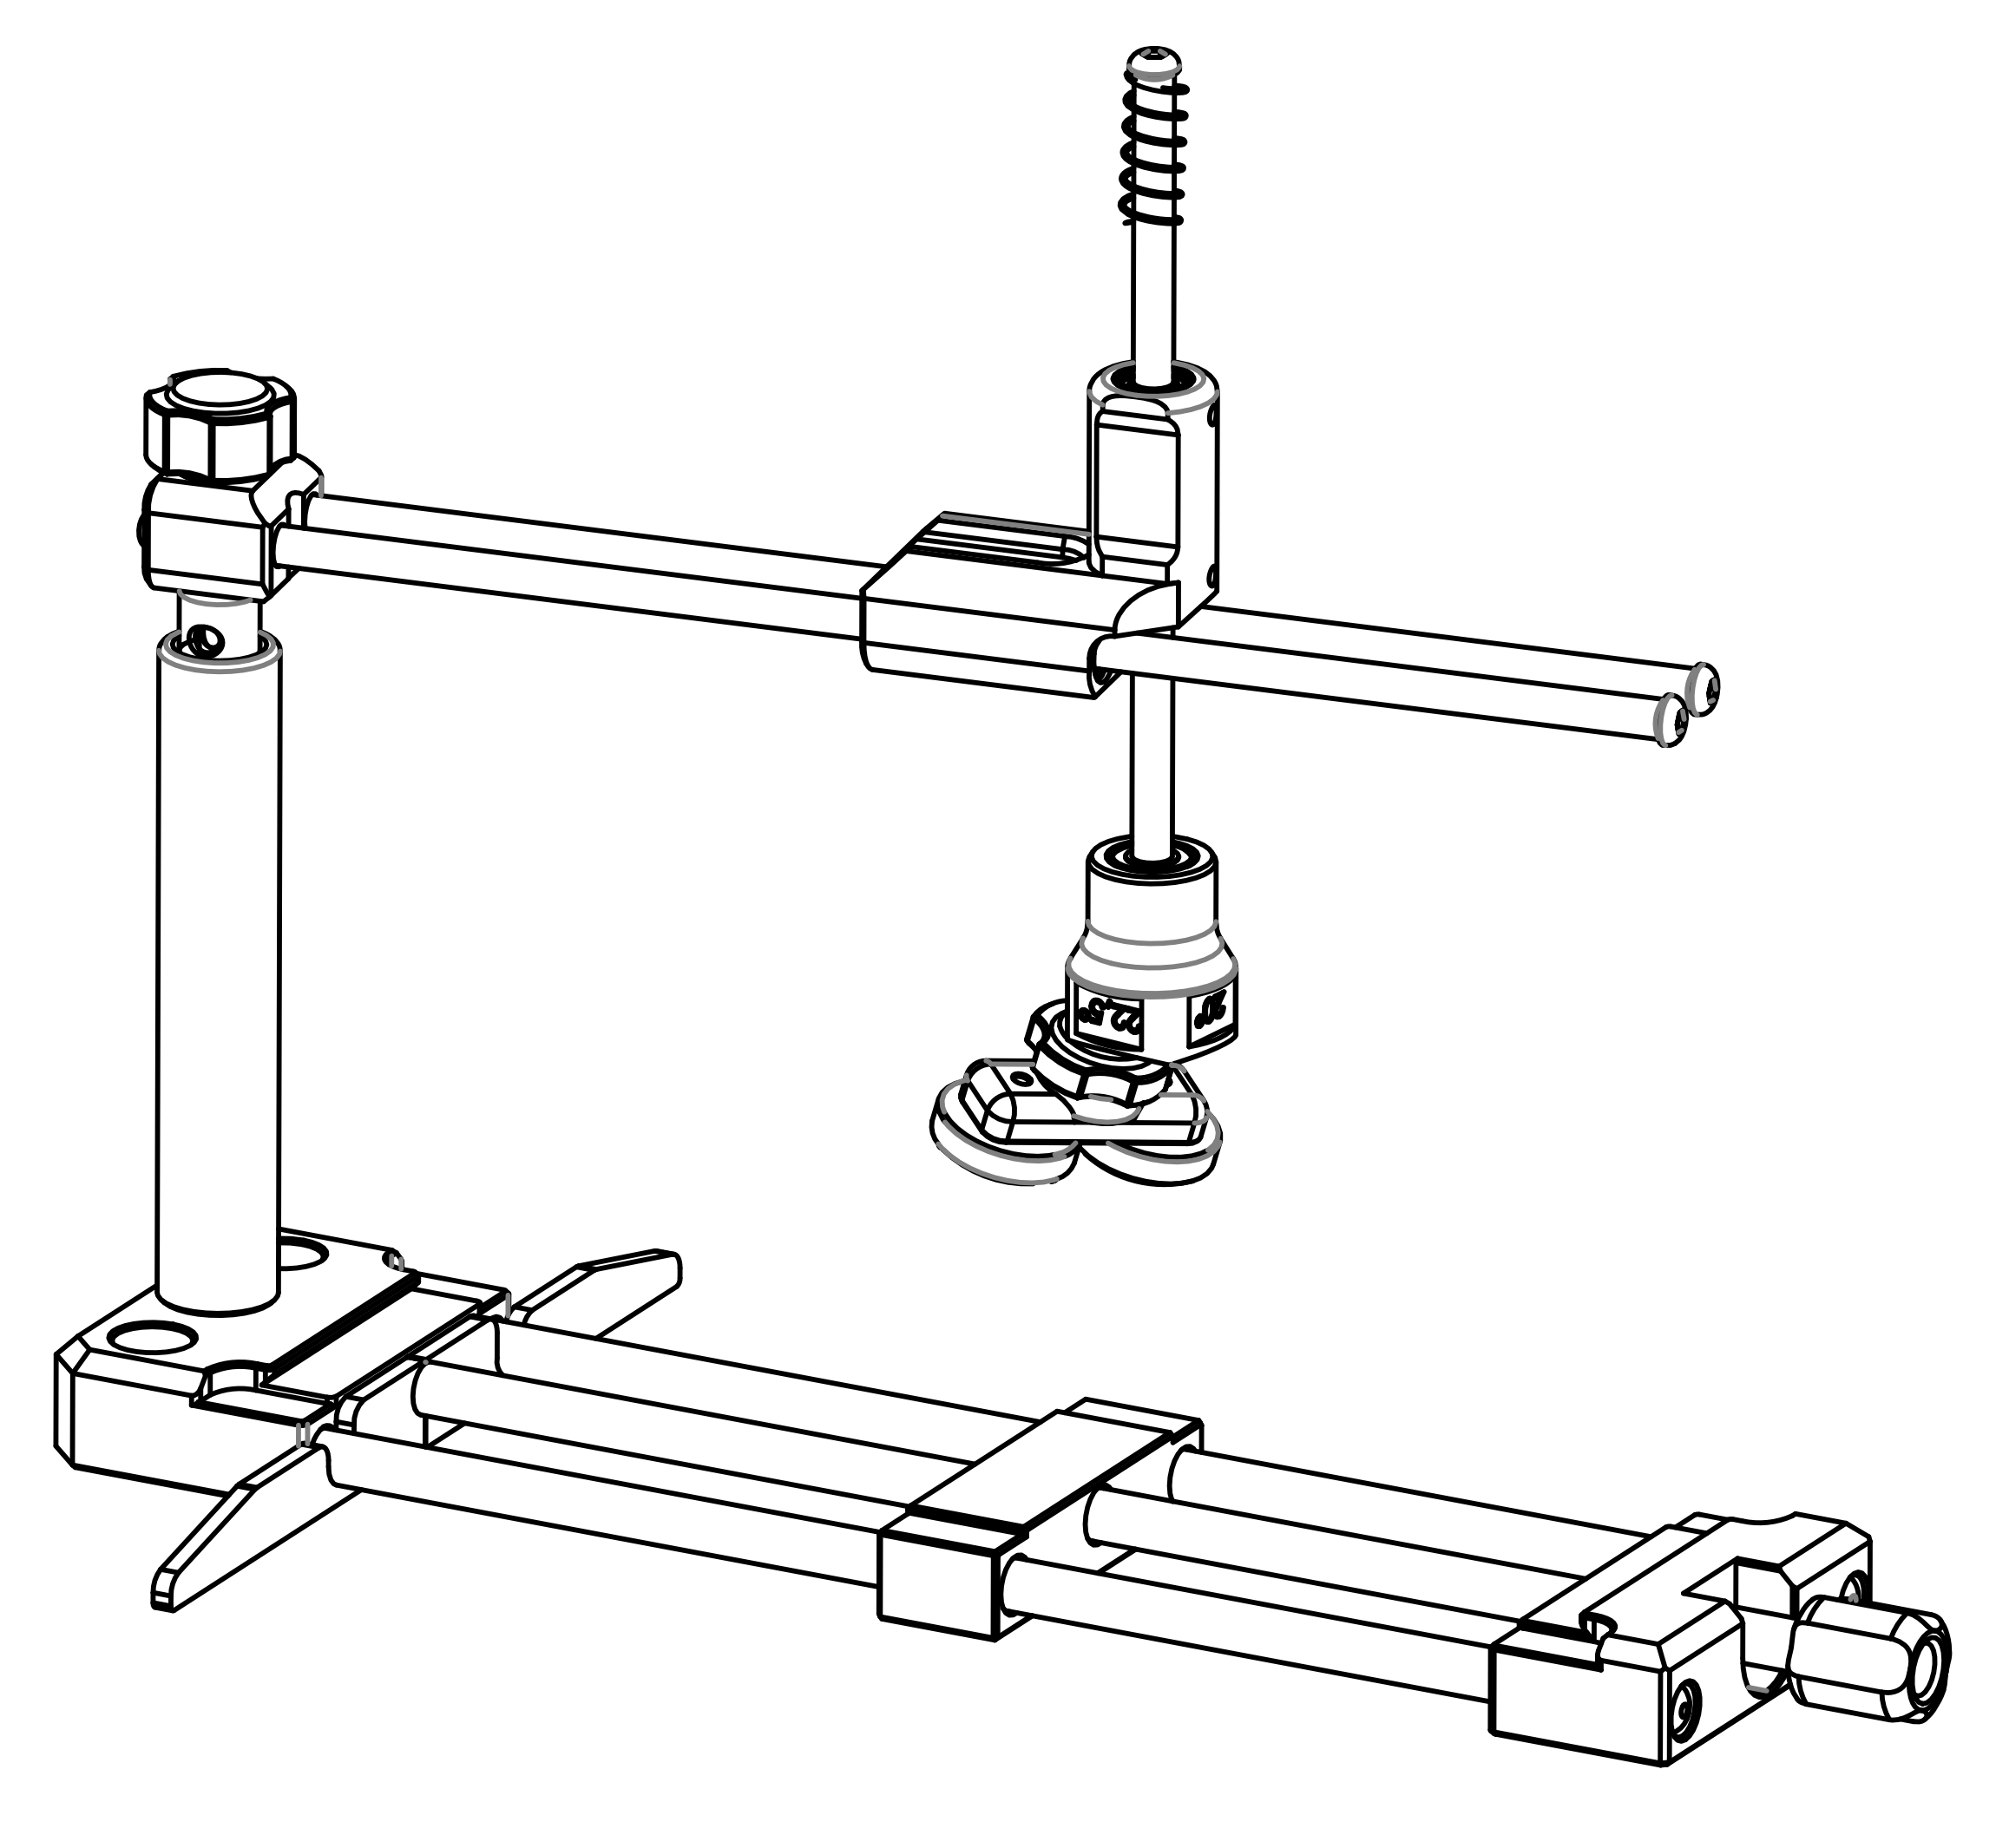 KMFS Sensei holding angle precise patented system
KMFS Sensei – A Revolution in Precision Knife Sharpening | Czech Patent in Action 🇨🇿
Sets for symmetrical sharpening
Systems allowing alternating sharpening of both sides of the bevel
Symmetrical sets are much faster — you don't have to flip the knife; simply sharpen both sides of the bevel with alternating motions.
Taidea system
A smaller double-sided system primarily suitable for pocket knives due to the small clamp holding the knife. The system can be adjusted so both arms are at the same angle to the knife and sharpening is quick as you follow the original bevel angle — less material removal. In its travel packaging, it's ideal for effortless field sharpening of pocket knives thanks to the diamond surfaces.
Taidea — Travel diamond symmetrical sharpener
KMFS Rival Diamond Recommended
One of the best solutions I know and use myself — precision results, perfect finish, and no fear of damaging the knife. This is the Czech KMFS RIVAL system. While the initial investment is higher, the results are immediate. In the package you get three grits of diamonds — twice. The results are excellent even for an amateur. It's truly the first and last investment you'll make in sharpening. It just works.
KMFS Rival in detail
 KMFS Rival Diamant Stealth
Video tutorials for KMFS Rival
KMFS Rival Diamant Stealth
Video tutorials for KMFS Rival
KMFS Rival Diamond Stealth — instruction manual
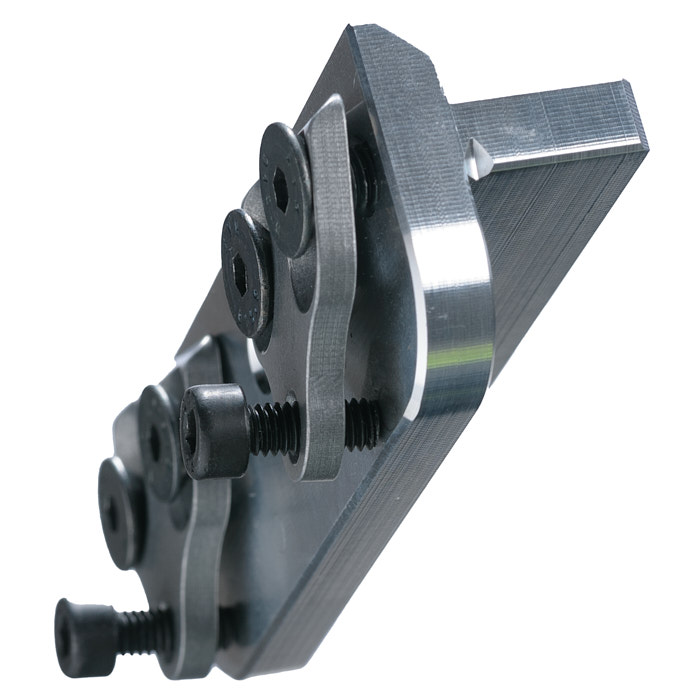
KMFS Accessory: Auxiliary Clamp
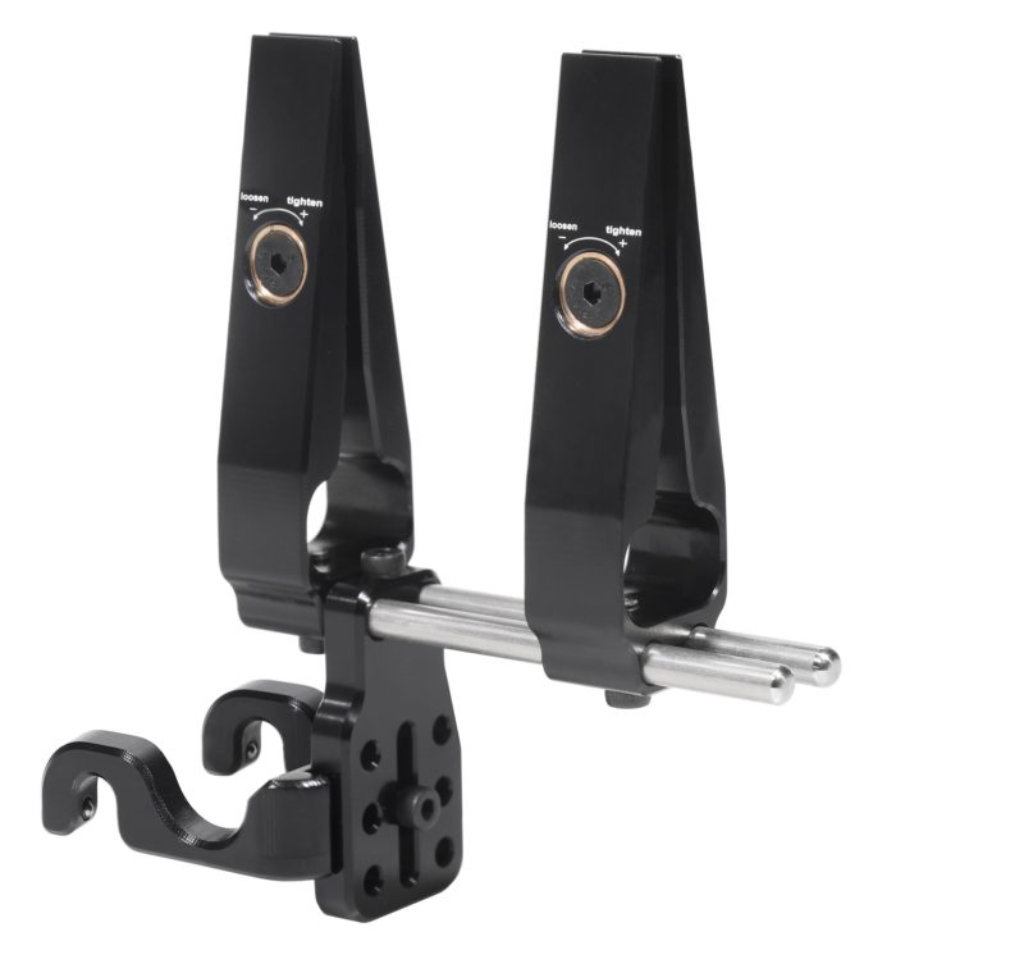
With the new accessory clamps, you can help hold even very flexible blades — such as filleting knives. These attachable arms limit flexibility enough to keep the knife in a single plane.
KMFS Accessory: Scissors Holder
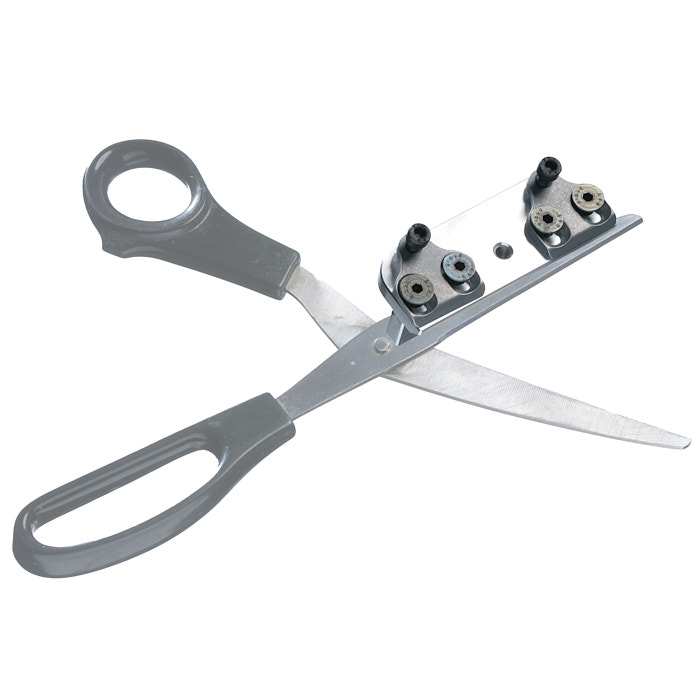
With the new 90° collet for scissors, you can easily sharpen scissors on KMFS systems, which would otherwise be a problem due to their obtuse angles.
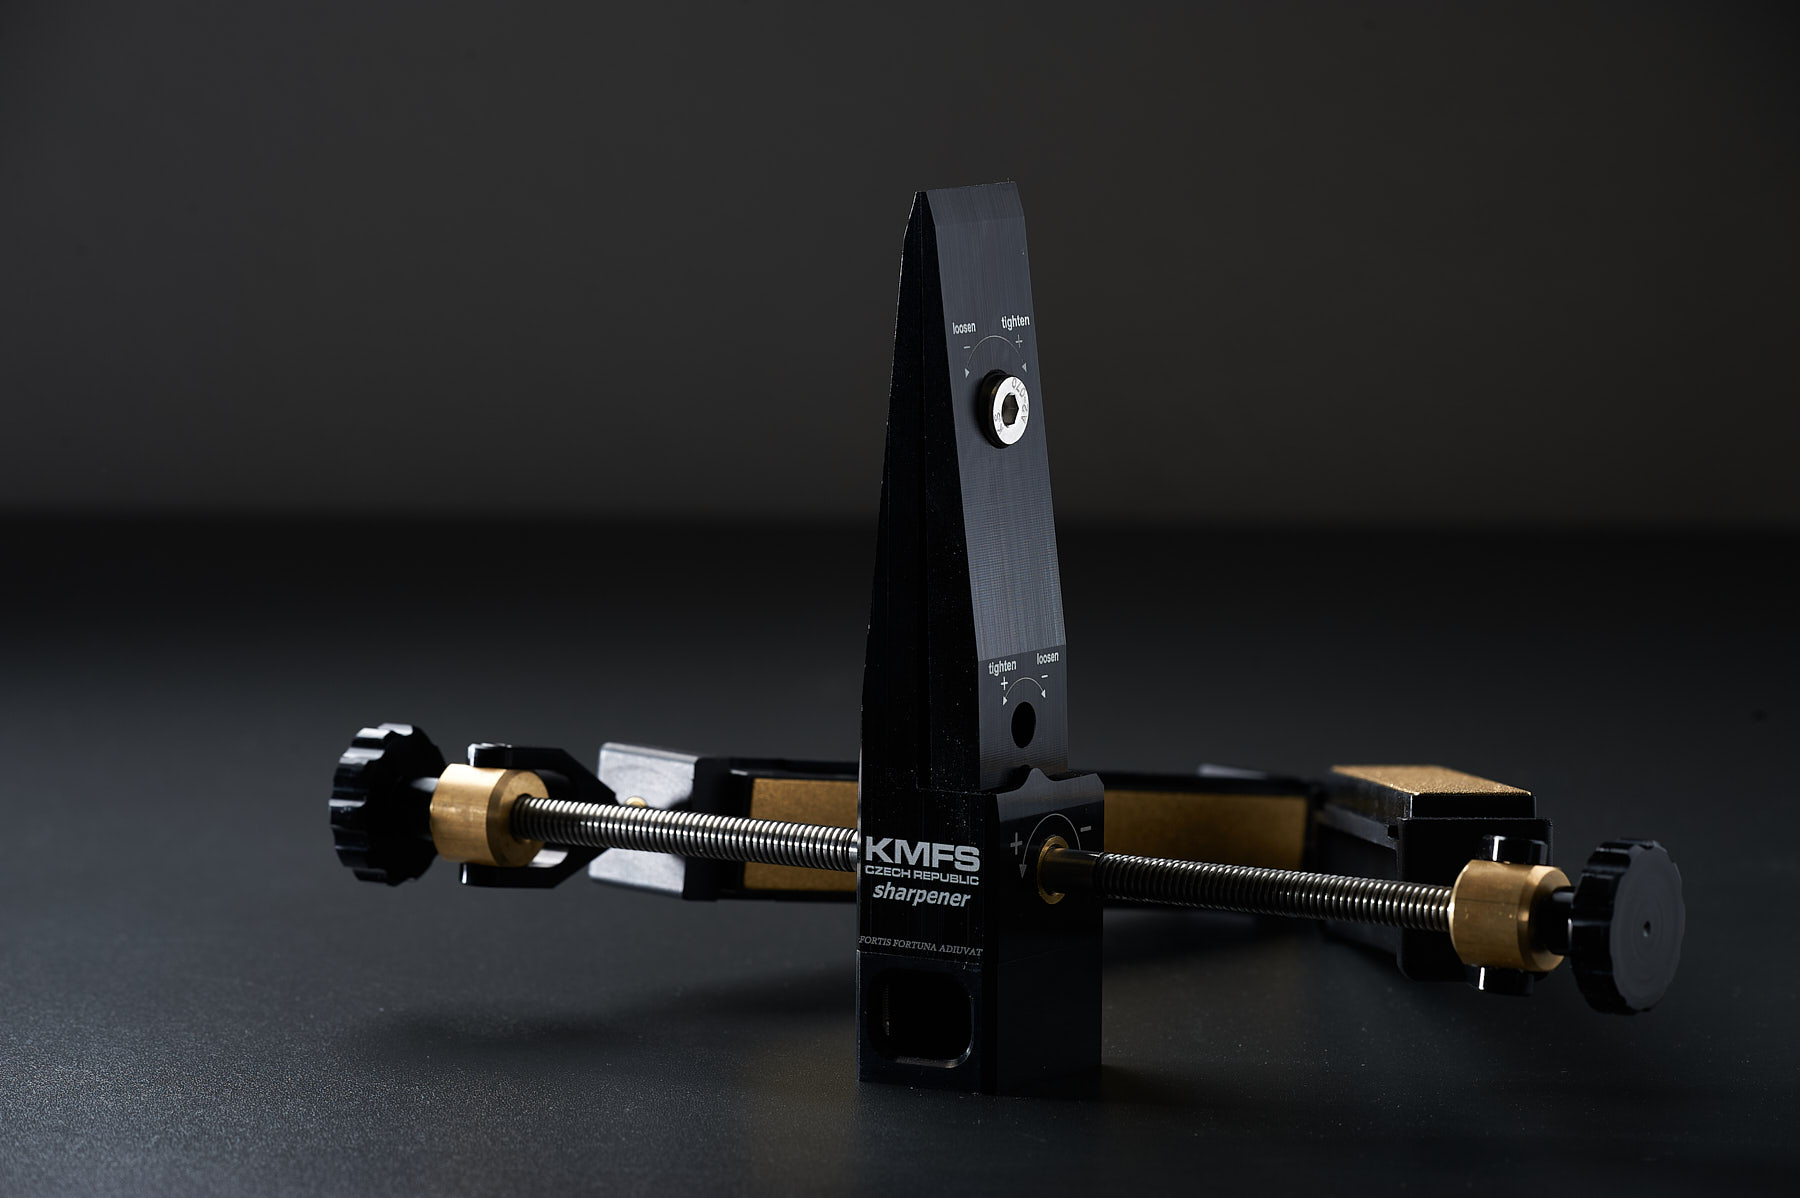
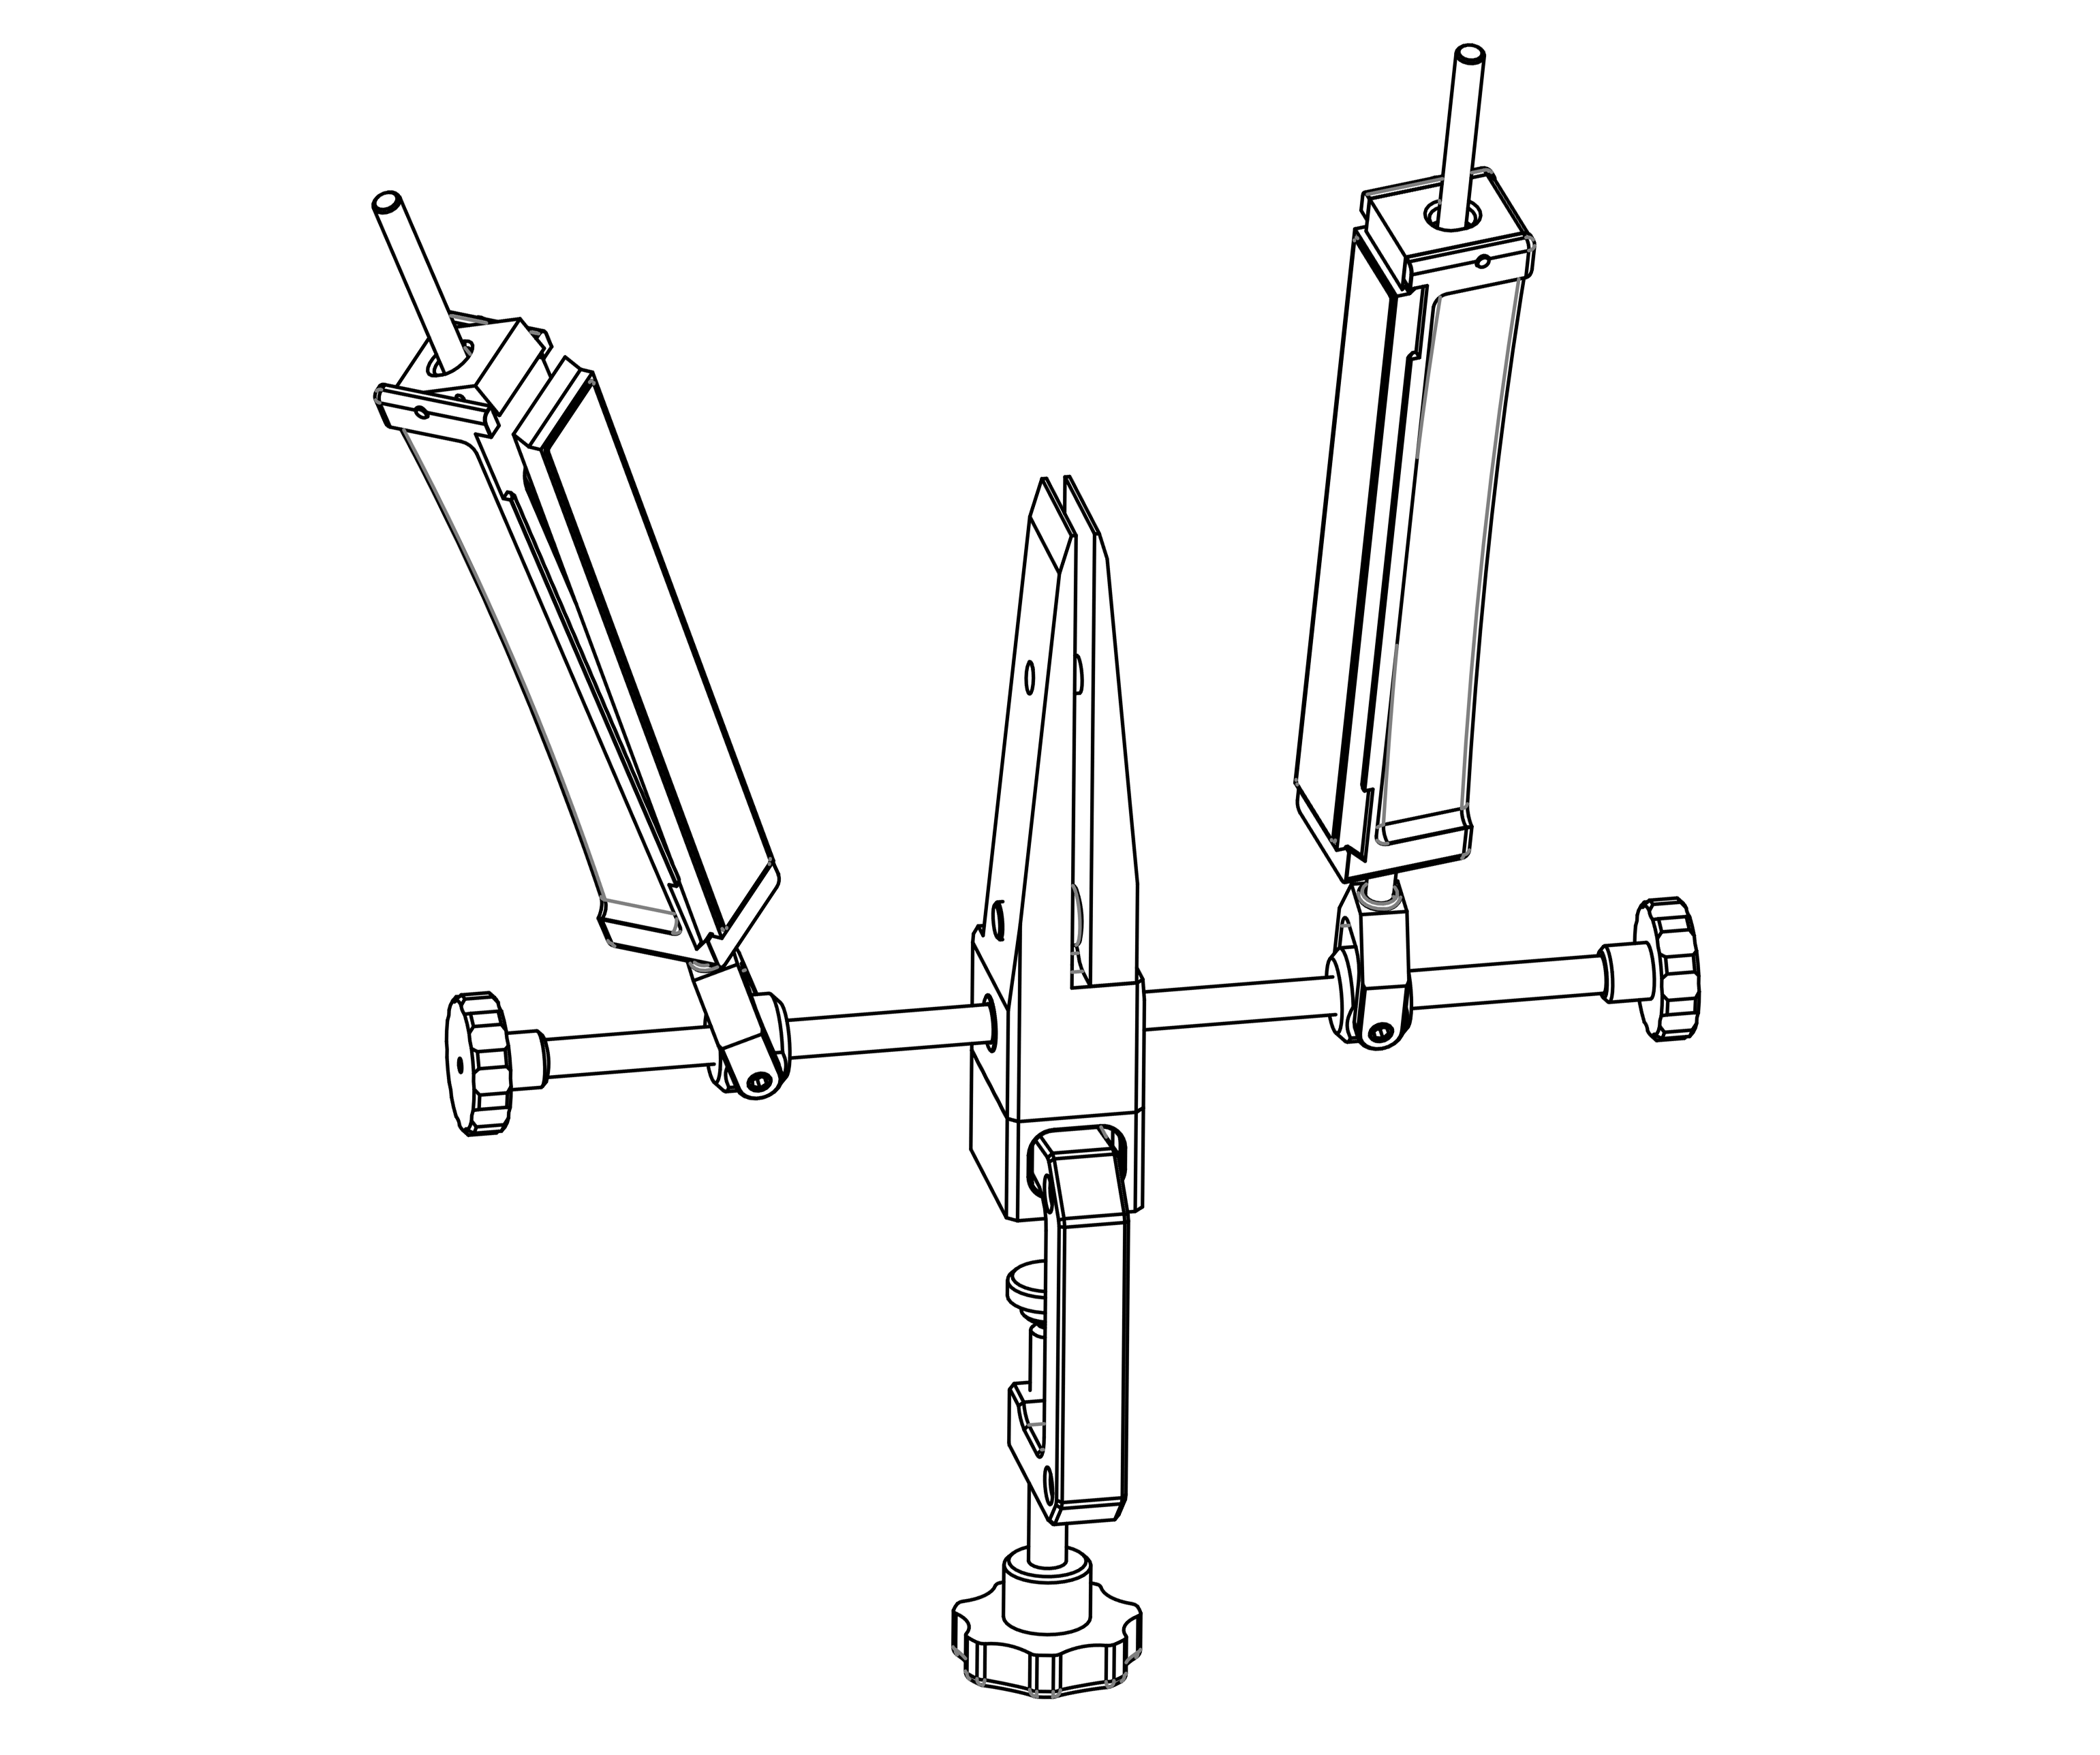
KMFS MOA21
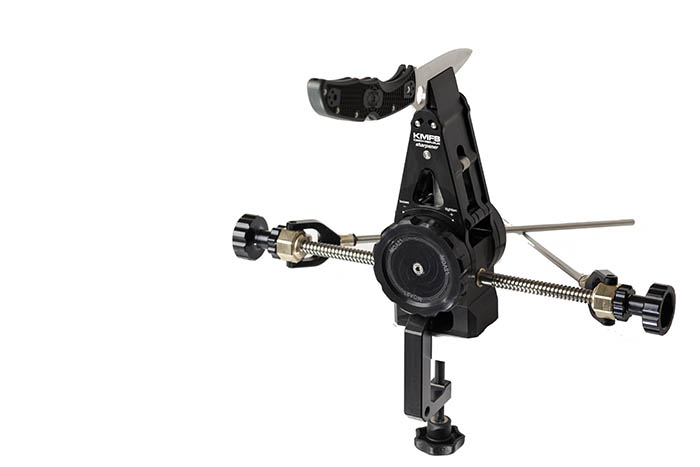
KMFS Master of Angle :) One of the best solutions I know, elevated to a tool-free, self-centering clamping solution. Very interesting technical execution with several advantages — and a few disadvantages, which I'll cover later.
Main advantages: Complete CNC machining from solid ENAW 7075 T651 ERGAL alloy for maximum rigidity. Patented clamping mechanism — simply by turning the clamping wheel, it automatically adjusts to the knife's thickness. Precise angle adjustment with 3 mm steps on a TR10 lead screw. Identical angle adjustment on both sides via linked movement of left and right sides. No tools needed for clamping the knife or adjusting angles.
KMFS MOA21 review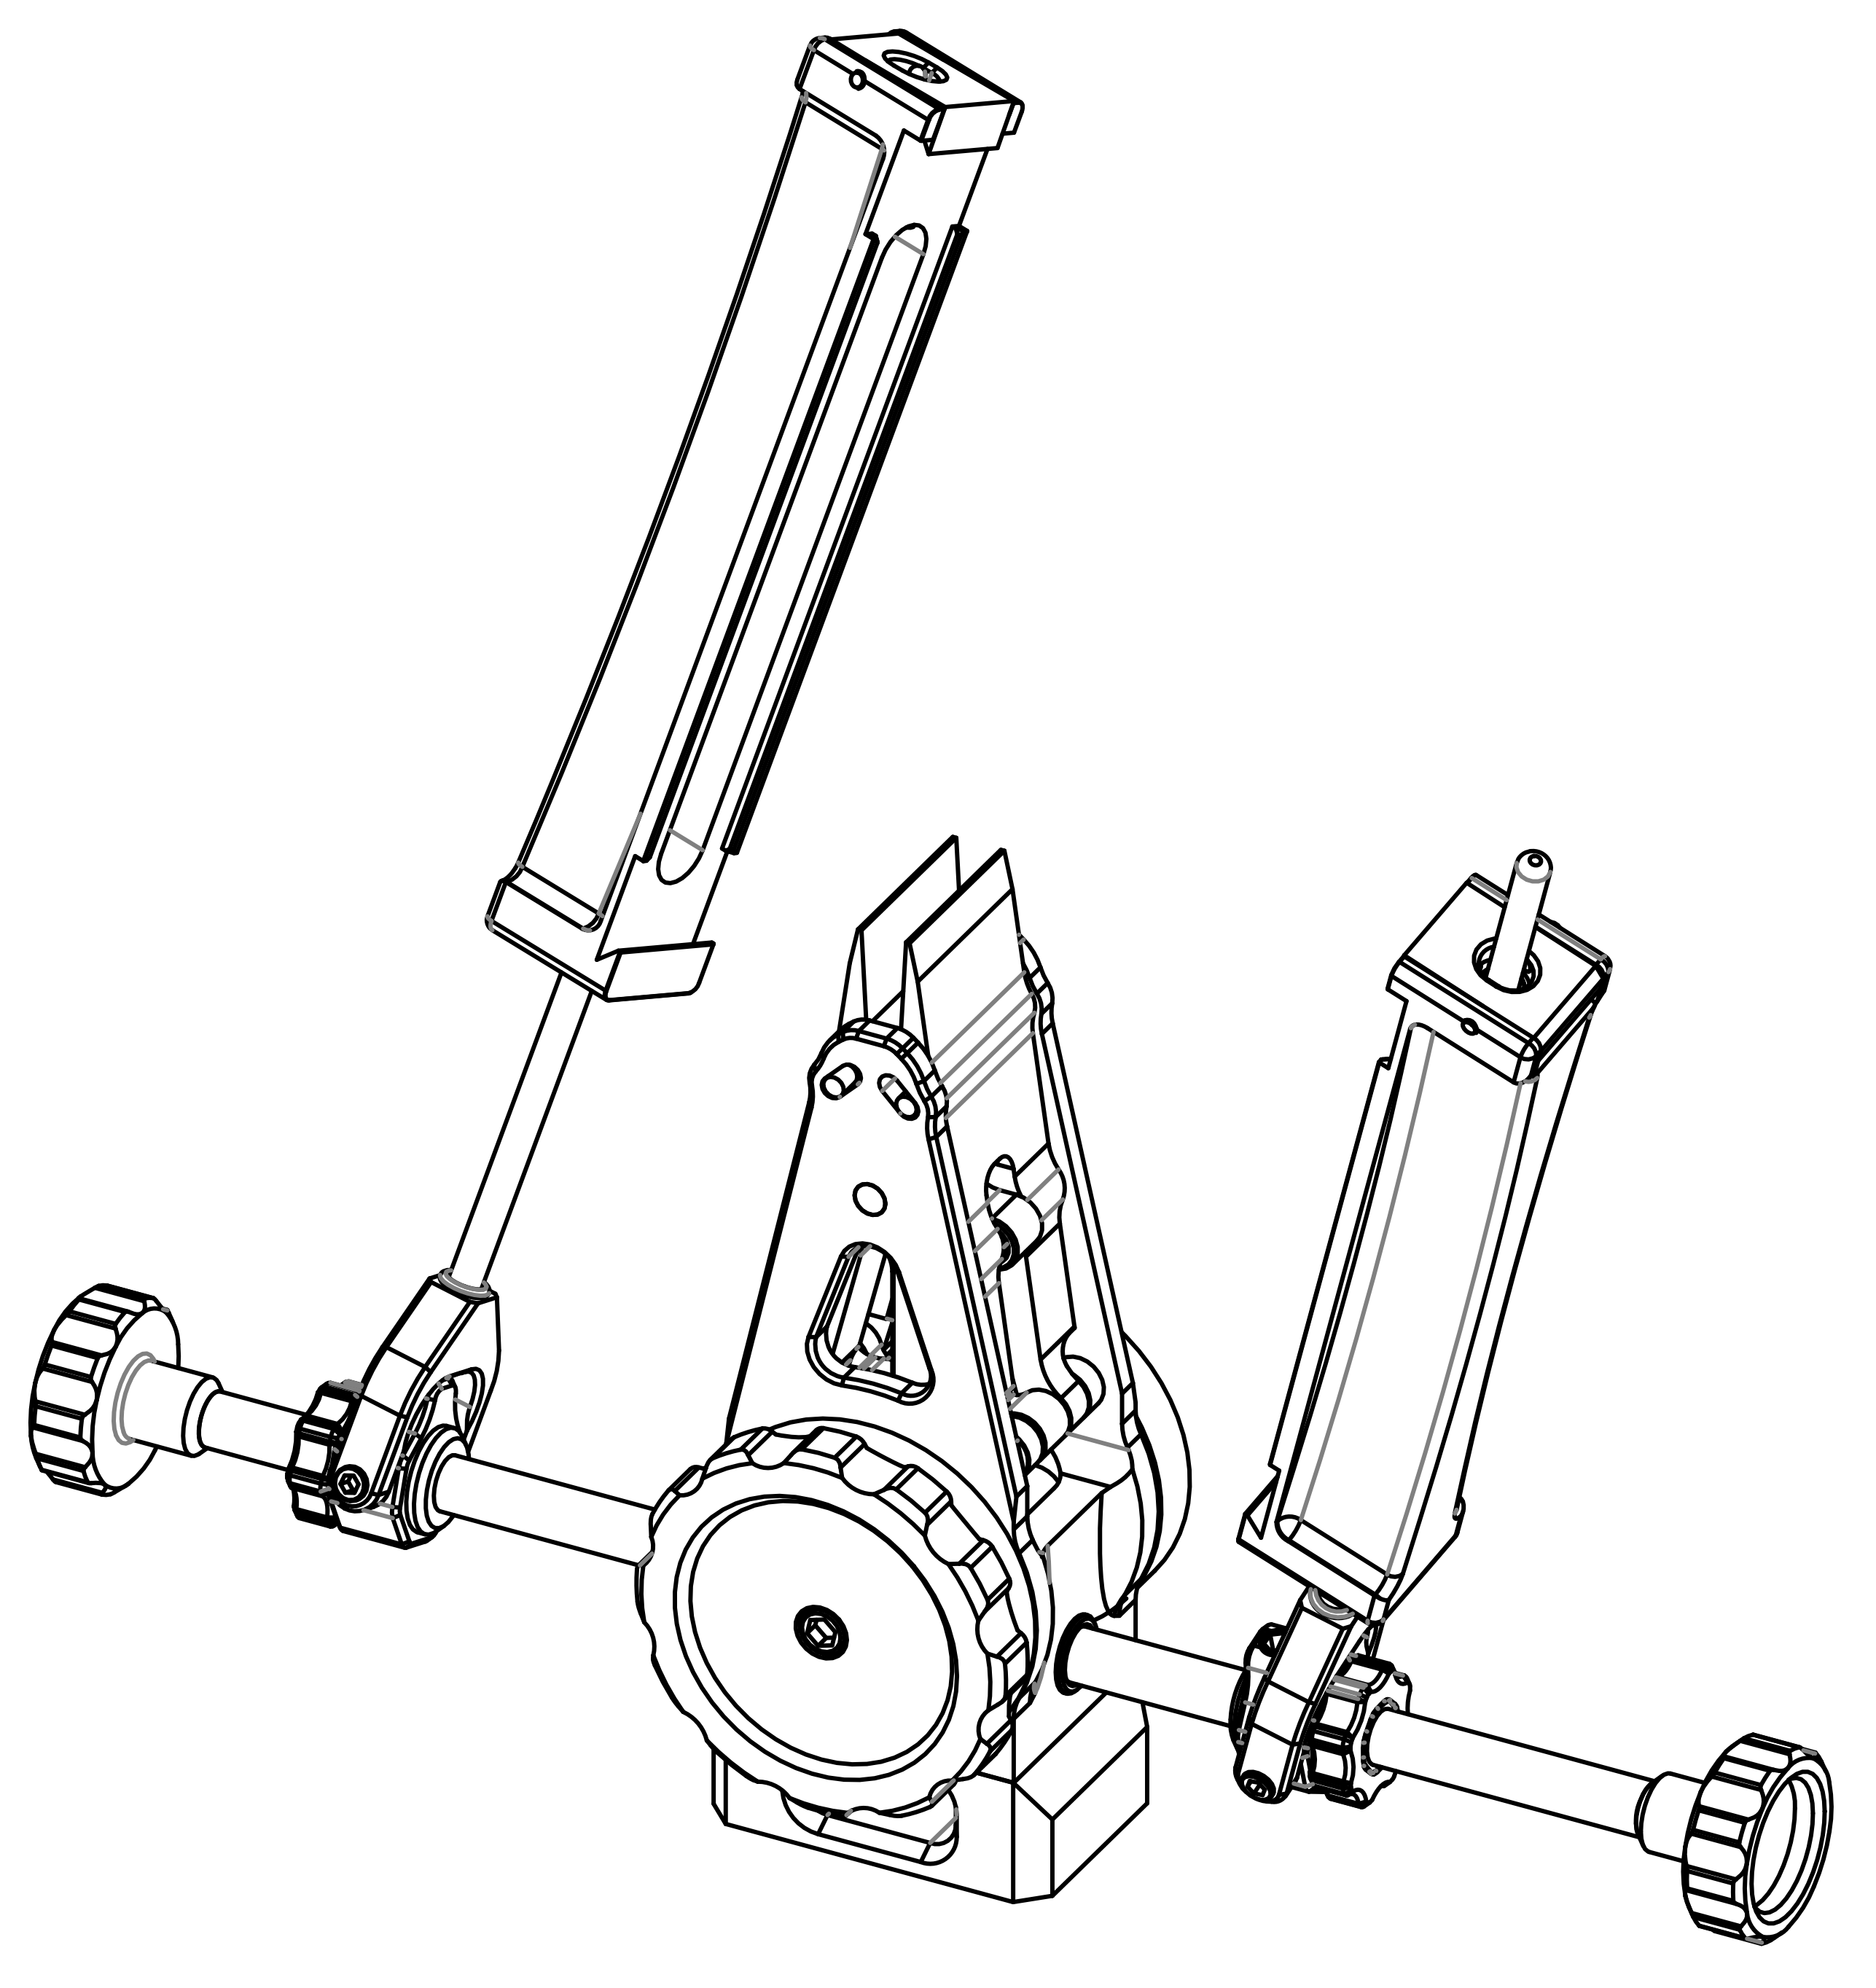 KMFS MOA21 sharpening system
KMFS MOA21 — Self-centred jaws, no tool needed sharpener
Videos
Brief video tutorial and introduction to the KMFS symmetrical sharpening set
Basic setup and demonstration of the KMFS Rival sharpening set, which helps maintain a precisely set angle throughout the sharpening process. The knife is razor-sharp after sharpening.
KMFS Sensei: A Revolution in Precision Sharpening | Czech Patent in Action 🇨🇿
KMFS Sensei – a revolutionary sharpening system from Czech manufacturer KMFS (Krinner Multi Fix) that changes the rules of edge care. Forget about guessing angles. Sensei combines manual sharpening on stones with uncompromising engineering precision.
Flattening a Sharpening Stone
Place the flattening stone in water for about 5 minutes, as well as the stone to be flattened. Under constant moisture, rub the flattening stone across the entire surface of the uneven stone until level. For easy visibility, mark the surface with a pencil — levelling is achieved once the pencil marks disappear across the entire surface.
Review: Kanetsune KC-462 versus KC-147 vs European Forged Knife
A very light and sharp knife by Kanetsune with high tungsten content in Blue Steel 2, cutting through food with incredible ease. In the video, I compare it with its smaller brother KC-147 and a European forged knife. Toward the end, there is a demonstration of how easily the edge can be restored on a leather strop with polishing paste.
KMFS Accessory: Scissors Holder
With the new 90° collet for scissors, you can successfully sharpen scissors on KMFS systems, which would otherwise be difficult due to their steep angles.
Stropping Leather
How to care for the stropping leather.
Support the site
If you would like to support my work or contribute to the website's hosting costs, simply scan the QR code in your mobile banking and contribute any amount. I appreciate it. If you contribute more than 100 EUR/USD, you will be credited with a thank-you note here.
Have a nice day, Ondřej
